December 27, 2009

Battle of belmont – take one

Couple of days ago I took opportunity of Christmas holiday and run Belmont scenario from Partizan Press scenario book that I reviewed some time ago. Results were interesting, although as it seems so often to be the case in games in which I participate, inconclusive. Nevertheless, here’s the after action report.

Pre-game considerations and setup

Since scenario booklets from Partizan are intended for ‘Guns of Gettysburg’, some modifications were required for me to be able to take advantage of special features of TCHAE. I didn’t make any changes to unit strengths, but did modify the characteristics of some leaders: based on scant reports of real battle and later careers of commanding officers, I made Grant both Gifted and Bold, while McLernand became a Political officer (his rather rotten career suggests he was completely useless). On Confederate side, Pillow’s rather unimpressive track record gave me enough reason for turning him into a Cautious officer. All those changes had significant impact on how the game developed and I have to say that I am more and more impressed by these nuances of TCHAE.

On paper, Belmont gives the impression of being a rather difficult game for the Union – they have inferior numbers and very tough victory conditions. Also, I am still experimenting with conversions of the table size and distances to 6mm and had no real grasp of how movement rates would influence tempo of the game. For that reason I decided to double the number of rounds before possible confederate reinforcements came onto the table. This turned out to be a sensible decision – from the events on the table I’m drawing the conclusion that throwing in another four confederate regiments at round 10 will turn this scenario into ‘mission impossible’ for the Union.

The game

This time I took upon myself to lead the Confederates, while L. tried his best to lead the Union forces to victory. Initial deployment was simple – I was allowed to deploy a small brigade of two regiments and only battery on the field in front of my camp. Rest of my units huddled behind the safety of makeshift camp fortifications. L. split his two brigades – one advanced against the rebels in the field and one moved directly toward the camp.

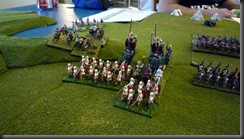
001_Start_aSituation at the start of the game

002_Closeup_a
Walker’s brigade braces for McLernand’s advance

003_Union Deploys_a
Union advance

004_Confederate Camp_a
Confederate camp

005_Birds Eye View_a
Bird eye view – Walker’s brigade falls back,
Dougherty prepares to charge

Those initial dispositions decided the event. Dougherty’s brigade reached my camp without any difficulties. His two regiments failed however to make any impression upon my regiments in the camp. A brave attack by one of his regiments resulted only in severe casualties and was repulsed with ease.

006_Dougherty's Brigade Attacks_a Dougherty’s failed assault

On the other flank, I realised rather quickly that it would be impossible for me to hold the field and I decided to slowly fall back. This task was eased by the fact that McLernand was pretty much useless in his attempts to coordinate movements of his brigade. Union overall commander tried his best to bring order into Union ranks and managed to bring couple of Union regiments into contact with Confederates. Grant’s efforts finally payed off when a bayonett charge by 31st Illionois succedded in throwing back 13th Arkansas at the extreme left of my line.

007_Grant Attacks_a Grant leads the attack on Union right flank

However, even that success couldn’t hide the fact that any possibility of Union victory have by now disapeared. McLernand’s brigade was strung out and out of touch with Dougherty, who on his own was far to weak to break into the Confederate camp. To make things worse, Confederate reinforcements would enter onto the field of battle within next couple of rounds. All those facts made L. call it a day and retire his troops back to his exit area.

008_Birds Eye View Final_aSituation at the end of the game

Musings after the battle

As I suspected, reaching historical results in this scenario (Grant managed to rout his opponent and burn the camp) is very difficult. Key problem was McLernand’s status as Political officer, which severly limited his usability and forced L. to use Grant to drive Union regiments toward the Confederate lines. However, I also have to say that L.’s decision to split his forces played large roll in indecisive result of the engagement.

Regardless of the end result, we had a lot of fun playing this scenario and having learned our lessons, we will run this game again in near future.

Couple of final words regarding TCHAE – I would recommend for players to take full advantage of the mechanics of the ruleset when adapting scenarios, but also during the game. Cautious and political officers can create a lot of mayhem and it’s a good thing. I’ve already covered McLernand’s impact on our game, but Pillow’s status as ‘cautious’ also created some difficulties – 13th Tennesse was supposed to enter the field on round 4, but unfortunate card sequence (Cautious/Political officer card came up before Pillow’s activation card) delayed their entry until turn 8. This delay was the result of my voluntary interpretation of the rules and did create some problems for me, but it was worth it. I guess what’ I’m trying to say is that TCHAE gives players the opportunity to mix things up a bit and that taking advantage if this feature makes a game that is more fun.

November 15, 2009

Overeager, overambitious and underprepared

So… more than a year after the decision to start our ‘Age of Arthur’-project, H. and I decided it was time to run our first trial game. The fact that H. had only three finished units against five of mine didn’t bother us – we wanted to get those miniatures out, give them a workout, roll some dices and have a few laughs.

Perhaps a little more serious problem was the fact that last time I had the opportunity to read the rules was… oh, a year ago or something like that. As for the army lists and pre-game preparation – since number of units was so uneven, neither of us bothered with those small details. That’s what the supplements are for!

It will come hardly as a suprise to most of you that our first game was something of a fiasco. Most of the time was spent on trying to find relevant rules, checking stats and similar ‘fun’ activities. By the time we had to start packing up (game took place at local game shop, after opening hours), we did manage to kill one skirmisher and have a successful Saxon cavalry charge, which ended in a draw. This “high watermark” was rather suitable finale of the game.

It has to be said, despite equal fumbling on both sides, we still somehow managed to have a blast. At the same time I think it will be best if we try to avoid games like that and for that reason I have this checklist to complete before next meeting.

  • Read the rulebook
  • Put together an army list
  • Prepare movement trays
  • Ensure that both players have their own set of rulesets for the game

On a side note, even the pictures from the game didn’t work out all that great (starting to be annoyed by my point and shoot, it’s time to get a simple DSL kit). Not that it’s stopping me from posting some pictures anyway. :-)

P1000387
Saxons on the far edge, Romano-British on the near edge

P1000388 Saxon army – two units of foot Duguth,
Duguth on ponies and some skirmishers

P1000389 Anglo-British – two units of milites, one of pedes, mounted commitates
and small ‘special unit’ of foot comitates (Dervel’s Wolftails)

P1000392 Milites brace for impact of Saxon cavalry

P1000393 Commitates try a sneaky flank manover that led to nowhere

P1000397 Saxons smash into milites and get stuck

November 11, 2009

DFF CON 2009

Over two weeks has passed since DFF CON 2009 and it’s about time for me to post couple of words about the show. Let me start with thanking the guys at Dansk Figurspilsforening for an excellent event. Even though I was one of those that arranged a game, my participation was minimal when compared with all the effort that went into all the background work. My participation in Saturday’s games was unfortunately limited to the game I was hosting. I run a slightly modified version of ‘Check Your Six’ scenario called ‘Jolly Good Show’, which I’ve already wrote about in one of my previous posts. The fun thing about this scenario is its replayability – this time around, British players, with help of proper tactics and a huge dose of luck, managed to down four bombers and damage another two for a loss of a single Hurricane. The amazing thing was that they managed to do all that in a single pass through the German formation.

What’s even more important, the scenario was played by a total of six players, five of which never played CY6 before. After three rounds they were ‘self-going’ and, if I am allowed to draw conclusions from the comments, had a really good time.

014Hurricanes passing through
German bomber formation

On Sunday it was my turn to have some fun. First of all, I’ve managed to get my first taste of ‘Fields of Glory’… finally. Couple of the guys at the club are very active with the ruleset and put up a simple 600 points demonstration game with Republican Romans and Phyrric Greeks. Things went according to the plan – Phyrrus’ elephants created mayhem on one of my flanks, cavalry danced around on the other, and in the middle Roman legions gave the Greeks a bloody nose… or at least they were in process of, because we had to finish just as things got interesting (some blokes needed the table :-( ).

006 Phyrrus elephants trample Spanish mercenaries

009 Roman legions clash with Greek phalanx

Even though my first game was untimely interrupted, the rules set gave me a very positive impression. It is rather complex and the game itself takes its time, but the game mechanics do look sound and I had fun while playing. This first impression was rather important to me, as I am in the middle of painting a rather large Greek army.

Next on the schedule was a naval action with ‘Fleet Action Imminent’. It was great game - two British battlecruisers exploded and another managed to get shot to pieces… unfortunately, I was on the British side, so I won’t write much more about that event. :-) However, despite bearing witness to a small British disaster, I have to say that ‘FAI’ is growing on me. Simple, quick to learn and yet manages to deliver realistic results – that’s the kind of ruleset that I like to play these days.

All in all, more than 10 hours gaming time over a weekend, it’s been a long time since the last time that happened. Already looking forward to DFF CON 2010.

Couple of snapshots of some of the other DFF CON 2010 games.

001 Start setup for an I Ain’t Been Shot Yet, Mom’ game.

003
Demonstration game of ‘From Valmy To Waterloo’…
WITH THE AUTHOR OF THE RULESET! :-)

010
‘Ambush Alley’ game.

011
Closeup of same game.

012
Colonial skirmish game… I think.

October 25, 2009

Back to Albert Canal

Call it for artistic drive or pure silliness on the part of the owner of this blog, but for quite long time I had a wish to write an after action report in narrative style, rather than a dry description of the moves, dice rolls and game mechanics. I finally did it in post “Battles over Albert Canal” and I have to say that I’m a little surprised over how hard it was. Still, some people enjoyed my first attempt at “writer’s career”, so I may do it again sometime.

However, for the sake of consistency, I do feel that I need to post a more traditional AAR of that game. So, what did really happened that day? Scenario for the game was taken from "Over The Channel - Battle of Britain" scenario book for Check Your Six. It’s called “Impossible Mission” and considering the real historical events it is based upon, it’s a very appropriate title. Six Fairey Battles escorted by two Vic- formations of Hurricanes attempt to bomb a bridge over Albert Canal. German side has six Me-109:s on patrol and the bridge itself is protected by light anti-aircraft artillery.

In our game, L. controlled German fighters, while F. and W. took control of escorting Hurricanes. I took charge of five apparently doomed Battles (we lost one in pre-game event check). At the start of the game, German fighters were spread over the table in three rote-formations, so British plan was to take advantage of that fact, get to the bridge as quickly as possible and then get out of Dodge.

Naturally, Battles were like the big magnet for Me-109, which started to close on them from three different directions. Hurricanes hastened to meet them and leader of W’s fighter formation managed to score hits on leader of one of German rotes in a head on attack. Unfortunately, the German pilot managed to return the favor – so one fighter on each side was out of the fight. Remaining fighters of those formations tangled with each other for the rest of the game, but none of the sides managed to score any hits.

Another German rote closed on the bombers from the opposite side, initially bypassing F’s Hurricanes. F. managed his planes in skillful manner and managed to place them in tailing position behind the Messerschmitts. L. disregarded the danger and pressed on his attack on the Battles. His effort was rewarded and one of Battles went down immediately, after a critical hit was scored by the leader of the German flight. His joy was however rather short-lived, since in subsequent turn his leader was shot down by the Hurricanes and wingman’s airplane suffered engine damage from a well-aimed burst from a Lewis machine-gun of leading Battle. He tried to escape, but was finished off by F’s Hurricanes in subsequent turn. Unfortunately, two of victorious British fighters expended their ammunition and were forced to head for home.

As the Battles got close to the bridge, last German rote caught up with them. Leader of this flight was the best pilot in the air that day and it showed – his opening salvo resulted in one Battle immediately shot down (once again, critical hits from the 20mm cannons), while a subsequent burst scored damaging hits on another Battle. Fortunately, he didn’t manage to do more damage before passing behind the British bombers and encountering remaining Hurricanes. Three surviving bombers reached the bridge and unaffected by ineffective AA fire, dropped their bomb load on the bridge. One of those was a direct hit, severely damaging the target.

Then “the freak event” of the day occurred – L. attempted to extract his fighters from the chaotic fighter furball behind the bombers (four planes in a single hex) and attempted an Immelman with two of his Me-109. Since both planes made same maneuver, they ended up yet another time in same hex and this time they collided with each other. Both planes managed to stay in the air, but with bombers reaching their target and only a single German plan in fighting condition we decided to call it a day.

End result was a brilliant British victory – bridge severly damaged, 2 German fighters shot down, while three other were damaged. Price for that victory was paid by two downed Battles. Point total for the scenario was 24 points for RAF and 8 points for Luftwaffe. Campaign total after the game is 54 points for RAF against 27 for Luftwaffe.

Historical background for this scenario can be found here.

Finally, a couple of words regariding the "Check Your Six" ruleset - to put it bluntly, it is without a doubt my current absolute favorite ruleset in all categories. It is easy to learn, very intuitive and immensly fun to play. However, there is an apparent upper limit of number of airplanes that a single player can handle. Two planes per player is perfect, six is an absolute maximium in my opinion. Also, once multiple airplanes get into same area, things can get rather complicated and tempo of the game slows down significantly. To counter possible confusion, I will in the future use color coding directly on the airplane bases for several aspects of the game.

October 15, 2009

DFFCon 2009 at Tøjhusmuseet will take place next weekend

Just a short notice about a historical wargames convention DFFCon 2009, that will take place on 24-25 October. This rather unique event for Scandinavia is arranged by Dansk Figurspilsforening at Tøjhusmuseet (Weapon Museum). Detailed information about the convention can be found here. Yours truly will be arranging a “Check Your Six” participation game on Saturday.

Wargamer's haven in Copenhagen

Considering the fact that this is probably the most significant wargaming event in recent years for me, I must say that this post is long overdue. OK, “most significant” may sound over-dramatic, but how else would you describe the fact that there is a very active historical wargaming club in the city where you are practically every day?

So what am I babbling about? Dansk Figurspilsforening in Copenhagen of course. The ironic thing is that I’ve known about their homepage for years, I even used some of their gorgeous flags for some of my ACW units, but the idea to visit the club never entered my head. Fortunately I came into contact with one of the members on TMP and the rest is history.

The club has activities every Wednesday from 1800 to late evening and the range of periods and rulesets that are used is quite mind-boggling. Larger games are also played on weekends, but those are one-offs events. There are two large tables available for games and complete sets of modular terrain available for the gaming pleasure of the members. In short, if you ever visit Copenhagen and are keen on a game, Dansk Figurspilsforening is the place to visit.

August 30, 2009

Adler ACW range review redux - part 5

What do they say... oh, yes, road to hell is paved with good intentions. I was hoping that after first week of my vacation I would be done both with my first Spartan unit for Fields of Glory and perhaps even with that beautiful Wolftail Band for my WAB Arthurians. As it is, I still have quite a lot of work left on my Spartans and Wolftails... well, let's not talk about them at this moment.

So, I am forced to re-run some old material - here's next part of my review of Adler ACW range. While I'm fully aware that it's a silly criterion, for review purpose I'm dividing Adler's miniatures into Union and Confederate miniatures based on the headwear type on their heads. Thus minis with kepis can be found in part one and minis with hats are reviewed below.

Of course I'm not using this principle when painting Confederate units. Right or wrong, I like my Confederates to have more irregular look than their Union counterparts. For that reason in I mix freely all minis available from Adler.

Adler Miniatures ACW range - strips ACW3A/XACW4
Strips with number 3 are basically same as 1 and 2, except for the fact that miniatures wear hats instead of kepis. Strip 3A has four miniatures with firing stance. Strips XACW3 and XACW4 can be used to achieve more animated units.

ACW3A - Hat, firing, blanket roll.

XACW4 - infantry, hat, loading.

Confederate regiment ready to fire.

Yes, they still look silly when in column formation.

August 25, 2009

Battles over Albert Canal

With red arrows piercing the blue lines at several locations, the picture shown on the operational map looked rather depressing. If anybody was still doubting it, one look at that map was enough to tell him that the “Phoney War” was over and Jerry was on the move.

Quiet murmur of plane crews discussing the events of the last couple of days quickly died out as Captain Richards, wing operations officer walked into the tent. He walked to the map, turned around and hesitated for a moment as he observed the men in front of him. “They look so tired.” – he thought and immediately felt his own exhaustion. He then cleared his throat and started today’s briefing.

“Gentlemen, as you are well aware, the situation at the front is not developing to our satisfaction. Despite best effort of our ground forces, Jerry managed to cross the Meuse and is pushing into Belgium as we speak. HQ would like to do something about it and has ordered RAF to take out the bridges at Albert Canal.

Your squadron will participate with six airplanes. You will be escorted by two sections of Hurricanes. Expect heavy opposition – there is substantial Luftwaffe presence over the Canal and intelligence reports indicate heavy ack-ack defenses in the target area.

We will be lifting of at…”


Flying Officer Henry Stevens anxiously scanned the skies, searching for the dark specks signaling presence of enemy fighters. So far they managed to avoid the attention of the yellow-nosed bastards, but he knew that it was unlikely that their luck would hold all the way through the mission.

He looked to the sides for yet another check of the formation. He could clearly see the pilots of two Battles in his section, their heads turning from side to side as they looked for the enemy. He couldn’t find the Hurricanes, but he knew that they were there – two Victor formations, behind and above his flight. “At least Jerry won’t be having free lunch today.” – he thought.


Initial setup.

He looked forward again and there it was – a silvery blue band of water cutting through the mostly green landscape. He followed the dark grey line of the road and found the spot where it intersected with the Canal. Their target was barely visible from this distance, but the hazy contour of the bridge was enough for him to feel the pang of excitement mixed with fear.

He pushed the radio button and said: “Target in sight. Form on formation leader. Change altitude to 400 feet.”

He put his plane into a shallow dive, felt the Battle accelerate and watched his wingmen disappear behind him. The plan was to approach the target in single file formation at very low altitude. Hopefully, the speed gained by the dive and low level of the flight would counter the anti-air artillery defending the bridge.

“This is Red One. Enemy fighters at two o’clock high! Engaging!”

Head-on pass of Red One.

Stevens had hardly time to find the two… no, four dots rapidly moving in his direction before the radio crackled again - “This is Blue One. Bandits at ten o’clock high. Breaking formation to engage!”. Stevens snapped his head to the left, but had at first difficulty finding the enemy fighters spotted by the Hurricane pilot. When he finally saw the German planes, they were no longer small specks in the sky, he now could see their wings.

He quickly checked his instruments and then looked for the target - he could now see the trees at the banks of the channel – before looking to the right again, just in time to see the tracers sprouting from two fighter formations approaching each other on collision course. Was it fire coming from one of the planes?

Rapid staccato of strained voices now came out of the radio.
-“Blue One. I’m hit! Returning to base!”
-”Blue Two. Blue One, you got him, bastard is smoking! Engaging the rest of bandits!”
-“Red One. Bombers, enemy planes on your left. Repeat, enemy closing on your left!”


German fighters approaching Battles, Hurricanes in pursuit.

That last sentence made Stevens snap his head to the left. It wasn’t difficult to find the enemy, those two Me109:s seemed to be right on top of him. Just a split second later he saw glowing fireballs spitting out of their wings, flying straight at him.

-“Green Two, I’m damaged. Can’t control he….” – the voice cut off before finishing the sentence. Green Two, that was his number two wingman, Henley. Stevens involuntarily tightened his grip on the stick as he heard the strangely high-pitched voice of his rear gunner shouting “Oh, my God!” on the intercom.


Death of Green 2.

It was with grim satisfaction that Stevens watched the effect of the fire comming from the Hurricanes that pursued the German fighters. Tracers seemed to embrace the leading Messerschmitt and large chunks separated from its airframe as it closed the distance with the Battles. For a second, Stevens was mesmerized by the sight of the stricken enemy fighter visibly stagger in its path, then pitching over into a shallow dive and heading for the ground. Next, rattle of his rear gunner’s machine gun pierced through the monotonous sound of the engine, snapping him out of his fixation on the seemingly mortally wounded Me109.

The bridge was now just a couple of kilometers away and he made last routine check of the instruments. Suddenly multiple fingers of tracers reached out toward him – yes, for once the intel was correct, a lot of ack-ack down there and they all seemed to focus on his plane. He pushed the grim thoughts out of his head and concentrated on the quickly approaching bridge. He heard his gunner shouting intelligibly with excitement on the radio. Then a Me-109 passed his Battle just couple of hundred yards away, its engine engulfed in flames. It disappeared below him, as suddenly as it appeared. Later he found out that Jenkins actually managed to damage the enemy airplane with his puny Vickers machine-gun and Hurricanes swiftly finished it off.

Bridge was straight ahead now. Just a couple seconds more….

Green One bombing the bridge.

“Releasing bombs!” – Nick Doyle, his bombardier confirmed what Stevens already knew, as he felt the Battle jerk up once it was released of its bomb cargo. Then he heard Doyle shouting “Direct hit!”. Sense of satisfaction replaced for the moment the dread that Stevens felt ever since the Messerschmitts were spotted.

That feeling lasted just for a second– Stevens kept his low altitude and banked the Battle to the right. As he banked the plane, he could see the horrifying spectacle above the bridge. Somehow he managed to get several hundreds of yards in front of his squadron – remaining Battles reached the bridge only now. Just before they reached the target, a pair of yellow-nosed 109 reached them and raked the bombers. Stevens’ face twisted in helpless fury as he saw the bullets tearing into two of the Battles, literally ripping one of them into pieces. The other one started to smoke, but stayed on course. Two surviving Battles released the bombs just a moment later, both missing the target with couple of yards.

What followed next stunned both Stevens and apparently everybody else. Two Hurricanes appeared behind the Me-109:s that annihilated the Battle just a second before and for a moment Stevens could hardly distinguish friend from foe. Then both German planes took advantage of their speed and rose up in the air, performing textbook Immelmans. Stevens observed them arching up in the sky, coming closer and closer together… and finally colliding with each other! The Messerschmitts seemed to bounce of each other, creating a cloud of debris at the point of impact, but amazingly both planes stayed in the air.

Bombing run of remaining Battles.


This rather unexpected event seemed to take the spirit out of the Germans. Anti-air fire slackened for a moment, crews of the guns probably being afraid to hit their own fighters. Surviving British airplanes took this opportunity to extricate themselves from the area. Stevens continued to wearily observe the German planes for a long while. As it turned out, he didn’t have to. Remaining 109:s seemed more interested in nursing their damaged comrades back to the base, rather than following the bombers that already did all the damage they could manage.


Stevens felt empty inside. “We did what you asked us, now make it count.” – he thought as he threw last glance at the black columns of smoke marking the graves of his comrades - “Make it count!”.

July 25, 2009

Review of "Heartland - the battles of Kentucky and the Tennessee" scenario book

Some time ago, Partizan Press released their ruleset for American Civil War, called “Guns at Gettysburg”. Shortly thereafter came the first scenario book for the system, called “Heartland – The Battles for Kentucky and Tennessee”. Since I am something of a compulsive collector in regard of scenario books, I couldn’t resist the temptation and ordered it almost immediately after it became available.

As it is implied by the title, focus of this book is put on the struggle for control of Kentucky and Tennessee during the early stages of the war. Engagements in the book take place between November 7th 1861 to October 8th. Each scenario consists of a short description of general situation before the battle, scenario objectives, detailed orders of battle on regimental level (including number of figures per regiment and classification of the leaders/units according to “Guns of Gettysburg”), a map and several paragraphs describing the events during the real battle and its aftermatch.

Following scenarios are included:

Belmont (7th November 1861) - small scenario with six infantry regiments and a single artillery battery on the Union side and ten infantry regiments and single battery on the Confederate side. Some fortifications are required for the terrain setup.

This one strikes me as perfect beginner scenario for two players that are just starting with the period or a ruleset. I plan to use it in my next game with ‘They Couldn’t Hit an Elephant’.

Logan’s Cross Roads (19th January 1862) – medium size scenario. Union side includes ten regiments of infantry and four small batteries. They are opposed by equal number of Confederate regiments and artillery, but the Rebels also have three small regiments of cavalry.

Breakout at Fort Donelson (15th February 1862)
- medium size scenario, where a green force of eight infantry regiments supported by three batteries tries to stop a frontal assault by twelve Confederate infantry regiments, supported by two batteries. To add to the misery of the Union side, Forrest is also present on the field with some cavalry.

This one looks to me like a foregone conclusion, but I’m the sucker for last stands and will be setting it up as soon as I make some field fortifications for the fort.

Assault on Fort Donelson (15th February 1862) – small, but interesting scenario where eight Union regiments supported by skirmishers and two batteries try to breach the fort. They are opposed by nine Confederate regiments and two batteries.

Interesting scenario, but one which will put some demands on my terrain supplies. Lot of field fortifications is needed to play this one.

Shiloh Church (6th April 1862) – large scenario, in which twelve Union regiments take the brunt of initial Confederate assault during first day of Shiloh. Confederates field whooping twenty infantry regiments and six batteries.

Fortunately the terrain isn’t very complicated. If you have enough miniatures, this one could be a great weekend game.

Hornet’s Nest (6th April 1862) – second scenario based on Shiloh and largest scenario in the book. Twelve Union regiments supported by three batteries stand up to twenty-one Confederate regiments supported by whooping ten batteries of artillery.

Richmond (30th August 1862) – medium sized scenario with eight infantry regiments, two batteries and two cavalry regiments on Union side and twelve Confederate infantry regiments, two batteries and two cavalry regiments.

This one seems really easy to set up for a quick afternoon game.

Munfordville (14th September 1862) – small scenario where three Union regiments aided by some skirmishers, token force of cavalry and a single battery try to hold strong fortified position. On the opposing side are six infantry regiments, two cavalry regiments and two batteries of artillery.

Another scenario requiring a lot of fortification terrain pieces, including a blockhouse.

Iuka (19th September 1862) – medium size scenario and first scenario in the book with characteristics of a meeting engagement. Union force consisting of thirteen infantry regiments, one cavalry regiment and two artillery batteries are on a collision course with Rebel force consisting of nine regiments and two batteries.

Hilly terrain and lots of woods should make this scenario very interesting and re-playable.

Battery Robinett (4th October 1862)
– medium size scenario dealing with one of main events during battle of Corinth. Union is on the defense here with eight infantry regiments supporting six entrenched batteries of artillery. Confederates field equal number of infantry regiments and are supported by two batteries.

Another scenario where one side is entrenched, making special demands on terrain setup.

Hatchie Bridge (5th October 1862) – a meeting engagement scenario dealing with the aftermath of the clash at Corinth. Ten Union infantry regiments, supported by a cavalry regiment and three batteries duke it out with six infantry regiments, some skirmishers, cavalry and six batteries on the rebel side.

Setup for this scenario is quite original and I think it may have a lot of replayability.

Peter’s Hill (8th October 1862) – a true meeting engagement, with both sides more or less blundering into each other in an attempt to occupy high ground position. Eight regiments, two cavalry regiments and three batteries are fielded by the Union. Confederates have seven infantry regiments, two cavalry regiments and two batteries at their disposal.

This scenario definitely caught my interest because of relatively uncomplicated terrain setup and variable entry times for most of the units. I think there is a lot of potential for total chaos in this one and that’s my favorite type of scenarios.

Chaplin’s Hill (8th October 1862) – here we have a straightforward ‘bash and mangle’ affair with twelve Union regiments and two artillery batteries confronting fifteen Rebel regiments and four artillery batteries.

In contrast to two previous scenarios, this is a classic set-piece assault on formed infantry line. However, terrain layout produces some interesting problems for both sides.

Invasion - a theoretical scenario with chess-like qualities. Both sides command equal forces of six infantry regiments, two cavalry regimens, and two batteries of artillery and have to achieve similar objectives. Terrain is a mirror image of itself along a diagonal line. This one seems to be a perfect choice for a tournament scenario, if such were ever played within ACW setting.

In addition to the scenarios, Partizan Press took the opportunity to include couple of pages of extra rules for ‘Guns of Gettysburg’. This fact alone should make this scenario book a must buy for players that use that ruleset. At the same time I must add that “Heartland” can be used without any problems with any regimental ACW ruleset, since figure ratios are provided in the book. Additionally, conversion table for Johnny Reb 2 should make it particularly easy to use “Heartland” for players that still play this classic ruleset.

What about scenarios then? I hope that my short synopsis gives a pretty clear view of the content – most scenarios have OOB’s hoovering around eight infantry units per side, which means that they are playable during an afternoon. Also, there is a lot of variety in the character of the scenarios and I do believe that everyone will be able to find at least a couple of scenarios that will catch their interest. At the same time I need to point out that five of the scenarios require fortifications of one sort or another, so you better have those walls and abatis pieces ready.

Two minor negative remarks: as far as I could see, there are no instruction in regard of the table size. While I assume that the scenarios are to be played on a 4’ by 3’ table, it would be nice if it was clearly stated somewhere in the text. Also, there are some typesetting errors in several of the OOB tables – misaligned rows that can cause a little consternation.

Regardless of that, I think that “Heartland” is an excellent scenario book and can recommend it to anyone interested in the period. Considering moderate size of most of the scenarios, I also think that it is a rather good starting point for people that are just beginning to assemble their ACW armies.

July 07, 2009

Guadalcanal by Richard B. Frank

The other day I’ve finished “Guadalcanal” by Richard B. Frank. I won’t go into the details of the book – Guadalcanal should be familiar to most wargamers, at least in broad strokes. I would however like to recommend this book to anybody with interest in the Pacific theatre of World War II and especially to people that wargame this period.

There are several reasons for my unreserved praise of this book. First of all, it gives a very detailed account of all aspects of the campaign – land combat, struggle in the air and clashes at sea. Second, it is based on primary sources of both sides and gives equal space to American and Japanese side. Furthermore, Frank narrative is very rich in detail, but remains very accessible.

From wargamer’s perspective, this book is a dream – there is a lot of material for scenarios of all possible kinds – control of Guadalcanal was contested at land, sea and in the air and ferocity of that struggle was equally intense regardless of the location. What’s even more important, Frank provides both the maps and orders of battle for both major clashes and minor incidents. And as a final cherry on the top, he also gives us excellent descriptions for all commanders involved in the campaign.

June 23, 2009

Lesson learned

Well... yet another change of layout - this time good, plain black. No it's not a reflection of my mood, but forced necessity. Earlier today I took a quick pick at the blogg and imagine my suprise - most of it was plastered with adds for Photobucket, encouraging me to create proffessional account. The explanation for this phenomenon was quite simple - custom template I've used has all of its graphic elements posted on Photobucket and owner apparently reached his bandwidth limit.

The lesson is learned - I'm sticking to a plain design with no frills. Sure, the page looks slightly boring without all the fancy gradients, but at least I am in control now. And I have to admit that I like the way pictures pop out with that black background.

June 21, 2009

Adler ACW range review redux - part 4

This is the final, at least for the moment, part of my review for figures suitable for the Union troops.

Regimental command strip

Regimental command strip ACW20A consist of one officer, one drummer and two flag bearers. As can be seen in pictures above, I always add one such strip to all of my units.

This strip and its sibling with figures in hats are perhaps the only source of problems in the entire range. Reason for those problems is quite obvious - flag poles are quite easy to break off, and I did receive strips with poles that were weakened by the transport or where poles were already broken off. There is really not much one can do about it, the metal used for figures is quite soft and any prolongated parts will have tendency to break off. My advice is simply to order twice as many command strips as you need and select those with strongest poles. Extra cost is negligable and you will save yourself a lot of grief.

ACW20A - Command group in kepis

Union artillery

ACW artillery in Adler range is limited to smoothbores and Parrot guns. Crews are also limited to two variants, one in hats and the other in kepis. For Union artillery I use strip ACW19A, but I guess you could mix both variants for the sake of variety.

ACW19A - Artillery crew in kepis

Union battery ready to open fire

Final comment on Union infantry

It is perhaps needless to say that strips with numbers 1 and 2 make up the bulk of my Union regiments. I would however like to recommend to everyone to at least order some samples of figures in Collector series - even at this scale they will add a lot of variation to your units.

June 17, 2009

Other that that, Mr. M, how was the ruleset?

Following Sunday's event, it would perhaps be a good time to write couple of additional words about “They Couldn’t Hit an Elephant”. My first impressions were confirmed – it is very playable and relatively simple ruleset. Before our game, I’ve prepared a set of two Quick Reference Sheets and a page listing possible actions for each of the players. Quick walkthrough of basic principles took about half an hour. Then we started to play and after a couple of turns, things flowed rather smoothly.

Our game also confirmed the fact that as in any other ruleset from TFL, cards and luck can sometimes make or break you. The infamous sudden death card, called ‘Coffee’ in TCHAE, didn’t bother us so much for the simple reason that I’ve inserted two of those in the deck. However, cards limiting actions of generals of certain type (‘Cautious’ and ‘Political’) can, with a bit of bad luck, still ruin the day for individual players. In Sunday’s game, player handling the Union brigade in the middle that was completely neutralized by ‘Cautious’/’Political’ card being turned over and over again just before his turn. Word of advice – be very careful with use of a single general with this attribute in your OOB, unless you dislike the player that will assume this command.

As always, some mistakes were made. The most important one in our game was the fact that I’ve forgot about the rule prohibiting use of multiple pips for movement, once a unit reached certain distance from the enemy. This seemingly small mistake made it much easier for units to get into close combat. On the bright side, my mistake may not have been a bad thing, since gave us experience with the rules that handle melees. As it turns out, bayonet charges are very unpredictable in “TCHAE” and should not be attempted by those faint of heart. At the same time, certain critique can once again be raised against the layout of the ruleset. My mistake could have been easily avoided if the ruleset made clear connection between movement rates, infantry fire ranges and the above mentioned restriction.

So what did my friends think of “They Couldn’t Hit an Elephant”? It will come hardly as a surprise that P, who was forced to suffer wrath of Confederate artillery without being able to do much about it, wasn’t very happy about it. T’s opinion was a little more of a surprise – he found randomness of TCHAE somewhat annoying and missed the detail and period flavor of “Long Road North” (my previous choice of rules for this period). L-A, Ha.and He. were much more positive – they liked the confusion created by the card draw and appreciated uncomplicated game mechanics used in TCHAE.

In other words, THAE didn't receive standing ovations, but neither did I hear any petitions for ritual burning of the pages. Personally, I have to say that this ruleset grows on me. There is certain elegance in those hidden relations between different mechanics of the game, although I wish they were clearly stated in the text. Also, what I saw on the table reminded me in many respects of the accounts by Shelby and Sears - confusion, units that moved erratically, heroics of the officers that changed the tide of battle... So with some tweaking, THAE has the potential of being a lot of fun.

Terrain

Union blinds on the move

Closing with the enemy

On to the top

Meanwhile, on the other hill

Mr. Elephant meets my friends

Introduction of “They Couldn’t Hit an Elephant” finally arrived last Sunday. Two Confederate brigades were to stop four Union brigades in their attempt to push their way across the gaming area. Wanting to make things slightly more interesting, I’ve added couple of twists to the scenario. Unknown to Union CinC during his planning phase, one of brigades under his command got lost during the advance to the battlefield. There is a very prosaic reason for this decision; one of Union players had to cancel and I needed to jump in instead. However, I wanted to ensure that my “familiarity” with the setup wouldn’t spoil the fun and decided to play as passive role in the game as possible.

Confederate side was served their own surprise – initially there would be only one brigade on the table. Arrival time of the second brigade was unknown to players on the Rebel side. Furthermore, I planned to give fair warning to the Union brigade commander on the flank that would be hit by Confederate reinforcements.

On the paper it actually did sound like a pretty good scenario – I imagined that Union troops would hit outnumbered Confederates in force, only to be distressed by sudden appearance of additional enemy troops on their flank. As everybody knows, things seldom turn out as planned, especially when you use TFL rules.

Stage 1
Union commander decided to enter the field on broad front – three brigades in line, with the fourth in support (my ‘no show’ command). Initial orders were to take holding positions along southern edge of the field, anchoring one flank on a nearby height.

At the same time Confederates attempted to show strength, moving the blind with “real” brigade into central position, while making best possible impression with dummy blinds.


Stage 2
Having assumed the intended holding position, two of Union brigades were either spotted or unmasked the blinds voluntarily. Confederate blind on the right was exposed and removed. Long range artillery duel started, causing some casualties and some consternation among one of Union regiments, but otherwise causing little damage. At the same time Union commander on the right flank received reports about substantial Confederate reinforcements moving rapidly toward his position.


Stage 3
Union brigades on the left and in the center receive orders to advance on Confederate position. Rightmost brigade moves rapidly and infantry on both sides start to exchange fire. Brigade in the center never moves out of its position. Confederate artillery fire starts to take effect, demoralizing one of the blue-clad regiments.

New arrivals show up on the field – lost Union brigade shows up, but far away from the expected entry point. At the same time, Confederate reinforcements show up on Union right flank. However, two of the rebel regimental commanders misunderstood their orders and got separated from the rest of the brigade. This causes some confusion and puts severe strain on newly arrived Confederate brigade commander.


Stage 4
Union assault on the left flank advances to contact with Confederate units on the high ground that dominates left portion of the field. Rebels are thrown back and appears to rout, but a courageous colonel manages to stem the flight and rallies the troops. Union right prepares for inevitable assault of Confederate reinforcements. Union center fails to support their comrades on the left, but the attached battery knocks out one of rebel guns.


Stage 5
What seems to be the final push on the Union left smashes into the battered Southern line. Amazingly, the line holds and same soldiers that were on brink of collapse just couple of minutes ago manage to throw back the blue onslaught in disarray. As so many times before, inexperienced troops can be very eager, but can also turn out to be very brittle tool.

Indecisive assault on the right flank ends in stalemate, while Union brigade in the center finally starts to show signs of activity. Unfortunately, it’s too little and too late, as both sides decide they had enough for the day.

June 02, 2009

Devil lies in the detail

Sometimes even a small detail can enchance the game experience - custom made quick reference sheets for each player, measurement tools specific to the ruleset, perhaps nice labels. In my case it's the movement trays - because of the lack of space and cost, I mostly use 6mm miniatures for games that are really intended for 15mm or 28mm. The end result is that bases are small and fiddly, which in turn results in lot of mishaps when they are moved on the table. Obvious answer to my problems was of course making a bunch of moving trays, but I couldn't decide on what material to use - thick cartoon, metal sheets, plastic...

In the end I've decided on using plastic. Bases themselves were cut out of 1mm thick plastic sheet, which is easy to cut with common kitchen scissors. Plastic sheet this thin is quite woobly, so I stiffened it with 1.5mm square profile rods from Evergreen - just front and the sides. Since bases for both my ACW and Napoleonic miniatures are 1.5cm wide, I've made a bunch of bases for various number of miniature bases. One important thing to remember is to add 3mm to each base width to compensate for width or the rods. In fact, I've added 5mm, as my miniature bases aren't very precisely cut. Better to have few milimeter gaps, than an unusable base. I've also decided to add 5mm to the shorter side - this will give me space to add labels with unit names and maybe some basic data. Self-adheseve label paper will be perfect for this purpose.

OK, so it's nothing revolutionary, but I'm quite pleased with the end result and somewhat suprised over how little time it took. I've made about 30 bases in about 2 hours. A quick spray paint job and I'm done.

June 01, 2009

They Couldn't Hit An Elephant - first impression

Three days weekend and quickly approaching date of introduction of the ruleset to my group gave me enough motivation for a quick test of “They Couldn’t Hit an Elephant”, Two Fat Lardies’ ruleset for American Civil War. Since my intention was to familiarize myself with the ruleset mechanics, I've decided to keep it simple, charge up a hill and see what happens.

For no particular reason I choose the Confederates to be on the defensive – two brigades, each consisting of four regiments and attached artillery battery were to receive an attack by three similar Union brigades. Terrain was created ad hoc from available terrain (made of GHQ TerrainMaker hexagonal tiles).

Thoughts after first reading
“They Couldn’t Hit an Elephant” is written in a style that is similar to that of other rulesets from Too Fat Lardies – clear and logical at first glance, but with some ambivalences and omissions that can confuse players rather quickly in their first games.

Like all TFL games, TCHAE is card-driven – basic cards activate either a brigade or division commander (depending on unit scale in the game). Upon activation, units that are part of leader’s command may move, fire, change formations or attempt to improve their current morale state. Amount of possible activities is limited by number of command pips, decided by a roll of an average dice.

Period flavor is defined by additional cards, which influence leaders of different character. For example a random cautious leader may be restricted to firing, but no movement, while inspirational leaders can get an opportunity to rapidly rally a unit or lead it into a sudden assault.

Last, but not least, there is the ‘Coffee’ card. When it is turned, it automatically triggers end of turn sequence of activities, after which the turn ends, deck is reshuffled and new turn begins. 'Coffee' card introduces fair amount of friction and uncertainty into the game, as players never know who will be able to act in current turn. It is also one of the usual TFL game mechanics that create most controversy among the players – it is either beloved or despised.

As is common for most rulesets, both units and commanders may be of varying quality and character. Unit morale state during the game is covered by four states – normal state allows the units to obey all orders, units that are ‘fightin’’ are locked in combat and won’t advance, while ‘defeated’ units are on the brink of breaking and will try to extract from combat. Finally, units that break, enter rout state and will run away until they find cover or are rallied.

Both ranged and close combat causes single figure casualties and may influence unit morale. Effectivness of firepower is low, most of the time there is either no effect or a single figure is lost by a regiment. Loss of two figures is a rare occasion.

All main game mechanics – movement, firing, close combat and command&control - are quite simple, but cover all the bases. At first glance I couldn't spot any bottlenecks in regard of game speed (very few dice modifiers) and there is just enough period flavor without the 'chrome' overloading the ruleset. So far so good… now on to my game.

Hold the high ground
In my imaginary engagement, Confederates were to stop Union troops from exiting along the roads that run to the edge of terrain behind the Confederate position. I didn’t give much thought to the most correct setup of the defensive position, my main goal was to create a situation where a clash between two forces would give me an idea about game mechanics. With this in mind I’ve placed Confederate forces in blocking positions near the roads. Initial rounds saw Union troops advancing under Blinds, one of typical TFL game mechanics, which allow both rapid movement and a degree of fog of war.

Confederate right flank...

...and the left

Union brigade on my left was quickly spotted by commander of the Confederate brigade on nearby high ground, forcing them to deploy while still in marching column. Confederate artillery opened fire on Union artillery battery while it was still limbered and drew first blood.

Union blinds enter the battlefield

Union brigade prematurely spotted

Union brigade on my right took its time and approached more cautiously, taking care of changing its Blind formation to ‘deployed’ before they were spotted by the Southerners. However, at the time they were spotted, woods on both sides of their advance route delayed their movement and made deployment of their artillery very difficult.

Last Union brigade swung through the open terrain in the middle and upon being spotted stacked its regiments in a single column. My intention was to throw those units against Confederate position on the hill and see what the result would be.

Overall situation in the middle of the game

Confederate view from the high ground

As the Union brigades moved into small arms range, both sides started to trade volleys and the ruleset started to show its strength. Units that suffer casualties need to take so called status check – first failure will cause the unit to assume ‘Fightin’’ status, which prohibits them from advancing any further. This very simple mechanics portray very well the character of ACW battles which often degenerated into two infantry lines pouring fire into each other until one side had enough. This is exactly what happened to the Confederate regiment in the woods on the right flank of Rebel line. Under pressure of a Union regiment and a battery of light artillery, they became first ‘Fightin’’ and then ‘Defeated’. Finally they were forced to move back into the woods.

The assault column in the middle came under intensive artillery fire from the hill in front of them. Advance of the regiment in front of the very Napoleonic formation stalled, as it became ‘Fightin’’. Second regiment bypassed them, as they recovered, but that was all their commander could do with his allotment of pips.

On Union right flank, things became very precarious for the blue-clad troopers. Difficult terrain hindered that brigade from deploying into effective formation. Furthermore, some rather silly decisions on the part of the player (yes, that would be me) caused one of the regiments to advance much too far without adequate support. The result was devastating – two Confederate regiments and an artillery battery opened fire and in a blink of the eye shattered their reckless opponent. The routed Union regiment…

Union right in peril

Dazed and confused
…at this point the ruleset stopped making any sense to me. You see, routed units perform mandatory flight movement as soon as the appropriate brigade card comes up. But for two rounds, the command card that would allow the broken regiment to run away didn’t come up. I refused to believe that this is how TCHAE was supposed to handle such situations, but the ruleset refused to give me an indication of how I was to proceed. Nevertheless, I came to the conclusion that I must have misunderstood some vital rule section. As it was 1.45AM, I've decided to call it a night, without achieving the goal of a close combat.

Afterthoughts
Even though this first test run was something of a failure, it confirmed my first impression of TCHAE as very quick ruleset with adequate feel of the period. After a couple of rounds I had pretty good understanding of the flow of the game, so the learning curve is low and even beginners should be able to grasp the basic concepts with relative ease.

At the same time, TCHAE also showed its weaknesses, which are quite typical for TFL rulesets. Some very fundamental concepts are either omitted or explained in convoluted manner that leaves them open for different interpretations. One of those omissions caused my confusion in test game above – as it turns out, status check for a unit that takes casualties is being done after ALL firing of ACTIVE enemy units is done. I on the other hand got the impression that status should be checked on every occasion a unit suffered casualties. My interpretation completely change the game - the unfortunate Union regiment that was shot to pieces made six test, but only two were required. Furthermore, some additional afterthought could have been given to placement of certain rules. For example, at the end of definition for 'Defeated' status there is a rather ingenious paragraph that effectively prohibits situation in which my Union regiment found itself in after being shattered. But as the situation was created as a result of firefight, I've primarily looked for the answers under sections dealing with combat and status checks.

Fortunately there is a very active Yahoo group that supports TFL games. After posting my questions there, I’ve had everything explained to me promptly and in very friendly manner. Next weekend I will run same scenario again and keep you updated about the outcome.