Showing posts with label Romano-British. Show all posts

June 24, 2017

Proving the theory

And so, finally, the day of the first outing for my newly painted Saxons have arrived.

With H.’s offensive on kingdom of Rhegis having slowed down to snail pace, L. decided to see if his tribe wouldn’t have better luck a bit further south, in kingdom of Caer Gynntguic. With his bunch being freshly painted and this being his outing with Dux Britaniarum rules, I decided to keep things simple and let him lead a basic raid on a village. The Saxon goal in this scenario is quite simple – run into individual the village, search the houses, find the loot on a roll of a six, grab the loot, run back home. Oh yes… try not to get killed in the process, but that’s optional. For Britons the objective is also pretty straightforward – kill’em all.

The plans

Dux_20170621_004

L.’s entry point in this scenario was from the far edge of the table. He was lucky enough to get three rounds of movement before my troops arrived on the table, unlucky to find out once I got there, I had all of my troops with me. This fact must have influenced his thinking, as only one group of warriors and a leader was sent into the village in search of the ‘treasure’, potentially slowing down his ‘search for treasure’ rate. Remainder of his raiding party – two units of hearthguard, two units of warriors and the bowmen – set course straight for my guys.

Dux_20170621_005

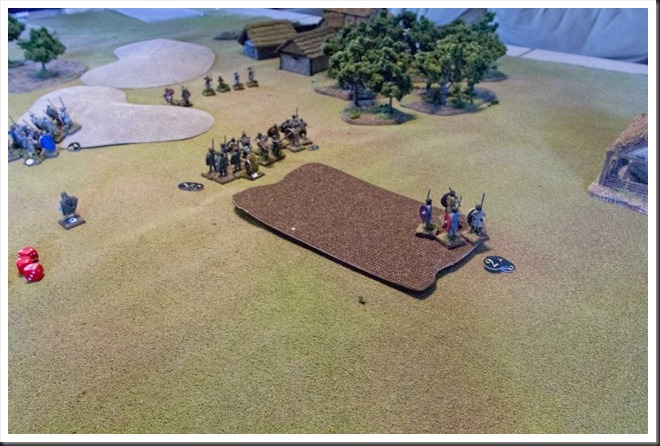
Just a couple of rounds into the game, the lines were drawn in the sand, traditional greetings in form of insults about relatives and personal hygene were exchanged… and a bit of a crisis materialized for my Britons. As can be seen in the picture, I was a bit too eager to get into contact with L.s hearthguard and exposed my flank to his other group of warriors. L. didn’t fail to notice my predicament and did actually try to smash into my exposed flank, but his dice roll for movement turned out to be inadequate for the task. His failure with the movement dice roll allowed me to bring up my peasant levies, grouped in a single large formation. By pure luck, I managed to avoid a potential disaster.

A quick clarification is necessary at this point – as it turns out, I had a truely crappy ‘photo day’ during this game and vast majority of pictures taken during the game have turned out to be unuseable. Because of that fact, the most vital part of this game has to be narrated without any visual aids.

Basically, what happened was this – L., tempted by a good set of Fate cards, smashed his hearthguard into the shieldwall in front of them. He ignored my commanipulares on the left flank and focused his effort on my warriors in center and the right. It was a pretty even and prolonged fight in which L. managed to break my warrior group on the right flank. In the end though, the Shock points mounted up for him and his front rank broke rank and fled. Remainder of his hearthguard gave it one more try, but it wasn’t enough. Once his chief was wounded, they followed the example of their comrades and withdrew in orderly fashion.

His two units of warriors engaged my other shieldwall, consisting entirely of peasant levies. Surprisingly, here the fight was rather onesided – both sides suffered some casualties, but the Shock caused the Saxons to break contact almost instantly after first clash of arms.

Dux_20170621_017

The picture above shows the situation after these dramatic events. L., unwilling to give up, charged the British warrior group that broke rank in fight with his hearthguard with what remained of his own warriors and actually managed to put them to flight. This success exposed them however to an assault by my peasants, who managed to maul them rather badly.

Dux_20170621_007

Meanwhile, L’s raiders in the village searched freneticaly for anything worth bringing back home. House after house was ransacked, but nothing even remotely shiney could be found.

Dux_20170621_021

With his hearthguard catching a breath at safe distance from what remained of my ‘main’ shieldwall and his search in the village turning up nothing of value, L. made a rather surprising decision to make one final attempt to break my levies. With just four warriors, he smashed in the middle of their shieldwall and actually managed to split it in two. This was however the high watermark of his effort – what remained of my peasants turned onto his warriors like mad dogs, or, at least they did so in my imagination. To be truthfull though, they didn’t manage to do much damage. They did however manage to convince L. about general unhealthiness of his current situation. His Saxons came to sensible conclusion it was best to break contact.

Dux_20170621_023

At this time the game was at a rather peculiar stage. Both L. and I did loose a formation of warriors. L’s hearthguard had a shedload of Shock points to deal with, but was otherwise still combat-worthy (one of his groups lost three men, the other was untouched). L. also had one completely fresh Warrior group in the village. From my perspective, the situation wasn’t that rosy neither. My peasant levy was still alive, but pretty much in shambles. My commanipulares didn’t suffer any casualties, but they were now supported only by a single group of four warriors; these guys would not stand for long if L. decided to attack. In other words, this fight was far from over!

But… as so often is the case in our hobby, real life clock and exhaustion took over. We’ve been at it for almost five hours and L. made the sensible decision to call it a day despite the fact that he didn’t manage to find anything of value in the village.

Musings after the battle

Let’s start with the obvious – the Saxons, newly painted as they were, never really had a chance in this game. The old wargaming truism has been proven yet again! Smile

If I am to be serious though, this game of ours was quite fascinating for me for two reasons. First of all, it was rather entertaining to see how different playing styles of H. and L. shaped the course of the game in very different ways. With H., I can usually assume that the Saxons will act cautiously and, for the lack of better word, rationally. L. explained to me later that he wanted to explore the ruleset and therefore acted consciously much more aggresively, seaching for a fight wherever it could be found. Thus, he took risks I’ve never experienced in my games with H. It has to be said that these risks did pay dividents, most important of them being the fact that he managed to split my levy shield wall with just four warriors accompanied by a leader.

Which brings me to the second reason this game was also a valuable learning experience. In Dux Britaniarum, a formation can be created by groups of warriors being formed either side by side or in two ranks, one behind the other. If a formation consists of two groups, they can be formed like this:

XXXOOO or XXXXXX
XXXOOO    OOOOOO

The difference between these two setups is that side by side groups always take equal shares of potential hits, while in ‘one rank behind the other’ setup the front rank absorbs all hits until their number dwindles to less than half of their comrades in rear rank. Then they shift place.

In our game, I played with groups side by side, L. set up his formations in two ranks. This was new experience, because H. usually preferred same setup as I did.

Why do I mention this? Well, for the first time, I had the opportunity to see the real differences in these two formation variants and they do add some surprising complexity to the ruleset. The advantage of the ‘side by side’ formations is that all involved groups support each other by division of possible hits. But this also means that all groups accumulate the Shock points, not necessarily at equal rate. It seems that one of the groups will always be ‘unlucky’ and accumulate more shock points than everybody else. In the end this will result in their rout, which in turn will split the formation into smaller components.

‘Two ranks’ formation seems to have their own set of pros and cons. As only the front rank absorbs all the hits, their comrades at the back are ‘protected’, at least at the beginning of an engagement. But the almost ‘manipular’ possibility to switch positions once casualties start to mount up seems to me rather unlikely – rather, the front rank wil suffer casualties and shock points and at critical point they just as likely break instantly, leaving their buddies to face the opponent all on their own. This is what happened in case of L’s hearthguard’s attack – his front rank took all shock points and by the time they lost half of their numbers, it was too much for them and they run away.

My point with this rather too long ‘analysis’ is that there are hidden depths in this deceptively simple set of alternatives for formation setup and I’m not sure how to deal with them. Further games seem to be necessary to explore this topic further! Smile

May 14, 2011

Not Dead Yet…

When I look at the date of my latest entry in the blog, I can't help but wonder about how fast time passes these days. Also, I wonder about how often the phrase 'Not dead yet!' has been used on half-abandoned blogs, followed by explanations and excuses. In this case, my long silence was caused by several different factors,but first and foremost - I moved to a new place. The bad thing here is that fixing the new place is taking ten times longer than I expected. The good thing is that I finally have both a nice painting area and plenty of space for a decent gaming table.

Returning to the age of Arthur
This blog is supposed to be about miniature wargaming, so enough about my new flat and let's move over to last Sunday’s event. On that day H. came over with his Saxons and we gave Warhammer Ancient Battles another go. It was our third game, so we were finally starting to get a grip of the ruleset. Nevertheless, I was a bit anxious, because our previous games ended in a rather inglorious whooping of yours truly. Now, I don't mind having my behind being handed over to me every once in a while. In case of H.'s Saxons however, the single reason for my defeats was the monstrous special character of his king, who so far managed to vaporize anybody who dared to stand in his way. Romano-British army list doesn't really offer any direct antidote to that monster, something that I admittedly started to find tad unfair and frustrating.

Same, same, but different
Since we are both still fumbling our way through WAB ruleset, we decided to run yet another set piecebattle with few pieces of terrain for sake of variety.

Our deployments were rather unimaginative. I placed a huge swarm of skirmishers in the rough ground to my right, while the rest of my infantry - two units of milites and one of peasant rabble were placed in the centre. My mounted mounted milites in skirmish order were placed on my right flank, while mounted commanipulares were held in reserve.
H.'s dispositions were pretty much a mirror of mine - his skirmishers, although heavily outnumbered by mine, intended apparently to meet mine in a straightout shootout contest. Three units of Saxon warriors were placed to the left of the skirmisher, while his cavalry concentrated on the Saxon left flank.

H's intention was apparently to repeat the events from our second game - smash with his cavalry through my rightmost milites unit and then take care of my cavalry. With that suspicion in my mind, I choose a purely defensive strategy - infantry would take the charge and hopefully hold. In the meantime, my light troops would try to annoy the crap out of the Saxons with missile fire.


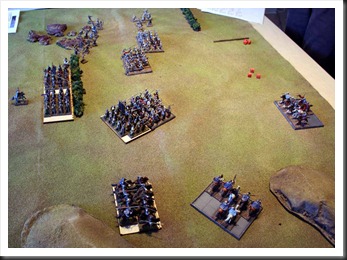
001_Initial_Dispositions001 Birds view before battle

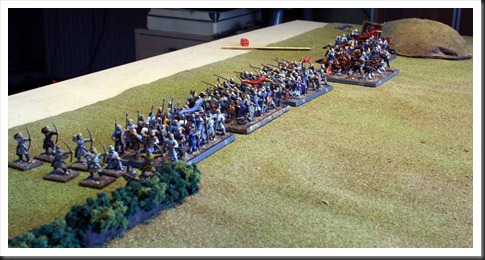
002_Romanl_Dispositions002 Romano-British deployment

003_Saxon_Dispositions003 Initial deployment of Saxons

When events actually follow the plan
The battle that followed can be described in very few words. H moved his entire army forward, while I awaited the onslaught. My foot skirmishers on right flank exchange missile fire with H's archers and mass of Saxon infantry. The results were inconclusive, the only source of real excitement being caused by an uncontrolled charge of some of his infantry, which my skirmishers avoided by a hair's breath.

Main action was once again initiated by H:s cavalry. His light cavalry unit charged bravely into my rightmost milites as soon as it was in range... and was promptly sent back with a bloody nose. I must admit it caused me no small pleasure, because similar charges in our two previous games started disastrous chains of events that led to catastrophic defeats of poor Romans. Not this time though; it's nice to know that WAB is capable to handle cavalry charges into formed infantry in proper manner. It’s even nicer to know that my army doesn’t always trip over its own legs at slightest push.

004_Failed_Saxon_Charge004 First Saxon charge bounces against Roman shieldwall

His initial setback failed however to disturb Saxon king's retinue, who in following round managed to completely mangle mounted milites on my left flank. Poor buggers came a tad too close to Saxons in open formation and were caught while trying to evade the predictable chagre that followed. This success placed Saxons in perfect position for a clash of arms with my mounted commanipulares, a contest which on both previous occasions proved to be catastrophic for my general’s retinue.

Sure enough, the Saxon king charged and to everybody’s suprise failed to make any impression whatsoever on my cavalry. The fact that I cunningly equiped them with heavy armour for this battle did help. To be fair though, H:s hopeless luck with dices helped even more. My retinue also managed to cause enough Saxon casualties to make them flee. This rout would have once again been been a decisive one, but for the fact that in this battle Saxons were as skilled at running away as they were in close combat on previous occasions.

006_Decisive_Moment006 Decisive moment

007_Halfhearted_Clash_of_Shields007 Inconclusive infantry engagement in the center

008_End_of_Battle008 Situation at the end of the game

By that time we were both satisfied with the outcome and decided to call it a day. It turned out to be yet another Saxon victory, although this time it was a mariginal one. Personally, I was mostly relieved that my Romano-British army didn't (once again) crumble like a paper mug. H. was probably a tad relieved over and certainly very entertained by happy escape of his king's retinue. Overall, a pretty decent Sunday afternoon.

June 19, 2010

What was that about?

OK, I had my fun with yet another narrative writeup, but what was it all about? Well... after more than a year and a half of painting and preparations, H. and I decided that we had enough painted figures to have a decent 1500 points Warhammer contest. I fielded a Romano-British force consisting of one unit of mounted commanipulares, another rather small force of commanipulares on foot, two units of milites and a largish unit of pedes. The difference was made up by a horde of skirmishers. H. countered with a mounted unit of Gedrihts and three of Duguths, one of them mounted. He also fielded a small force of skirmishers.

The game developed as described in the narrative - inital clash between best cavalry ended in disaster for me, mainly because of superior strength of H.'s leader and my lousy dice rolls. Then our infantry clashed together, with me loosing by a single point and failing morale test for three units (only one of which was actually in combat). Next round saw my cavalry being overrun and my commanipulares on foot being annihilated. The fact that all of three routing units managed to rally was a small consolation and we decided it was a rather overwhelming Saxon victory.

And what did we think about 'Warhammer'? Here's the thing - we are using the original edition. That's right, not 2.0, not even 1.5, but the original, that by now gives a different meaning to 'Ancient' in the title of the rules than was originally intended. I've understood from the comments on the net, that there are some ambivalences in the original ruleset and yes, now I can confirm that. For example, how the heck do leaders fight? And how does one fight against them, especially with thrusting spears? The way we finally decided on handling the leaders was to deal with them separately, before proceeding with the rest of combat, but I don't have a clue if we are doing it 'right'. Another thing - counter-charges by cavalry. Once more, I know that they were added to the ruleset, because I've seen them mentioned on the net. But they are certainly not described in Warhammer 'the original edition'.

Nevertheless, we both had a blast and really enjoyed the game. Even though it was a bit one-sided, I hope to smack those pesky Saxons back to Denmark as soon as I'll get the opportunity. And of course, me and H. are already discussing the next army. :)

Saxons Are Coming!

It was at the end of last year's autumn that first rumors about yet another huge Saxon host causing all sorts of mayhem and destruction reached the court of our lord, Severius Borus. News like that have become more and more common over last couple of years - ever since the Saxon revolt that took place almost a decade ago, everybody in our domain was worried about growing numbers of the invaders. We knew that sooner or later we would have to fight those barbarians. As more news about burned villages and overrun strongholds reached us from the east, or Lord decided that this time has now come upon us. It was better not to wait for same fate to befall on our domain, but rather to meet the Saxons on a field of battle and smash them before they could cause us great harm.

During the winter, messengers with a call to arms were sent to all corners of our lands. Trusted men were sent to our neighbors, urging them to join us and oppose the Saxons. As winter slowly turned into spring, our lord had huge force at his command. Foremost among all troops were commanipulares of our lord - experienced warriors with many battle scars proving their veteran status. All of them were equipped with best armor and weapons, their horses the best in the realm. Enough men gathered to the call of our lord to form two companies of milites. While not of the same status as commanipulares, they were good soldiers, some of them serving as youths in Roman legions, before those disapeared from Britannia for good. Last but not least, a huge mass of peasants, some with spear and shield, some with bows and arrows or simple slings, obeyed the orders of Borus. Our lord, in his wisdom, trained those who had proper equipment to stand and fight in a shield wall formation. The rest was instructed to act as scouts and cause whatever harm they could to the Saxon foe.

Finally the day of departure came and our splendid army moved out to meet the Saxon threat. News about their destructive deeds reached us with alarming regularity during the winter. Those who survived their encounter with the barbarians told us about a host as numerous in horsemen as it was in warriors on foot. They were lead by a man who was called 'Bear' - apparently a horrifying, huge man who possessed almost unnatural strength and who could drive a spear through three men with a single thrust. We all discarded those stories as something to scare children with, but our lord valued the information about the location of the Saxon host.

Apparently, the Saxons had their spies in our midst, for the news that reached us told us they were moving rapidly in our direction, leaving a track of destruction in their wake. It took us less than six days of march to find the Saxons, or maybe for them to find us.

On the day of the battle our footmen were formed in three battles consisting of milites and pedes. Foot commanipulares acted as a reserve to the rear. Peasant skirmishers were sent to our right flank, where rough going would protect them against Saxon hordes. After making sure that our battle line was formed to his satisfaction, our lord took personal command of mounted commanipulares and rode round the right flank, with intention of smashing Saxon hordes once they were softened by our footmen.

WAB_1 Saxon army

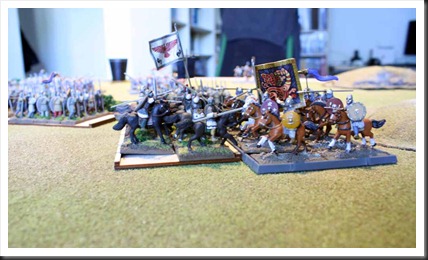
WAB_2 One of Saxon cavalry units

WAB_3 Roman battle line

It was a sound plan, yet somehow everything went horribly wrong. As our heavy cavalry maneuvered to hit the flank of barbarians, it was swiftly met by the best cavalry of the Saxons. While far from being as splendid as our warriors, it was numerous and acted confident, even as it met our best warriors head to head. Bear was leading them and all who could see the clash of horsemen quickly understood that the tales about that man were all true. Using his huge sword almost as a club, he stroke down everyone who dared stand in his path. His men rode into the holes he ripped in our formation and just like that, our warriors panicked and turned around. With Saxon horsemen slashing at their backs, few managed to keep their lives. Fortunately, our lord was one of those who managed to retreat to safety.

WAB_4 Clash of cavalry…

WAB_5 …and the aftermatch

Meanwhile more Saxon cavalry appeared at our other flank, forcing one of our battles to turn to the left and face that threat. Even as our milites scrambled to form a new shieldwall, Saxon infantry smashed into the middle of our battle line. I was there and witnessed as Saxons charged our men and barely made contact before our troops, terrified by the savage onslaught broke ranks and run away. Panic spread like plague and the rest of our men followed the cowards who started the flight!

WAB_6 Initial contact between infantry

The only men who stood their ground were the foot commanipulares. Those valiant med didn't hesitate for a moment and rushed forward in an attempt to stem the Saxon flood. They managed to stop the Saxons for a couple of valuable moments, thereby buying valuable time for our troops to recover from the initial shock. The price was however heartbreaking - commanipulares died to a man, some being slain where they stood, the rest was simply swept away by the Saxon horde.

WAB_7 Last stand of foot commanipulares

By that time it was apparent that our lot lost their heart and could not stand up to the Saxons. Our lord gave signal for a retreat and from then on it was 'every man for himself'. Saxons pursued us half-heartedly, scattering our once mighty host into all directions.

WAB_8Bear victorious

Twelve days have now passed since the great disaster and remains of our army have gathered at the stronghold of our lord. There are few of us, but we will stand our ground and defend our land to the last. Pray for us, for Saxons are coming...

November 15, 2009

Overeager, overambitious and underprepared

So… more than a year after the decision to start our ‘Age of Arthur’-project, H. and I decided it was time to run our first trial game. The fact that H. had only three finished units against five of mine didn’t bother us – we wanted to get those miniatures out, give them a workout, roll some dices and have a few laughs.

Perhaps a little more serious problem was the fact that last time I had the opportunity to read the rules was… oh, a year ago or something like that. As for the army lists and pre-game preparation – since number of units was so uneven, neither of us bothered with those small details. That’s what the supplements are for!

It will come hardly as a suprise to most of you that our first game was something of a fiasco. Most of the time was spent on trying to find relevant rules, checking stats and similar ‘fun’ activities. By the time we had to start packing up (game took place at local game shop, after opening hours), we did manage to kill one skirmisher and have a successful Saxon cavalry charge, which ended in a draw. This “high watermark” was rather suitable finale of the game.

It has to be said, despite equal fumbling on both sides, we still somehow managed to have a blast. At the same time I think it will be best if we try to avoid games like that and for that reason I have this checklist to complete before next meeting.

  • Read the rulebook
  • Put together an army list
  • Prepare movement trays
  • Ensure that both players have their own set of rulesets for the game

On a side note, even the pictures from the game didn’t work out all that great (starting to be annoyed by my point and shoot, it’s time to get a simple DSL kit). Not that it’s stopping me from posting some pictures anyway. :-)

P1000387
Saxons on the far edge, Romano-British on the near edge

P1000388 Saxon army – two units of foot Duguth,
Duguth on ponies and some skirmishers

P1000389 Anglo-British – two units of milites, one of pedes, mounted commitates
and small ‘special unit’ of foot comitates (Dervel’s Wolftails)

P1000392 Milites brace for impact of Saxon cavalry

P1000393 Commitates try a sneaky flank manover that led to nowhere

P1000397 Saxons smash into milites and get stuck

May 03, 2009

A peasant shieldwall

There really isn’t much space for variation in WAB list for Romano-Bristish. Basic unit is either formed from plain milites or even plainer pedes. Still, pedes are good, sturdy peasants that hopefully will stand long enough in their shieldwall for the more flashy commanipulares to hack their way through whoever is on the opposite side. Also, they are cheap and that’s never a bad thing.

For my pedes I stuck with the miniatures from Gripping Beast. Unit in pictures below consists of a unit pack that is being sold at slightly reduced price. To be honest, I’m pretty sure, I will stuck with Gripping Beast for most of this project – I like the sculpts and the range covers all my needs.

The look I was going for was that of poor peasants, so no flashy garments or elaborate shield designs. Plain, drab colors and mostly handpainted shields, although I did try to get some more variation with shield decals from Little Big Men Studio. Unfortunately, all of the decals that I've got from them, were to small by at least 5 milimeters for the huge shields these minis are equiped with.


March 19, 2009

Britannia is still a part of the empire.

After a brief interlude over the French skies, let's now return to my WAB project. Or rather, let's go back to the start of it. As I mentioned before, a buddy of mine and I - under the inspiration of Cornwell's 'Warlord' trilogy - decided to start collecting armies from 'Age of Arthur'. My friend choose the Saxons, while I (once again succumbing to my strange love to anything called 'imperial'), choose to defend the civilization and set my heart on a Romano-British army.

As a starting point for my army I selected a milites unit from Gripping Beast's extensive selection of miniatures from this period. I must say that I am very happy with my choice - figures are very nicely sculpted, don't require a lot of cleaning up and are a joy to paint.

I had some difficulty in deciding about how I would paint my milites. In the end I've reasoned that it would be highly improbable that any regular units would be available on the Isles during that period and painted each figure differently. I tried however to give the unit a 'Byzantine' look. Also, I've limited my mix of shield transfers to just a couple of schemes. All in all I am quite pleased with my first foray into 28mm 'scale'.


January 02, 2009

Why Warhammer Ancient Battles?

My WAB project was started more or less by coincidence or rather for several, quite different reasons. First of all, I’ve been drooling over those gorgeous transfer decals from Little Big Men Studios for quite some time. I really wanted to have a reason to use them for something.

Then, some time last year, a friend of mine expressed interest in kicking off new project, preferably in the ancient or dark age period. He’s an old Wahammer and Epic player, so Warhammer Historical was a natural choice of rules for him.

By coincidence I was at that time finishing ‘Winter King’ by Bernard Cornwell. I can’t praise this book enough – marvelous story of King Arthur in historical setting, colorful heroes and villains and great battle descriptions. A wargamer needs much less for inspiration to start a new painting project. Before I knew, Hakan and I were placing our first order for miniatures from Gripping Beast. I’ve selected Romano-British as my army, while Hakan went for the Saxons.

That’s been about six months ago. Since then the project has progressed slowly, but steadily and I now have two infantry units ready for battle, while much needed reinforcements in form of heavy cavalry unit is progressing very nicely. In coming days I intend to post couple of pictures of those miniatures.