All right… let’s start the new year in right tone with a post that is actually about a game? And never mind that it’s been played more than five weeks ago! 
The scenario
I continue to work my way through the excellent “Heartland” scenario book from Caliver Books and this time around it was time to re-play initial Confederate assault in Battle at Shiloh, or more specifically the part of that assault that took place in the area around Shiloh Church (on extreme Union right, if I recall correctly).
Initial setup in this scenario isn’t very encouraging for the Union side and to be honest, even before start of the game I doubted that it would be a very exciting game. Basically, the defensive position that Union troops are deployed in is compromised by the fact that its both flanks are wide open and begging for exploitation. In theory at least, the Federals should be able to hang on to the original position, but only until Confederates figure out the situation on the flanks, at which time their superior numbers should allow them to outflank Union boys on both sides, effectively ending the game.
But, as we all know, strange things can happen in wargames…
Originally, I wanted for H. and L. to play against each other with me acting as GM. At the last minute I decided that leading the massive Confederate force could be overwhelming for a single player. Therefore I took upon myself to lead the largely static Union troops and let my friends take control of the Rebels.
OK, I admit freely that my motives weren’t altogether altruistic. I did hope that this change would also lead to increased lack of coordination on Confederate side, thus at least to certain extent reflecting what seemed to have occurred in real battle.
Tweaking and tinkering with the ruleset
We are now arriving to the reason why this AAR is delayed by over a month – I had to post the two previous posts before this one, thus laying the foundation for the significant changes that I have done to ‘They Couldn’t Hit An Elephant’ for this game.
A short re-cap of previous posts is now in order. In them, I presented my reservations against card driven game turn engine in its original form. My objections consist of of two main arguments:
- A card deck of even moderate size (around 10-14 cards), provides far too many combinations to be able to provide expected ‘average’ statistical outcome within number of turns of a normal game (in my personal opinion, a game is usually finished between 20 to 40 rounds). This point of critique is especially directed toward the ‘Tea Break’ card mechanism, which I claim is far to random within the scope of a single game of average length.
- Unequal number of cards in the deck introduces a purely mathematical advantage for the player with larger number of cards. Such advantage is in my opinion, unintended alt. unrecognized by the ruleset design and creates games where one side is unintentionally handicapped by a factor outside the scope of the ruleset.
I took several ‘dramatic’ steps to adjust TCHAE in an attempt to alleviate the issues described above:
- Instead of cards, I decided to use game markers as activation tools for units, leaders and special events such as ‘Coffee Break’. Game sequence was to be decided by random draw of one marker at a time.
This change has two consequences: the activation sequence is ‘fluid’ throughout a turn, as any marker has equal chance to be drawn at each draw during the turn (opposed to a card deck, where turn sequence is ‘locked’ after cards have been shuffled). Also, this system is ‘self-levelling’ – if multiple markers for one side are drawn for one side, the chance for drawing the other side’s marker is increased.
- Regardless of number of markers needed for the game, the number of markers for both sides was to be equal in ‘marker pool’ at all times throughout the game. Dummy markers would be added to the marker pool to even out the numbers, if necessary.
In this particular game, this change was especially significant – eleven Confederate markers, five Union markers and four ‘neutral’ markers were needed for all purposes in the game. If I stuck with those numbers, I’m pretty sure that Union side would be hardly able to act at all in this game, making it a very dull game indeed. By adding additional six dummy markers for the Union side, the ‘probability’ issue was neatly removed.
- All markers were in the play from first round. This has two effects: balance is kept the same throughout the game, regardless of losses. Also, chance for ‘Blind’ markers being drawn is equal for both sides regardless of number of deployed units on the table.
- The game started with three(!!!) ‘Coffee Break’ markers in ‘marker pool’. This allows for rather free initial movement (although surprises still occurred).
- One ‘Coffee Break’ card was to be removed once first small arms salvo has been fired. Second ‘Coffee Break’ card was to be removed after first unit rout in the game. This alteration was based purely on ‘gut feeling’ in an attempt to provide increasing friction as the battle progresses.
The game
The game developed in expected manner, with Confederate troops approaching the Union position on wide front, successive waves of Rebel troops smashing against the Blue line, initially bouncing back on most occasions. As the loses mounted on both sides and with Federal line being slowly outflanked, I tried to retreat to alternative defensive position, while feeding in the reinforcements into the gaps in my line as they appeared. This tactic proved to be successful, until a series of determined Confederate charges against my left flank brigade resulted in what can only be described as its complete disintegration.
A single picture is, as they say, worth thousand words. Therefore I invite the readers to take a look at the series of pictures below for a more detailed analysis of the game.
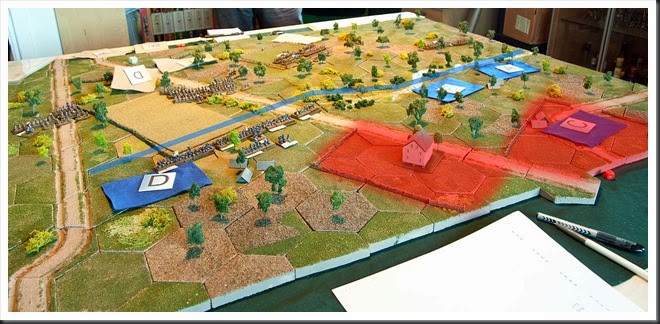
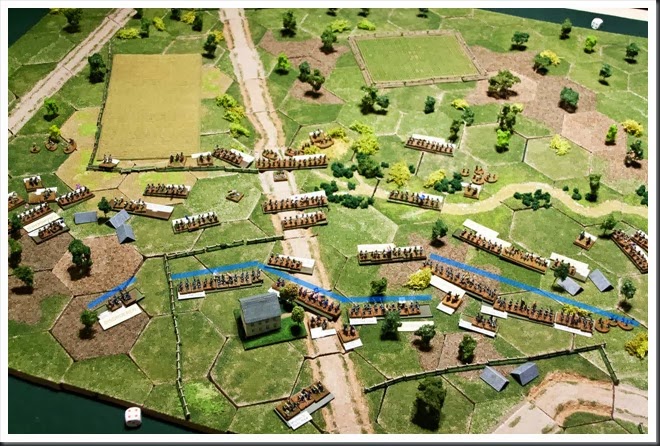
 Confederates approach the Union position. Original defensive line of the Union troops is marked with blue line, Confederate objectives are marked in red. According to the scenario, two Rebel brigades were deployed on the table at the start of the game, the rest was to enter the battlefield on 5+ roll on a D6 for infantry brigades and roll of 6 on a D6 for artillery batteries. H. and L. managed to roll 5 or higher for all of their infantry brigades in first turn of the game.
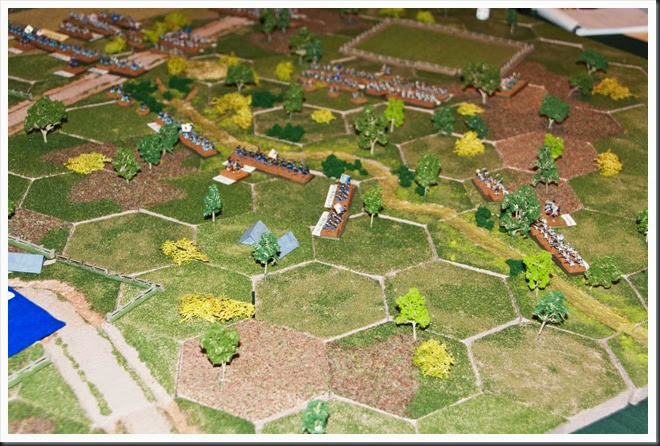
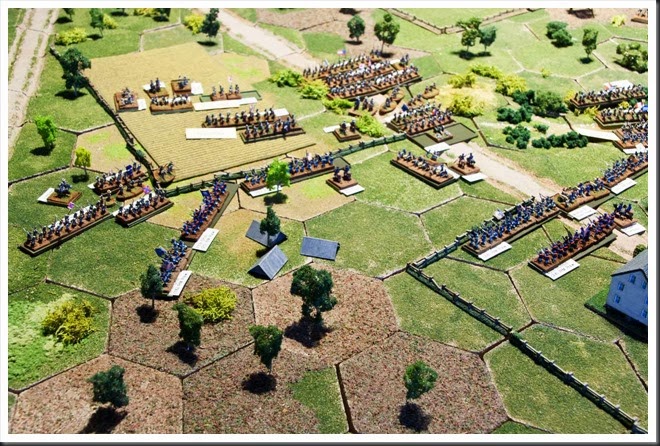
 As Union dummy blinds are ‘spotted’ and removed from the game, the harsh truth about weakness of Union position is revealed. Already after a couple of turns, the Confederate troops started to overlap Federal line, forcing it to bend in an attempt to cover the flanks. However, fortunate (or unfortunate, depending on point of view) marker draws stopped Confederates from moving decisively and exploiting the situation to their full advantage. In this picture, Buckland’s brigade on Union right flank is adjusting position of one of its regiments in an attempt to meet the threat of being outflanked by rebels of Colonel Pond.
 Cleburne’s brigade throws itself against Union centre early in the battle. Raw troops of Hildebrand’s brigade meet this charge with a hailstorm of fire from small arms and artillery, throwing it back in disarray and permanently breaking the rebel regiment leading the attack.
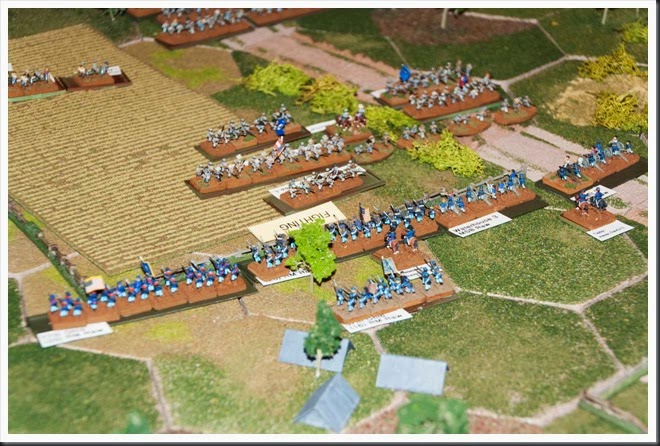
 As battle progresses, more Confederate troops come into close contact with the Federals. Here, Russel’s brigade is clashing with Union troops defending strong position at the bank of Shiloh’s Branch, trying to push their way across the stream. This particular attack didn’t succeed, but it pinned Union forces in place and did cause considerable casualties.
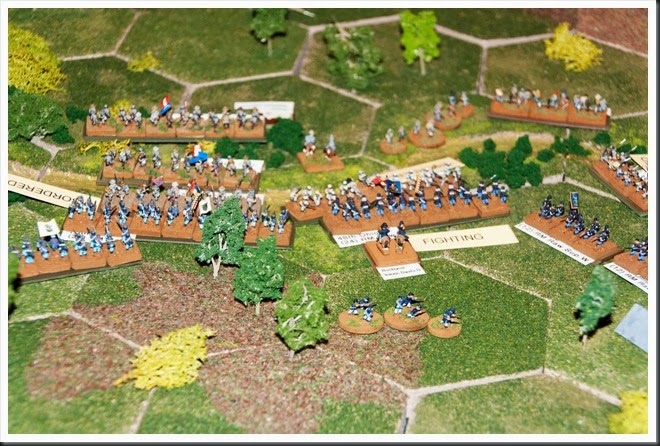
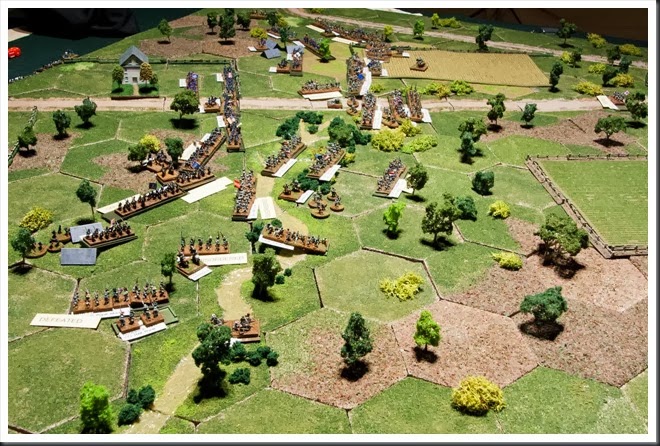
 Situation in the middle of the game. Union centre thrown into disarray, with one artillery battery taken by the rebels, the other one trying (unsuccessfully, as it would turn out) to retreat toward second Union line. Hildebrand’s brigade on Union right is buckling under mounting weight of Confederate pressure. In Union rear, McDowell’s brigade is trying to establish second defensive position, blocking the road.
At this time, L. and H. went home and I proceeded with the final phase of the game on my own.
 Situation on right Union flank at the same time. Confederate attempts at outflanking the Union position continue to be thwarted by bad luck in activation marker draws – that’s the main reason why the blue line is still relatively intact.
 ‘Agressive’ characteristic of many of Confederate regiments decide the battle on Union left flank. Units with this characteristic move forward on their own if activation marker for their brigade isn’t drawn and the brigade has ‘Assault’ orders. Furthermore they have significant positive modifiers in close combat. In this battle, individual ‘agressive’ regiments from Cleburne’s and Anderson’s brigades smashed repeatedly into Hildebrant’s raw Union regiments, first throwing them back in disarray and then routing them from the field. Brigadier Hildebrand was killed in the course of this rather confused melee.
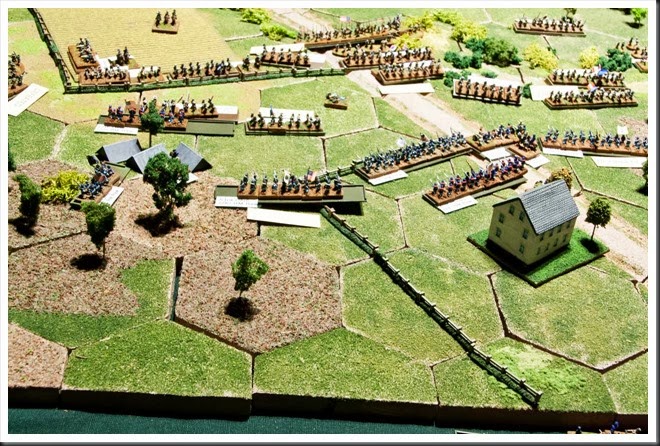
 Right flank of Union line at the end of the game, still in pretty good shape.
 Situation at the end of the game, seen from Confederate perspective. With Union left disintegrated and two Rebel brigades ready to enfilade second defensive line of Federal troops, the final outcome is just a question of time.
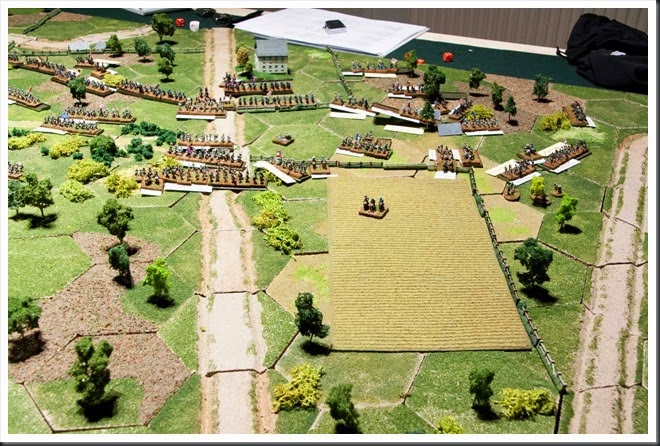
 Overall situation at the end of the game. Notice the large Confederate formation at the rear of rebel lines. Johnson’s brigade, second strongest brigade in Confederate OOB never managed to get into the fight. Something to ponder about for rebel commanders.
Musings after the battle
I don’t think much more needs to be said about the scenario itself – as I suspected beforehand, there can only be one outcome here. Scenario designer does recognize this fact and makes this scenario playable by setting sensible victory conditions for federal side –the game is to be limited to about 15 turns, at which time rebels are to be in control of their objectives. If they’re not, the Union side can claim victory. With the ‘Coffee Break’ card used as end of turn marker, this condition needed to be modified – I choose to give Confederate side 40 ‘Coffee Break’ cards to achieve their objectives. I’ll let the reader figure out the intricacies of this condition. 
If you insist on asking who won the game, I’d say that Confederates did, despite failing to reaching the objectives – the Union position was compromised by the time I decided to call it quits (I believe that about 35 ‘Coffee Break’ cards were played by that time). Further resistance would at that time only mean more meaningless slaughter and I am quite sure that a sensible Union commander would recognize that fact and call for a retreat. On the other hand, the ‘real world’ Union CinC on that occasion was no one else but William T. Sherman, so who knows, maybe he’d fight to the last man regardless of his hopeless situation.
Never mind the battle/game though, what about the massive ‘surgery’ I made to the ruleset? Well… obviously, I’m not objective, but I must say that things flowed rather smoothly from the start and there weren’t too many objections from H. and L. neither (both of them played TCHAE in original format).
Personally, I was mostly concerned that the additional markers would slow down the game, especially at the start of the game, when only few of the markers would actually activate units. Fortunately my worries were completely unfounded. My activation markers were made of numbered poker chips and we just drew them one of them after the other until playable marker was activated. Took no time at all.
If I am to be completely honest, I’d go as far as saying that without the modifications I applied, this scenario would be an unplayable cake-walk for Confederates and a very sad, maybe even frustrating affair for Union players. As it was, both sides had fair chance to act and manoeuvre. Remarkably, if there was any frustration during the game, then it was caused by the fact that a couple of Confederate brigades consistently failed to be activated at crucial moments in the game, causing certain people to voice completely unfounded accusations of me playing with ‘marked’ game markers. 
On a more negative note, I have to confess that I am growing slowly disillusioned with TCHAE as a ruleset. One thing that bothers me more and more is its order system, which consists of four order types – hold, advance, engage, manoeuvre. The ‘Hold’ order is the only one intended for defensive purposes and its nature is quite rigid – units under this order are pretty much to fight until they break or die. This makes flexible defence pretty much impossible and renders artillery especially vulnerable to frontal assaults, since it’s not allowed to evade while ‘Holding’. By now I’ve lost artillery batteries on several occasions because of the rigidity of this order. While I’m fully aware that this opinion can be debated, I’m starting to feel that there is something missing in this part of the ruleset and I’m growing a tad weary of having to ‘fix’ yet another issue in TCHAE.
At the same time, I have to be fair and admit that even with its ‘flaws’, it does give a decent ACW game. It’s slow, ponderous and requires a lot of ‘grinding’ before any decisive results can be achieved. Any real victory can only be achieved by decisions on higher level of command, by proper deployment and hammering at right spots with elements of at least brigade size. That’s American Civil War for you, like it or not. Also, there is something to be said about familiarity with a particular ruleset and by now I do know TCHAE inside out.
Still, I think that the time to give ‘Guns at Gettysburg’ and ‘Black Powder’ a shot is slowly approaching….
