Showing posts with label Copenhagen. Show all posts

April 22, 2010

Duel of the Eagles

For next installment of our Battle of Britain-saga we selected scenario with very suitable title 'Duel of Eagles'. It was our first pure fighter game, which was a nice change of pace from previous games, where bombers were the primary targets.

The setup

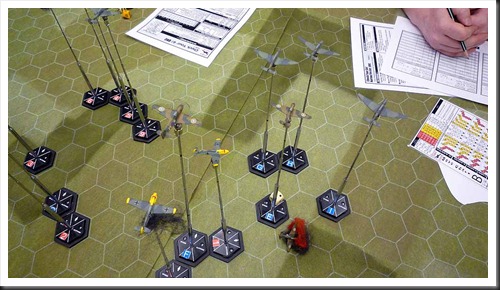
Historical encounter depicted by 'Duel of Eagles' was between elements of Jagtgeschwader 26 and Squadron No.76. Pilots of both formations were very experienced and both were led by an ace - Adolf Galland and "Sailor" Malan. To reflect this fact, both sides in our game had an Ace pilot and a bunch of Veteran pilots each. R.A.F was represented by three sections of Spitfires, while Germans had four sections of Me109:s. Entry point and initial altitude of each section was determined randomly, although random Scenario Special Rule roll allowed the German side to enter one section of Messerschmitts at highest altitude at the beginning of round 2.

Random setups have sometimes tendency to put a certain spin on a game and this was one of those occassions. Malan's section entered the table at very low altitude and it was obvious that his formation would not have much influence on the initial phase of the game. Galland's rote and second Spitfire section entered the table on the opposite sides of the table, at high altitude, but equally out of position. Third section of Spitfires was however definitely in trouble - two sections of 109:s were in their immediate vicinity. Furthermore, unbeknownst to the player controlling British fighters, last section of Messerschmitts would show up on their tails at the beginning of second round.

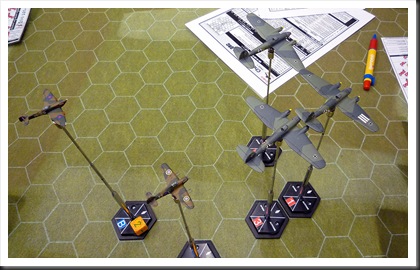
A001 Separated Spitfire section at the start of the game

The game

It could be said that this game had two very distinct phases. First half was spent on maneuvers where every one of us was trying to select their targets and gain an advantageous position. On one side of the table focus lay on Malan's Spitfire section that started at very low altitude. This formation was a very obvious target for Galland's Messersmitts, which started to the right of Spitfires - both sections tuned into each other, Spitfires climbing, 109:s diving. Both sides opened fire simultaneously, missed and then they were past each other. While Malan's planes continued on same course, still climbing, Galland's rote met the other section of Spitfires that started on same side of the table. This time the Brits were the lucky ones - Galland's wingman was hit and damaged and both Messerschmitts were suddenly fighting for survival.

The picture was very different on the other side of the table. Single section of Spitfires, with enemy fighters both in front and behind them, had no choice but to run toward the middle of the table. Initially the only good news for those British planes was the fact that one of German flights was below them and had to climb before it posed a real threat, while the remaining 109:s didn't really have a good shooting resolution and choose not to open fire.

B002 Between the rock and the hard place

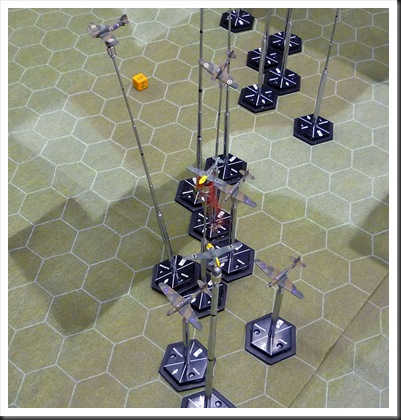
In other words, the game was at first separated in two separate chains of events. Then all airplanes found themselves in the middle of the table and at roughly same altitude. As it turns out, it was a recepy for total chaos - six Spitfires and eight Me109:s were basically on top of each other, every pilot having at least one target in its sights at any given time. For the first time we experienced a true dogfight.

C003
Gathering in the middle

Considering the amount of fire, surprisingly few hits were scored. First victim of the day was one of green Spitfires that turned the wrong way (incorrect plot) and found two Messerschmitts in its path. Short burst of cannon shells demolished the unfortunate Spitifre and it spun down to the ground. Another Spitfire was shot down shortly afterward by a random snapshot from a German fighter. The Brits returned the compliment and hit one of 109:s, setting its engine on fire.

D004 Two vs. one

E005 Engine on fire and long way away from France

With two British fighters shot down, the Germans seemed to gain the upper hand. At this moment, Malan's flight finally found its way to the fight, with immediate and telling effect. A deflection shot from British ace found its target, putting the Messerschmitt into a spin from which it never recovered. Third Spitfire became victim of German fighters at the same time, but two of German fighters also run out of ammunition. Those events changed the picture dramatically - German planes found themselves outnumbered and in a disadvantageous position. Prefering prudence before glorious death for the Fatherland, all German pilots put the superiour diving speed of their planes to use and managed to exit the table without any additional loses.

F006 Time to head for home

Final score of the game - three Spitfires and one Messerschmitt shot down, two Messerschmitts damaged. Another German victory, but this one with much narrower margin than in previous games.

Musings after the game

This game made two things rather apparent. First, a game without bombers is a very different experience - there are no obvious targets and players can take their time, searching advantage of position or simply waiting for a mistake from the opponent. Second, a melee like the one that developed in this game is a very unhealthy proposition for everyone involved. Firing arcs are very generous in CY6 (and we are playing with the optional, narrow arc), so most of the time it is almost impossible to avoid potshots.

From practical point of view, I have to say that it wasn't the most enjoyable CY6 game I had opportunity to play. Chaos that developed made it rather hard to keep track of who was supposed to move when. Additionally, if one is to draw any conclusions from this game, dogfights tend to concentrate all the planes in a very narrow area. This fact creates some purely physical problems, as you can fit only so many bases in a single hex.

At the same time I have to say that 'Duel of Eagles' has a lot of replayability and does seem to be an excellent pick up scenario for multiple players. In our game we had three players on British side and four on the German. Two of them were complete beginners, but managed to be 'self-going' within a couple of rounds.

April 09, 2010

Black day for R.A.F.

One week after the slaughter of German bombers on a forlorn night mission, it was time for us to run ‘Dogfight Over Convoy BOSOM’. This scenario is the first in the Battle of Britain scenario book that actually takes place during that battle. Scenario in question depicts one of many raids aimed at the Channel convoys in the initial phase of the campaign. Although the targets of those attacks were obviously British ships, the real goal of Luftwaffe was to lure slender R.A.F. forces into a battle of attrition.

Initial setup

At first sight, ‘Dogfight Over Convoy BOSOM’ does look like another milk run for the British. Not only do they have superior fighter force, they are also allowed to setup very close to their primary targets, a group of nine Ju-87:s, more famous as Stukas. German side has one rote each of Me-109:s and Me-110:s, although it has to be said that German fighters are severely hamstrung by rather restricting setup rules.

The game

With setup rules allowing the British airplanes to start basically on top of the Stukas, this scenario can be characterized as “short and sweet”… which it was, although not in a way that one would expect.

A001 British fighters bounce the Stukas

British fighters (one vic of Spitfires and Hurricanes) approached the bombers out of the sun, ten o’clock high relative to the German formation. With German escorts far behind the bombers (a calculated risk on the part of the Germans), Brits had opportunity for one freebie pass on the bombers before they had to tangle with the escorts. This was a temptation that guys on the British side couldn’t resist - Spitfires went after the group closer to the British entry point, while Hurricanes selected to make a head on pass against the remaining Stukas a bit further back. The reward for the trouble was surprisingly slim – one Junkers received a solid hit to the engine, while another started to burn after a lucky hit from a .303 bullet.

B002 Hurricanes trying to get behind the bombers

Seeing the Brits splitting up forces, German fighters did the same – Me-109:s side slipped to the right to meet the Hurricanes, Me-110:s dove toward the Spitfires, two of which surprisingly choose to disregard the escorts and turned behind the Stukas. Remaining Spitfire left the formation in an attempt to try his luck with 109:s and was immediately shot down in what can only be described as a nonchalant manner by a single burst from German rote leader’s cannons.

C003 Doomed Spitfire

This unexpected kill was the start of a nightmare for the British side. Leader of Spitfire formation was the next one to pay the ultimate price – after his engine was damaged by accurate fire from Stuka rear-gunners, he was unable to do anything against Zerstörers at his six o’clock.

Last survivor of the Spitfire formation tried to get away, but was unable to shake off the Me-110:s. 20 mm cannon shells found their target in next round and last Spitfire immediately went down in flames.

Demise of the Hurricane formation was equally rapid, but far more memorable. After a completely unsuccessful head-on pass, British fighters choose to repeat the mistake of their comrades flying the Spitfires – they turned to the left with the intention of gaining tail position on the Stukas. The fact that two Me-109:s were rapidly closing on them apparently didn’t bother them… however, the fact that the formation leader managed to turn so tightly that he managed to collide not with one, but two Ju-87:s struck everybody with complete amazement. Miraculously, the first Stuka suffered only scratches on its paint, while the Hurricane suffered minor damage. British pilot wasn’t as lucky in his second ramming attack – his plane blew up. It has however to be noted that his perseverance paid off and he managed to bring his victim down with him.

E005 Amazing performance of the evening

Remaining Hurricanes were bounced by Messerschmitt immediately afterward. Position advantage of German fighters made the dogfight a foregone conclusion and both British fighters were shot down after a short dogfight. One of Me-109:s was damaged in the process, but that was a small price to pay for the complete triumph of Luftwaffe in this fight.

D004 Hurricanes bounced by Messerschmitts

Musings after the battle

The entire game took less time than it took me to write this post – it was all over after only two hours, or six game rounds. This however is unimportant. It is however worth noticing that “Check Your Six” once again proved to be an excellent game ruleset and you will suffer if you ignore Boelke’s Dicta. In this game, both British players choose to ignore the threat of German fighters at their back and suffered the consequences.

Meanwhile in the other room…

F006G007

March 22, 2010

Disaster in the dark

Two weeks ago it was time for another ‘Check Your Six’ scenario from ‘Over The Channel’ scenario book. This time it the turn came to ‘Into the darkness’. Name of the scenario refers to the fact that it is a little different from the rest, as it tries to represent the challenge of night bombing raids in those early years of the war.

Setup

To simulate the difference in night and day missions, a couple of special rules are implemented in this scenario. Visibility is very limited, while German bombers are allowed to fly individually. Additionally any airplane that is can be shot at, needs to perform a check for illumination – if it makes it, it is invisible for the rest of the turn.

The game

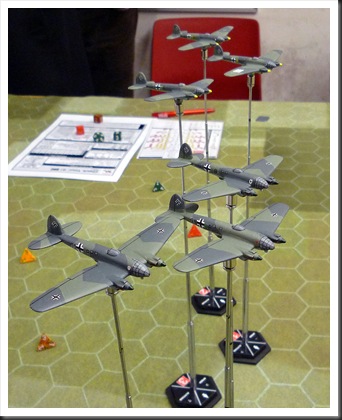
Goals of this scenario are very simple for both sides. The objective of six Heinkels was simple – try to stay alive while traversing the board. For three sections of British assailants – one section each of Spitfires, Hurricanes and Blenheims – the task was to find the bombers and bring down as many as possible. Their task was made difficult not only by very limited visibility conditions and special rules, but also by random entry points in regard of both location and altitude.

As things turned out, start of the game ment some good news and some bad news for the German players. Blenheims came in low and out of position – this was very fortunate for the opposition, since those obsolete light bombers hastily converted into night fighters are real hogs in regard of speed and climb rate. But any optimism on the German side was quickly dispersed by the fact that both Hurricanes and Spitfires entered the table with height advantage and behind the Heinkels. We didn’t know it by then, but this simple fact more or less decided the outcome of game.

P1000495A
Blenheims making a debut in this game

The game itself was straight forward and the events need only few sentences to be described. William and I were in control of the bombers and we decided upon different strategies. My previous experience told me that defensive armament of German bombers can be very effective made me decide to keep my planes in formation. William went for speed and additional maneuverability of bombers flying individually. One of us made the right call, the other was disastrously wrong and payed the price.

P1000501B
The hunted…

I have to add though that I don't think any decisions would change the course of the game – both Hurricanes and Spitfires took full advantage of altitude and speed and came into range within a couple of rounds. Since my three Heinkels were from British point of view was flying slightly behind William’s bombers, they were the natural first target and they took the brunt of British onslaught. As soon as the fighters reached optimal firing position, it was all over but the crying for my doomed Heinkels. A single burst of .303 machine guns was all it took to bring down first victim; other two put up a better fight, but nevertheless went down after being repeatedly by British fighters.

P1000506C
…and the hunters

Distraction of three juicy targets or ‘the heroic sacrifice’, as I prefer to call my dismal performance in this game, did have one positive side-effect – it bought William enough time to dive, dive, dive and put some distance between majority of British fighters and his Heinkels.

P1000510D
Heinkels making it to the other edge of the table

Nevertheless, one Spitfire and one Hurricane did manage to score some hits into his bombers, with limited success of knocking out both dorsal gun positions on one of the bombers (two lucky hits, both resulting in same effect). This didn’t stop William from exiting the game area with three more or less intact Heinkels.

March 13, 2010

Over Albert Canal once again – this time bigger and improved

Year of 2009 seems to be starting for me under the sign of reruns. First a double take on Belmont and last week I had opportunity to yet again play the Albert Canal scenario with Check Your Six ruleset.

Same Game, Different Approach
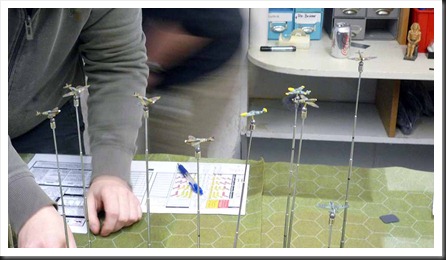
A little background info about the second bombing run on the Albert Canal bridge. Great rulesets attract the attention of many wargamers and Check Your Six is no different – William from Dansk Figurspilsforening in Copenhagen became as delighted in CY6 as I did and decided to run the Battle of Britain campaign for the club. But while our objective was the same, our approaches could not be more different. In simple terms, I choose the ‘cheap and simple’ approach – 1/600 airplanes, simple stands, as small gaming area as possible. William went ‘full monty’ – 1/300 airplanes of best possible quality, telescopic stands with custom magnetic mounts, historically correct decals… Quick comparison of the pictures from our games will show the difference in visual impact.

1A
William’s Messerschmitts 109:s…

2B

…Battles…

3C

…and Hurricanes

Once again, over the bridge
On to the game… In some respects, the scenario played out in surprisingly similar manner as my first attempt. Three rotas of Me109 were spread out all over the edge opposite to entry point of the British, but having the altitude advantage, quickly closed the gap. First blood was drawn by the German veteran pilot, who despite having to take a difficult deflection shot, managed to down one of Hurricane formation leaders with a single burst from his 20mm cannons. This caused some consternation on British side. Loss of one of their valuable Skilled fighter pilots this early in the game would have been bad enough. However, this sudden victory allowed victorious German and his wingman to fly over British bombers and then sweep behind the completely defenseless rear formation of Fairey Battles. The best comparison for what followed would be ‘fox in a hen house’. Two of the Battles went down in quick succession, while the remaining survivor was forced to turn home, trailing thick plume of smoke. The fact that wingmen of the downed Hurricane caught up with the Germans and managed to damage airplane of the wingman was small consolation for the British.

4D

No bombers for me this time around.

Meanwhile, a vicious dogfight developed in area around the remaining Battles. One pair of Me109 dove onto the bombers with the intention of obliterating them in a single head on pass. This maneuver was matched by the three Spitfires, shooting wildly in an attempt to discourage the Germans. This tactic was successful – no hits were scored by the Germans, but one of Messerschmitts suffered airframe damage.

5E

Dogfight around the front formation of Battles

Remaining German formation initially stayed out of the fight, maintaining the height advantage until the last moment. Just as the foremost Battle was about to reach the bridge, leader of German formation performed a very deep Split-S, placing himself in perfect position behind the bomber. Cannon shells ripped the Battle apart just seconds before it could drop its bomb. (Yes, it was one of my planes – and since it’s my blogg, I can brag all I want here :-)

6F

Panoramic view of the action

This violent maneuver had however some unfortunate consequences – in a desperate attempt to follow his leader, wingman of victorious German pilot managed by accident to place himself in front of two Spitfires (same guys that already scored hits on one of Me109:s in the other formation). .303 bullets found their target and yet another German Messerschmitt suffered serious damage.

Next couple of rounds put a smile on the faces of British players – all German fighters were by now out of position and unable to do anything to stop last two surviving Battles from flying over the bridge and putting one of the bombs squarely into the target. One of them was hit immediately afterward by a stray bullet from German fighter and started to burn, but the fire quickly subdued (I must say that I love the shooting mechanics of CY6) and both Battles were able to turn, heading for home.

Final episode of our game occurred when one of the Hurricanes tried to pursue my damaged wingman – undeniably reckless decision, as it made it possible for three German fighters to get on its tail. Brave but foolish British pilot became an easy pray for the Veteran Messerschmitt pilot and my rote leader

7G

Surviving Battles heading for home

The game ended on that somber note. British side suffered horrible losses – three bombers and two fighters were downed, while two more Battles were badly shot up. Germans didn’t come out unscathed out of the contest with three of the Me109:s suffering serious damage. Nevertheless, thanks to a single well-aimed bomb, it was yet again a close British victory with final the final score being 22 to 20.

November 11, 2009

DFF CON 2009

Over two weeks has passed since DFF CON 2009 and it’s about time for me to post couple of words about the show. Let me start with thanking the guys at Dansk Figurspilsforening for an excellent event. Even though I was one of those that arranged a game, my participation was minimal when compared with all the effort that went into all the background work. My participation in Saturday’s games was unfortunately limited to the game I was hosting. I run a slightly modified version of ‘Check Your Six’ scenario called ‘Jolly Good Show’, which I’ve already wrote about in one of my previous posts. The fun thing about this scenario is its replayability – this time around, British players, with help of proper tactics and a huge dose of luck, managed to down four bombers and damage another two for a loss of a single Hurricane. The amazing thing was that they managed to do all that in a single pass through the German formation.

What’s even more important, the scenario was played by a total of six players, five of which never played CY6 before. After three rounds they were ‘self-going’ and, if I am allowed to draw conclusions from the comments, had a really good time.

014Hurricanes passing through
German bomber formation

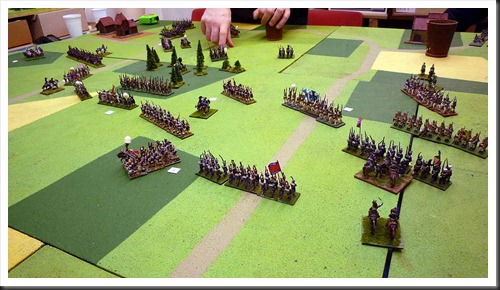
On Sunday it was my turn to have some fun. First of all, I’ve managed to get my first taste of ‘Fields of Glory’… finally. Couple of the guys at the club are very active with the ruleset and put up a simple 600 points demonstration game with Republican Romans and Phyrric Greeks. Things went according to the plan – Phyrrus’ elephants created mayhem on one of my flanks, cavalry danced around on the other, and in the middle Roman legions gave the Greeks a bloody nose… or at least they were in process of, because we had to finish just as things got interesting (some blokes needed the table :-( ).

006 Phyrrus elephants trample Spanish mercenaries

009 Roman legions clash with Greek phalanx

Even though my first game was untimely interrupted, the rules set gave me a very positive impression. It is rather complex and the game itself takes its time, but the game mechanics do look sound and I had fun while playing. This first impression was rather important to me, as I am in the middle of painting a rather large Greek army.

Next on the schedule was a naval action with ‘Fleet Action Imminent’. It was great game - two British battlecruisers exploded and another managed to get shot to pieces… unfortunately, I was on the British side, so I won’t write much more about that event. :-) However, despite bearing witness to a small British disaster, I have to say that ‘FAI’ is growing on me. Simple, quick to learn and yet manages to deliver realistic results – that’s the kind of ruleset that I like to play these days.

All in all, more than 10 hours gaming time over a weekend, it’s been a long time since the last time that happened. Already looking forward to DFF CON 2010.

Couple of snapshots of some of the other DFF CON 2010 games.

001 Start setup for an I Ain’t Been Shot Yet, Mom’ game.

003
Demonstration game of ‘From Valmy To Waterloo’…
WITH THE AUTHOR OF THE RULESET! :-)

010
‘Ambush Alley’ game.

011
Closeup of same game.

012
Colonial skirmish game… I think.

October 15, 2009

DFFCon 2009 at Tøjhusmuseet will take place next weekend

Just a short notice about a historical wargames convention DFFCon 2009, that will take place on 24-25 October. This rather unique event for Scandinavia is arranged by Dansk Figurspilsforening at Tøjhusmuseet (Weapon Museum). Detailed information about the convention can be found here. Yours truly will be arranging a “Check Your Six” participation game on Saturday.

May 17, 2009

Etruscan collection in Glyptoteket

Couple of weeks ago I had a great pleasure of visiting Glyptoteket Art Museum in Copenhagen (thank you, Ewa). For those unfamiliar with what Glyptoteket is, it was created by the son of Danish brewer Carl Jacobsen, who thought that his workers should have access to fine art. Glyptoteket is an art museum, so it may seem strange that I am posting about my visit on this forum. The thing is though that Glyptoteket has a huge Etruscan collection and quite a few objects related to Etruscan military.

So without any further comments, below are some pictures that some of you could find of interest.