Showing posts with label Gripping Beast. Show all posts

July 31, 2016

Trying to turn things around

Well, with first seven months behind us, it is safe to say that 2016 shapes out to be a really slow wargaming year for me! This in itself is a bit of a paradox – after all, I’ve managed to finish the “basic” setup for ‘Charlie don’t surf’ earlier this year. Funnily enough, after just two games, I seem to have run out of steam (or interest) in regard of Vietnam and can’t be bothered to set up another game! Rest easy though, I just need a breather and more fun in the jungle will surely commence in a couple of months or so…

Meanwhile, over last couple of months my focus shifted almost exclusively to my bunch of jolly Dannish imigrants preparing for their first ‘Dux Britaniarum’ tour of British shores. Just to recapitulate – last time I reported about this project, I was done with all of the rabble, eh… common warriors. Next in cue were the chaps arranging the whole trip as well as their closest buddies, aka hearthguard. In other worlds, I had to work my way through a pile of figures in chainmail and with spangenhelms. Some hangarounders with bows and arrows also managed to get some paint on them and voila, second project of the year is completed!

For those interested – this lot is a mix of minis from Footsore Miniatures, Westwind Productions and Gripping Beast. They all mix together rather well, with Footsore Miniatures and Gripping Beast being very similar in size and ‘heft’. Minis from Westwind are a rad chunkier, but once placed on the table with the the rest of their brethren, it’s impossible to see the difference from a meter apart. All minis were fun and easy to work with. I must however give the honorable gold star to sculptor from Footsore Miniatures – his stuff has definitely most ‘character’.

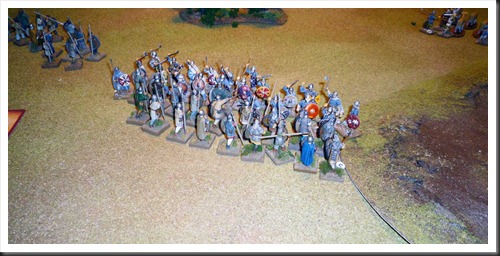
Last couple of pictures are ‘graduation snapshots’ for the whole lot just before their first trip to the ‘other side’. I must confess that I’m quite stoked over whole bunch, but that’s hardly a surprise, is it?

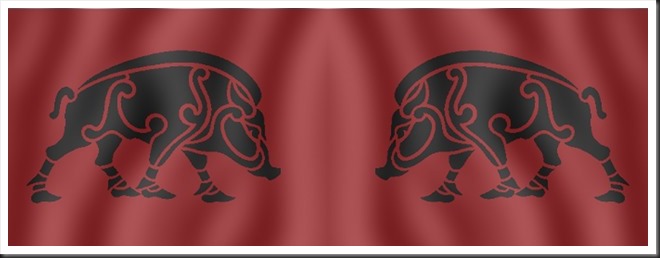
Finally a couple of words about the banner of my raiding party. It’s a simple thing – I found the boar shape on the Interwebs and gave it a quick once-over in Photoshop. Not the quality of Little Big Men Studio, but it will do. If you feel like using it, you can grab it at the bottom of this post.

Saxons_20160731_003

Saxons_20160731_004

Saxons_20160731_006

Saxons_20160731_009

Saxons_20160731_010

Saxons_20160731_012

Saxons_20160731_016

Boar Flag Final

March 16, 2013

Grab that Cow

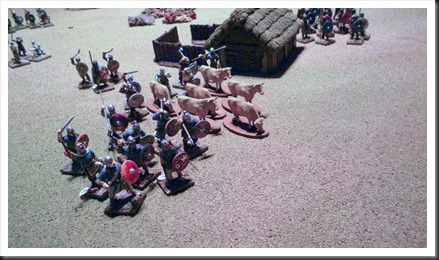
Undiscouraged by the rather bland aftertaste of his initial raid on the British lands, last Sunday H. decided to have another go at Dux Britanniarum. This time around it would be a simple wealth redistribution barbarian style – grab some cows, get them on the boats, have a feast once safely home. Any locals having objections were more than welcome to discuss the issue with the tip of a Saxon spear.

Scenario setup

The scenario begins with Saxons already having acquired meat for their planned barbecue. They are now trying to get to their boat at the opposite end of a table stuffed with more or less randomly placed terrain features. Natives, obviously rather miffed at the Saxons, make their  entry through a section of one of the long sides of the table decided by a roll of a six-sided dice.

The game

In our case, Saxons had a nice ahead start of three rounds before my Brits appeared on the table. Luckily for me, the cows did their patriotic bit, not only insisting on moving at “oh look, a patch of grass, let’s graze for a while”-speed, but also veering off in any direction but straight forward almost every time they had a chance to do that. Perhaps Saxon way of herding the cattle with sharp side of the axe had something to do with it…

01 Initial setupSituation at the start of the game

In any case, when the time for my vanguard to make their appearance finally arrived, the dice decided that it would be at the flank of the Saxon convoy. It looked like it would be a rerun of previous scenario, but this time around H., having deployed a proper flank protection, was ready for any eventuality. Initial clash of shields ensued almost immediately. With the advantage of superior numbers and shieldwall formation, I managed to push Saxons back without much effort, but this was just a foreplay before the main event.

In reaction of the initial setback, H. quickly turned his hearthguard around to support his rather hard-pressed warriors. Over next couple of rounds, we both gathered and formed up our forces. The end result was something of a standoff, with two massive lines of warriors facing each other, while the cows sloooowly made their way to the Saxon feast tables.

02 Before the clash of shieldsGathering forces

Not willing to take on H.’s massed force in front of me, I decided to send my peasants of a furious run around the the Saxon flank, hoping to catch the cows before they reached the edge of the table. My advantage was in the fact that my movement rate was 3 D6 dices per turn, while the cows moved only with 2 D6 dices. There was also a chance of those cows veering of if they rolled same result on both dices. All said and done, there was a good chance my peasants would be able to swamp the Saxons and reclaim those cows before they were spirited away to the Danish shores. In the meantime, my “proper” warriors would keep the attention of Saxon host without actually attacking them.

H. would have none of that, of course. Once he had his troops in order (a relative term when used regarding Saxons), he swiftly jumped on my host with obvious intention of gutting every single one of my followers. A gruesome and protracted clash of shields between two rather evenly matched forces ensued. Casualties were quite even on both sides, but Lady Luck smiled at me also on this occasion and the Saxons finally run away, cracking under the weight of shock.

03 Bashing awayClash of shields

In the meantime, the race between the cattle herd and my peasants was slowly decided in the favour of two-legged creatures. My mob caught up with their target just as they were about to exit the board and I actually did have a chance to try to stop the Saxons. However, I faced two problems. My bunch of peasants were unformed and would certainly suffer serious losses even against the few Saxon warriors who were controlling the cattle. Furthermore, the remains of the main Saxon host were by that time just a stone throw away and H.’s hearthguard would make mincemeat out of my levies. So in the end, I just didn’t dare to attack and let the Saxons get away with their loot.

04 Almost thereThe getaway

Musings after the battle

Aside from the fact that we had a much nicer time than in our first game, there are two things that are worth discussing. The first is the combat mechanism used in Dux Brittaniarum. At first glance it is rather simplistic ‘buckets of dice’ system, but this impression is rather deceiving. Maybe we were just lucky, but in our huge clash of shields, the system provided a truly gruelling and nail-biting experience with proper historical feel to it. Add the faith deck cards to the mix and the result is a close combat system that is fun, “realistic” and somewhat unpredictable.

The second issue that requires further attention is the campaign setting in which scenarios are played. I’m not sure if I’m alone here, but the fact that there are consequences beyond the last dice roll of the game do significantly change the way I play. In this particular game, I consciously held back on two occasions - first, when two evenly matched forces faced each other and then in the final phase of the game, when I decided that the casualties I’d probably suffer weren’t worth the potential gain. If this were a stand-alone game, I wouldn’t even think twice before attacking in either of those situations.

Finally, a quick apology for varying quality of the few pictures I was able to salvage from this game. My regular camera has decided to quit on me and the compact that I used for this game is simply not up to the task.

March 03, 2013

Bits and pieces for my Romano-British army

It’s a bit ironic – just as I’m starting to be convinced that  our Warhamer campaign has reached its premature grave after a single game (probably together with our interest in Warhammer Historical), I’ve also completed painting final figures for my Romano-British army. Since there wasn’t much activity on this blogg during last month, I decided to have a bit of fun with my camera and grab some pictures of those late-comers.

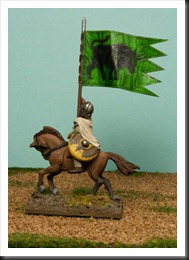
Mounted figures are from the RB01-blister from West Wind Productions, while the priest is from Gripping Beast. The cross that the priest is equipped were made by yours truly. I’ve cut it out of thick cardboard, added the endings made of green stuff and stiffened everything up with couple of layers of undiluted white glue. Once dry (took it about a week or so), the entire contraption was hard enough to be painted and glued into place. In retrospect, it may be over dimensioned, but I’m quite pleased with the end result nonetheless.

The walking stick is just a roll of green stuff.

RomanoBritishBitsAndPieces001_030213RomanoBritishBitsAndPieces002_030213RomanoBritishBitsAndPieces003_030213RomanoBritishBitsAndPieces004_030213RomanoBritishBitsAndPieces005_030213RomanoBritishBitsAndPieces006_030213

October 28, 2012

Dux Britanniarum - ruleset overview and first impressions

When I read first announcement about Too Fat Lardies' Dux Britanniarum' ruleset, my wargaming heart skipped a beat. A ruleset about Saxon invasion of British Isles? For once I had all the figures I would need before getting the rules! With that thought in mind, I've got a bundle consisting of hardcopy and a card deck as soon as it became available. A PDF version was sent to me as an extra only hours after I sent Mr. Clarke the payment; that's what I call customer care!

The ruleset

Dux Britanniarum is a low level skirmish ruleset with deceptively simple game mechanics. A "standard size" game can be played with about 50 figures per side. Units consist (at least initially) of six figures each and come in three classes- levies, common warriors and the elite hearthguard warriors. Additionally the players will need at least four figures for their leaders and a champion warrior. Throw in a handful of skirmishers with bows or slings rounds into the mix and you have all the figures necessary for most games and indeed also for the launch of a full-fledged campaign.
The game itself is controlled in usual TFL-manner, with help of cards activating individual leaders. Once a leader is activated, he can use his activation points to manage units within his command range. This basically means that he can order them to move, form up in formations consisting of two or more six-man groups, fight or to rally those units that about to crack.

Movement is handled with another TFL-patented mechanism - up to 3D6 are rolled to decide the distance units will move in a specific turn; movement can be reduced by individual pips or whole dices depending on terrain, formation and morale state of the unit.

Formations are handled in rudimentary fashion - individual units can be brought together into larger bands which require single activation point to act and thus become more manageable. There are two types of formations - massed formation and a shieldwall. Both have different advantages, but they also have adverse effect on movement speeds and maneuverability of units in formation.

Combat is handled with 'buckets of dices' vaguely reminding of the Warhammer Ancients mechanism. Combatants roll a bunch of D6 decided by number of figures participating in combat, attached leaders, differences in troop quality and terrain. High results are considered to be a hit that can be 'deflected' by a subsequent defense roll. Hits that "get through" come in two varieties - direct kills and Shock points. The effect of the first is self-explanatory, accumulation of the later mean all sorts of bad things for effectiveness of afflicted unit.

There is of course a bunch of 'chrome rules' that add complexity and period flavor, but it is clear even after the first read-through of the ruleset that the designer of Dux Britanniarum wanted the combat mechanics to be simple and utilitarian. If they were all that there was to Dux Britanniarum, one could easily draw the conclusion that it was a ruleset of vanilla variety.

There are however two mechanisms in this ruleset that make it into anything but vanilla. Fate Cards are the first of them. Before the battle begins each player gets a hand with five of those cards and they can be used during the game to affect the gameplay in a variety of ways. While there is nothing unique with this 'event deck', it works especially well in this setting. The cards also add a factor of chance and uncertainty that goes a long way to alleviate the simplicity of the core rules and potentially make even a smallest skirmish into a nail biting affair. (Just to clarify, players' hand is continuously replenished, so the players usually have about five cards in their hand throughout the game.)

The second element that turns 'Dux Britanniarum' into something different and unique is its campaign meta-game. I must say that even before I played my first game, I've got the impression that the campaign is the main component of this ruleset and that the individual battles serve primarily to drive it forward. When 'Dux Britanniarum' is played as a campaign (and I think already that it's the only way in which this ruleset should be used), a completely new dimension is added into the mix. Not only does this aspect of the game bind otherwise slightly meaningless 'one-off' battles into a coherent and exciting story, but it also puts the players into a position of fledgling chieftains trying to make a name for themselves with help of theirs sword and wits. Let's be honest, who among us can resist such challenge?

Our first game

For our first attempt H. and I decided to keep things rather relaxed and give ourselves a chance to familiarize ourselves with different aspects of the portion of the game that deals with battles. Thus, we used the scenario generator to setup a generic battle with a simple goal of slaying as many of opponent's warriors as possible before we run out of time.
Having placed 'default armies at start of the campaign' on the table, we proceeded with pre-battle phase, which was the only campaign mechanism we choose to use that evening. This part of the game is supposed to reflect what we assume took place before real encounters of this type. The basic idea is to perform one or more of several possible actions, such as a speech to the troops or offerings to the gods, with purpose of improving the morale of one's army. Even though those actions in most cases require a simple dice roll and a result check in a table, I'm quite convinced that this part of the game is guaranteed to generate many boasts if things work out and snarky remarks if player's efforts are less than favorable for his cause.
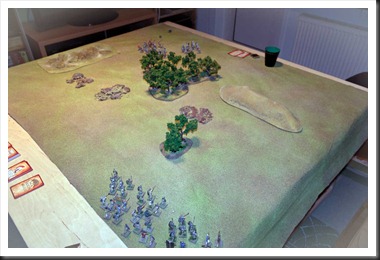
Dux_A20121028Britons hasting to meet the Saxon warband

In our case, H. decided that it would be a good idea to start the event of the day with single combat of our champions. Since my champion won it handedly, H. switfly proceeded with drowning the disappointment of his warriors by the barrels of beer brought for after-the-battle feast. His gesture was received with remarkable enthusiasm. Toast of his followers were so loud that barely anyone noticed the fact that he also took the opportunity to make a little speech. I on my part decided to put the time to good use and attempted to cheer up my men by telling them that if they find themselves in grassy green fields, then they're already dead and are in Elysian Fields. You know, It worked for Crowe! 

In my case, pointing out the chance of meeting grim end in next couple of minutes only resulted in everybody becoming a little gloomy. Or perhaps the reason for the sudden drop in morale of my troops was caused by the fact that we now saw the horde of Saxons running toward us. Apparently they run out of beer.
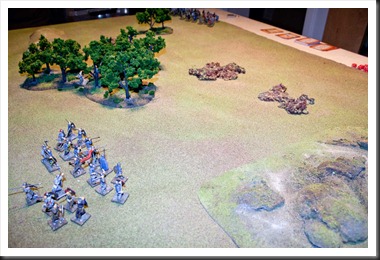
Dux_A20121028_1Saxons on the move

First couple of rounds took a bit of effort to complete, as is usually the case with new rulesets. However, once we got hang of the basics, the pace picked up considerably. H. split his force in two groups, apparently trying to fix me with one of them and flank me with the other. I followed his suit and divided my force into two equally sized formations. First contact took place when a group of Saxons led by one of H.-s sub-chiefs rushed forward way in front of their companions and clashed with my chieftain and his hearthguard.
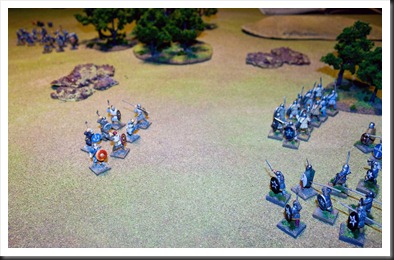
Dux_A20121028_2First encounter

It was a short encounter and disastrous for the Saxons, who were swiftly slaughtered without mercy almost to the last man. Their wounded leader was, in true Hollywood style, the sole survivor of this debacle. Somehow, he managed to scurry back to his chieftain to tell the tale and demand vengeance for the death of his men. My Britons, who suffered no casualties in this initial encounter, calmly set up a shieldwall and waited for next onslaught.  Their confidence in their skill was greatly bolstered. Supporting shieldwall, consisting of warriors, was to their right rear, but based on demonstration of prowess just displayed by my hearthguard, I didn't think that it would be necessary to bring it up.
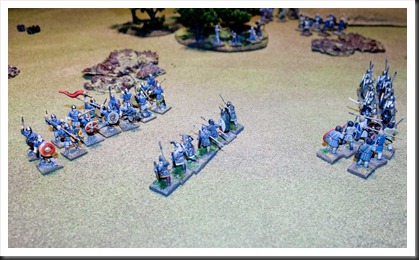
Dux_A20121028_3Saxon heart guard preparing to charge the shieldwall

In next turn, H. showed me the foolishness of my assumption. Responding to the call of his sub-commander, he pushed his hearthguard warriors forward and smashed into shieldwall of my men. One of my men went down in the initial clash, then two more were struck down. All of the sudden, it was the Saxon elite warriors that displayed why their lord choose them as body guards. Next thing I knew, they decided that enough was enough, broke rank and started running away.
The collapse of my hearthguard put me in rather precarious situation with enemy warbands on both flanks of my warriors huddling behind their shieldwall. but luckily my remaining troops were saved by the bell - we run out of time and called it a day.

Musings after the game

For now, I'd like to refrain from drawing any deep conclusions about 'Dux Britanniarum'. All I can say is that combat mechanics are simple and most of the time are clearly explained in the ruleset. H. and I did become confused about a couple of things, but any questions we had were clarified by the author of the rules on TFL Yahoo forum on the very next day.

The impressions of our first game were something of a mixed bag. H. and I were especially amused by originality of the pre-game phase. It may strike one as a gimmick, but there is however some depth hidden in that feature - a player needs to carefully judge whether he wants to max out the staying power of his troops, as this will mean protracted battle and higher losses, which will then have to be replaced in campaign setting.
H. was less impressed by the rules governing the battle itself, mainly because he found the a bit unclear and perhaps a bit too 'quick'. It has however to be said that he is yet to read the rules and I think that once he does, he will agree with my opinion that when set into the context of the campaign, they are more than sufficient for what they're supposed to do. Also, I don't think we can fully appreciate the full potential of the Fate Deck yet and will be able to 'see the whole picture' much better once we get a couple of battles under our belts.

We're already making plans for our campaign, so stay tuned...

April 17, 2012

Return of Derfel's Wolftails

As already mentioned (on several occasions), my main inspiration for starting Romano-British WAB army was "Winter King" trilogy by Bernard Cornwell. It would therefore be rather strange if I didn't have Derfel's Wolftails among my units. However, the heroic status of Derfel's warriors in the book didn't matter much on wargaming table - H. demonstrated that fact to me in rather painful manner by wiping them out to the last man in their first and so far their last battle.

I could of course have blamed the disaster that befell Derfel's warriors on the fact that they were brand new. After all, it is widely known fact that newly painted units always get their butt kicked. But the real reason for their untimely demise was rather more prosaic - a unit of twelve figures has no staying power in WAB. Naturally, the solution to the problem was to paint more miniatures. Well, it took me a while, but after finding some time during last weekend I was finally done with my "recruiting" efforts. Now, the new and improved Derfel's Wolftails can finally be presented to the public. I must admit that I am rather pleased with the end result. I still suck at painting realistically looking spears and as it turns out it is physically impossible for me to draw a decent looking five-pointed star. But the fact remains that this could very well be my best painting work so far.

Wolfpack1

Wolfpack2

May 14, 2011

Not Dead Yet…

When I look at the date of my latest entry in the blog, I can't help but wonder about how fast time passes these days. Also, I wonder about how often the phrase 'Not dead yet!' has been used on half-abandoned blogs, followed by explanations and excuses. In this case, my long silence was caused by several different factors,but first and foremost - I moved to a new place. The bad thing here is that fixing the new place is taking ten times longer than I expected. The good thing is that I finally have both a nice painting area and plenty of space for a decent gaming table.

Returning to the age of Arthur
This blog is supposed to be about miniature wargaming, so enough about my new flat and let's move over to last Sunday’s event. On that day H. came over with his Saxons and we gave Warhammer Ancient Battles another go. It was our third game, so we were finally starting to get a grip of the ruleset. Nevertheless, I was a bit anxious, because our previous games ended in a rather inglorious whooping of yours truly. Now, I don't mind having my behind being handed over to me every once in a while. In case of H.'s Saxons however, the single reason for my defeats was the monstrous special character of his king, who so far managed to vaporize anybody who dared to stand in his way. Romano-British army list doesn't really offer any direct antidote to that monster, something that I admittedly started to find tad unfair and frustrating.

Same, same, but different
Since we are both still fumbling our way through WAB ruleset, we decided to run yet another set piecebattle with few pieces of terrain for sake of variety.

Our deployments were rather unimaginative. I placed a huge swarm of skirmishers in the rough ground to my right, while the rest of my infantry - two units of milites and one of peasant rabble were placed in the centre. My mounted mounted milites in skirmish order were placed on my right flank, while mounted commanipulares were held in reserve.
H.'s dispositions were pretty much a mirror of mine - his skirmishers, although heavily outnumbered by mine, intended apparently to meet mine in a straightout shootout contest. Three units of Saxon warriors were placed to the left of the skirmisher, while his cavalry concentrated on the Saxon left flank.

H's intention was apparently to repeat the events from our second game - smash with his cavalry through my rightmost milites unit and then take care of my cavalry. With that suspicion in my mind, I choose a purely defensive strategy - infantry would take the charge and hopefully hold. In the meantime, my light troops would try to annoy the crap out of the Saxons with missile fire.


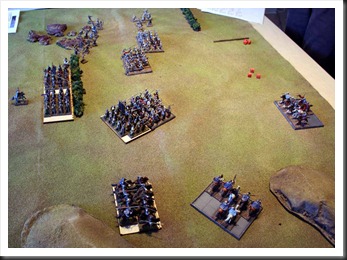
001_Initial_Dispositions001 Birds view before battle

002_Romanl_Dispositions002 Romano-British deployment

003_Saxon_Dispositions003 Initial deployment of Saxons

When events actually follow the plan
The battle that followed can be described in very few words. H moved his entire army forward, while I awaited the onslaught. My foot skirmishers on right flank exchange missile fire with H's archers and mass of Saxon infantry. The results were inconclusive, the only source of real excitement being caused by an uncontrolled charge of some of his infantry, which my skirmishers avoided by a hair's breath.

Main action was once again initiated by H:s cavalry. His light cavalry unit charged bravely into my rightmost milites as soon as it was in range... and was promptly sent back with a bloody nose. I must admit it caused me no small pleasure, because similar charges in our two previous games started disastrous chains of events that led to catastrophic defeats of poor Romans. Not this time though; it's nice to know that WAB is capable to handle cavalry charges into formed infantry in proper manner. It’s even nicer to know that my army doesn’t always trip over its own legs at slightest push.

004_Failed_Saxon_Charge004 First Saxon charge bounces against Roman shieldwall

His initial setback failed however to disturb Saxon king's retinue, who in following round managed to completely mangle mounted milites on my left flank. Poor buggers came a tad too close to Saxons in open formation and were caught while trying to evade the predictable chagre that followed. This success placed Saxons in perfect position for a clash of arms with my mounted commanipulares, a contest which on both previous occasions proved to be catastrophic for my general’s retinue.

Sure enough, the Saxon king charged and to everybody’s suprise failed to make any impression whatsoever on my cavalry. The fact that I cunningly equiped them with heavy armour for this battle did help. To be fair though, H:s hopeless luck with dices helped even more. My retinue also managed to cause enough Saxon casualties to make them flee. This rout would have once again been been a decisive one, but for the fact that in this battle Saxons were as skilled at running away as they were in close combat on previous occasions.

006_Decisive_Moment006 Decisive moment

007_Halfhearted_Clash_of_Shields007 Inconclusive infantry engagement in the center

008_End_of_Battle008 Situation at the end of the game

By that time we were both satisfied with the outcome and decided to call it a day. It turned out to be yet another Saxon victory, although this time it was a mariginal one. Personally, I was mostly relieved that my Romano-British army didn't (once again) crumble like a paper mug. H. was probably a tad relieved over and certainly very entertained by happy escape of his king's retinue. Overall, a pretty decent Sunday afternoon.

June 19, 2010

Saxons Are Coming!

It was at the end of last year's autumn that first rumors about yet another huge Saxon host causing all sorts of mayhem and destruction reached the court of our lord, Severius Borus. News like that have become more and more common over last couple of years - ever since the Saxon revolt that took place almost a decade ago, everybody in our domain was worried about growing numbers of the invaders. We knew that sooner or later we would have to fight those barbarians. As more news about burned villages and overrun strongholds reached us from the east, or Lord decided that this time has now come upon us. It was better not to wait for same fate to befall on our domain, but rather to meet the Saxons on a field of battle and smash them before they could cause us great harm.

During the winter, messengers with a call to arms were sent to all corners of our lands. Trusted men were sent to our neighbors, urging them to join us and oppose the Saxons. As winter slowly turned into spring, our lord had huge force at his command. Foremost among all troops were commanipulares of our lord - experienced warriors with many battle scars proving their veteran status. All of them were equipped with best armor and weapons, their horses the best in the realm. Enough men gathered to the call of our lord to form two companies of milites. While not of the same status as commanipulares, they were good soldiers, some of them serving as youths in Roman legions, before those disapeared from Britannia for good. Last but not least, a huge mass of peasants, some with spear and shield, some with bows and arrows or simple slings, obeyed the orders of Borus. Our lord, in his wisdom, trained those who had proper equipment to stand and fight in a shield wall formation. The rest was instructed to act as scouts and cause whatever harm they could to the Saxon foe.

Finally the day of departure came and our splendid army moved out to meet the Saxon threat. News about their destructive deeds reached us with alarming regularity during the winter. Those who survived their encounter with the barbarians told us about a host as numerous in horsemen as it was in warriors on foot. They were lead by a man who was called 'Bear' - apparently a horrifying, huge man who possessed almost unnatural strength and who could drive a spear through three men with a single thrust. We all discarded those stories as something to scare children with, but our lord valued the information about the location of the Saxon host.

Apparently, the Saxons had their spies in our midst, for the news that reached us told us they were moving rapidly in our direction, leaving a track of destruction in their wake. It took us less than six days of march to find the Saxons, or maybe for them to find us.

On the day of the battle our footmen were formed in three battles consisting of milites and pedes. Foot commanipulares acted as a reserve to the rear. Peasant skirmishers were sent to our right flank, where rough going would protect them against Saxon hordes. After making sure that our battle line was formed to his satisfaction, our lord took personal command of mounted commanipulares and rode round the right flank, with intention of smashing Saxon hordes once they were softened by our footmen.

WAB_1 Saxon army

WAB_2 One of Saxon cavalry units

WAB_3 Roman battle line

It was a sound plan, yet somehow everything went horribly wrong. As our heavy cavalry maneuvered to hit the flank of barbarians, it was swiftly met by the best cavalry of the Saxons. While far from being as splendid as our warriors, it was numerous and acted confident, even as it met our best warriors head to head. Bear was leading them and all who could see the clash of horsemen quickly understood that the tales about that man were all true. Using his huge sword almost as a club, he stroke down everyone who dared stand in his path. His men rode into the holes he ripped in our formation and just like that, our warriors panicked and turned around. With Saxon horsemen slashing at their backs, few managed to keep their lives. Fortunately, our lord was one of those who managed to retreat to safety.

WAB_4 Clash of cavalry…

WAB_5 …and the aftermatch

Meanwhile more Saxon cavalry appeared at our other flank, forcing one of our battles to turn to the left and face that threat. Even as our milites scrambled to form a new shieldwall, Saxon infantry smashed into the middle of our battle line. I was there and witnessed as Saxons charged our men and barely made contact before our troops, terrified by the savage onslaught broke ranks and run away. Panic spread like plague and the rest of our men followed the cowards who started the flight!

WAB_6 Initial contact between infantry

The only men who stood their ground were the foot commanipulares. Those valiant med didn't hesitate for a moment and rushed forward in an attempt to stem the Saxon flood. They managed to stop the Saxons for a couple of valuable moments, thereby buying valuable time for our troops to recover from the initial shock. The price was however heartbreaking - commanipulares died to a man, some being slain where they stood, the rest was simply swept away by the Saxon horde.

WAB_7 Last stand of foot commanipulares

By that time it was apparent that our lot lost their heart and could not stand up to the Saxons. Our lord gave signal for a retreat and from then on it was 'every man for himself'. Saxons pursued us half-heartedly, scattering our once mighty host into all directions.

WAB_8Bear victorious

Twelve days have now passed since the great disaster and remains of our army have gathered at the stronghold of our lord. There are few of us, but we will stand our ground and defend our land to the last. Pray for us, for Saxons are coming...

November 15, 2009

Overeager, overambitious and underprepared

So… more than a year after the decision to start our ‘Age of Arthur’-project, H. and I decided it was time to run our first trial game. The fact that H. had only three finished units against five of mine didn’t bother us – we wanted to get those miniatures out, give them a workout, roll some dices and have a few laughs.

Perhaps a little more serious problem was the fact that last time I had the opportunity to read the rules was… oh, a year ago or something like that. As for the army lists and pre-game preparation – since number of units was so uneven, neither of us bothered with those small details. That’s what the supplements are for!

It will come hardly as a suprise to most of you that our first game was something of a fiasco. Most of the time was spent on trying to find relevant rules, checking stats and similar ‘fun’ activities. By the time we had to start packing up (game took place at local game shop, after opening hours), we did manage to kill one skirmisher and have a successful Saxon cavalry charge, which ended in a draw. This “high watermark” was rather suitable finale of the game.

It has to be said, despite equal fumbling on both sides, we still somehow managed to have a blast. At the same time I think it will be best if we try to avoid games like that and for that reason I have this checklist to complete before next meeting.

  • Read the rulebook
  • Put together an army list
  • Prepare movement trays
  • Ensure that both players have their own set of rulesets for the game

On a side note, even the pictures from the game didn’t work out all that great (starting to be annoyed by my point and shoot, it’s time to get a simple DSL kit). Not that it’s stopping me from posting some pictures anyway. :-)

P1000387
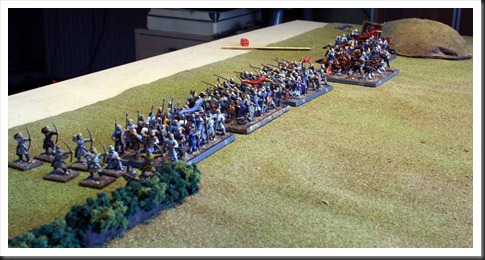
Saxons on the far edge, Romano-British on the near edge

P1000388 Saxon army – two units of foot Duguth,
Duguth on ponies and some skirmishers

P1000389 Anglo-British – two units of milites, one of pedes, mounted commitates
and small ‘special unit’ of foot comitates (Dervel’s Wolftails)

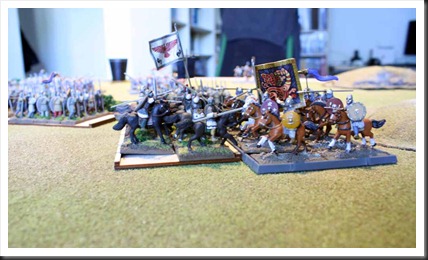
P1000392 Milites brace for impact of Saxon cavalry

P1000393 Commitates try a sneaky flank manover that led to nowhere

P1000397 Saxons smash into milites and get stuck

May 03, 2009

A peasant shieldwall

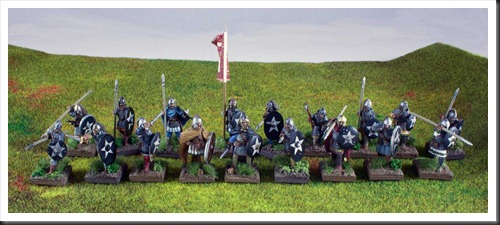
There really isn’t much space for variation in WAB list for Romano-Bristish. Basic unit is either formed from plain milites or even plainer pedes. Still, pedes are good, sturdy peasants that hopefully will stand long enough in their shieldwall for the more flashy commanipulares to hack their way through whoever is on the opposite side. Also, they are cheap and that’s never a bad thing.

For my pedes I stuck with the miniatures from Gripping Beast. Unit in pictures below consists of a unit pack that is being sold at slightly reduced price. To be honest, I’m pretty sure, I will stuck with Gripping Beast for most of this project – I like the sculpts and the range covers all my needs.

The look I was going for was that of poor peasants, so no flashy garments or elaborate shield designs. Plain, drab colors and mostly handpainted shields, although I did try to get some more variation with shield decals from Little Big Men Studio. Unfortunately, all of the decals that I've got from them, were to small by at least 5 milimeters for the huge shields these minis are equiped with.


March 19, 2009

Britannia is still a part of the empire.

After a brief interlude over the French skies, let's now return to my WAB project. Or rather, let's go back to the start of it. As I mentioned before, a buddy of mine and I - under the inspiration of Cornwell's 'Warlord' trilogy - decided to start collecting armies from 'Age of Arthur'. My friend choose the Saxons, while I (once again succumbing to my strange love to anything called 'imperial'), choose to defend the civilization and set my heart on a Romano-British army.

As a starting point for my army I selected a milites unit from Gripping Beast's extensive selection of miniatures from this period. I must say that I am very happy with my choice - figures are very nicely sculpted, don't require a lot of cleaning up and are a joy to paint.

I had some difficulty in deciding about how I would paint my milites. In the end I've reasoned that it would be highly improbable that any regular units would be available on the Isles during that period and painted each figure differently. I tried however to give the unit a 'Byzantine' look. Also, I've limited my mix of shield transfers to just a couple of schemes. All in all I am quite pleased with my first foray into 28mm 'scale'.