Showing posts with label After Action Report. Show all posts

May 27, 2018

Chaplin’s Heights Redux–solo edition

So last Saturday, after the guys left for home, I took the stock of things. I could pack everything in and continue to feel seriously disappointed about the entire affair… or I could give it another try, this time all on my own. The choice wasn’t that hard.

Some decisions to make

My approach in a solo games is always to act more as an observer than a player – decide upon initial plan for both sides and then just ‘sit back’ and see how things will develop. With this mindset, I came to following conclusions:

  • As Confederate commander, I needed to show some patience. Before the real ‘push’, I would let Steward’s brigade get out of the woods. Hopefully, by that time, Field’s brigade (which failed to appear on the field in initial game) would show up on my right flank and put additional pressure on Union line.

    I also made a different judgement of situation on my left flank. Jones’ brigade, consisting of only two regiments and some skirmishers, was a pretty weak force. It seemed overly risky to charge against Harris, it seemed much more sensible to let the Confederates on my right to remain where they were, at least to begin with.

  • From Union perspective, things were what they were. The blue-clad boys were on defensive pretty much everywhere but on their right flank. So the question was – should Harris’ brigade immediately attack rebels on Hill 5 or should they wait? Since both options made equal sense, I let chance decide. A D6 was rolled and Harris’ brigade was issued orders to assault Hill 5.

The game

2018_Blog_112

Maney’s and Donelson’s brigades advance toward Union positions. Their job is to engage and pin the enemy in place.

2018_Blog_113

At the same time, Harris gathers together his somewhat spread out regiments and forms up in line for the assault against Hill 5. Jones observes the movemen to his front and sends forward his skirmishers of 34th Mississipi.

2018_Blog_116

Starkwater reacts to Confederate advance and establishes his line along the stone wall and the road. Rebels will have to work for it now.

2018_Blog_117

33rd Mississipi gets into contact with Union troops and is promptly sent packing with a well-aimed volley from 38th Indiana.

2018_Blog_121

Field’s brigade appears on the field without any delay on turn 3 of the game.  Union position on Hill 2 is now in serious peril.

At same time, rebels in Steward’s brigade appear out of the woods and halt at the stonewall, as ordered. The brigade is now ready to proceed with their advance toward enemy.

2018_Blog_123

33rd Mississipi gets their act together and starts to seriously molest Harris’ right flank with accurate sniping. 38th Indiana is hit especially hard! Still, the Union advance toward rebel line continues steadily.

2018_Blog_126

Union skirmishers on Hil 7 and Starwater’s regiments along the stone wall are doing pretty good job and casualties in Donelson’s regiments start to pile up at alarming rate.

2018_Blog_127

Harris’ brigade ready to assault rebels on Hill 5. If only those skirmishers stopped hitting everything they aimed at!

2018_Blog_132

Field’s brigade charges Hill 2. Union artillery beats hasty retreat as 1st Tennessee flanks their position.  Meanwhile, green 105th Ohio rattles 3rd Tennessee with a well-aimed volley and stops them cold.

 2018_Blog_135

Steward’s brigade gets over the stone wall and into the open field. 4th/5th Tennessee is immediately hammered with accurate artillery fire from battery deployed to the rear of Union line, on Hill 1. The ‘double-six’ throws their assault column into confusion and stops further advance. Steward himself is hit by a shrapnel… which is stopped by the Bible in his chest pocket!

Same ‘double-six’ gives Union CinC ‘Aim low’ chit, allowing him at any time an option to add +2 modifier to a fire or melee roll of a unit up to 15cm from him.

2018_Blog_137

On Union left, 105th Ohio cooly retreats to the crest of Hill 2. Intensive action along entire line.

2018_Blog_139

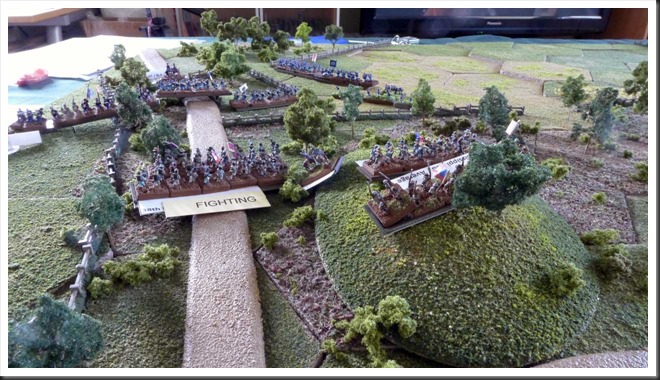
Harris’ gives orders to charge Hill 5 and things go to hell in a handbasket! Skirmishers from 33rd Mississipi take their final revenge against 38th Indiana for that painfull volley couple of rounds ago. They roll a ‘double-six’ at critical moment - Harris is wounded and put out of action for the rest of the round, while 38th Indiana’s casualties reach above 50 percent. Obliged to test their morale, they fail badly and disperse!  10th Wisconsin is blasted by rebel artillery and retreats in confusion. 2nd Ohio does manage to throw their opponents from the hill but it’s too little and too late, as entire brigade breaks and falls back toward their own lines.

2018_Blog_141

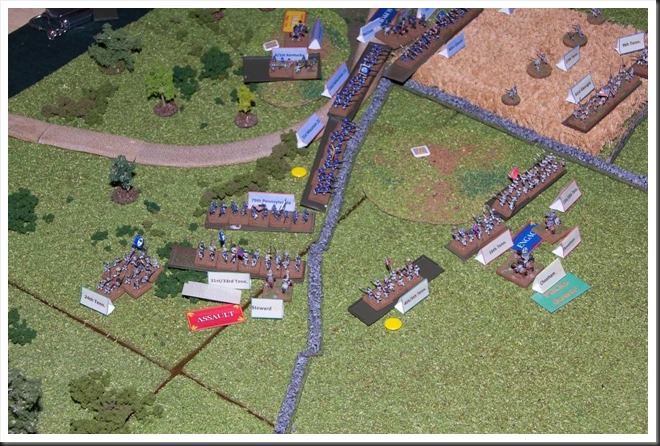
Round later it’s time for Confederates to charge the enemy. Union CinC (McCook) has his heroic moment as he rides forward and holds the fire of 24th Illinois until very last moment (remember that ‘Aim low’ chit?). 31st/33rd Tennessee suffers grevious losses, but led personally by Steward, still reaches the stonewall. Perhaps infuriated by that well-aimed volley, they show no mercy in subsequent melee and rout their opponents. A hole is punched in Union line!

2018_Blog_149

2018_Blog_153

Aftermath of two charges, at the end of round 6. Harris’ brigade falls back in disarray. 24th Illiois simply runs away. Union right flank is wide open, at least for the moment.

2018_Blog_157

With pressure mounting on both flanks, Union center slowly gives ground. Last ditch defence will be mounted along the road and the stone wall. Confederates in Donelson’s brigade, having already suffered surprisingly heavy losses, aren’t too keen to follow up and stay put.

2018_Blog_160

Harris tries to re-establish control over his brigade…

2018_Blog_166

…and McCook tries to do the same with battered brigades still in reach of his command. Artillery batteries on the left should be able to stop any further rebel advance. 79th Pensylvania pulls back in an attempt to form a defensive line on the right.

2018_Blog_168

Steward’s brigade tries to sort itself out after the charge, but 3rd/4th Tennessee is yet again raked by acurate artillery fire from Hill 1 and breaks. Remaining two regiments reform (24th Tennessee still in attack column!) and prepare to continue their advance along the stone wall.

2018_Blog_172

Round 8 – 105th Ohio continues with its obstinate retreat and seems to be living a charmed life. Their casualties mount slowly and their position makes them focus of rebel attention, but they refuse to fold! Field’s Tennesseans try to charge them yet again and yet again are stopped by combined fire of Ohioans and Union artillery deployed along the stone wall.

2018_Blog_173

Steward’s regiments in the woods are ready to continue their assault and 3rd/4th Tennessee returns into fray.

2018_Blog_181

Round 10 and final collapse of Union position finally takes place. Steward’s entire brigade rushes 79th Pensylvania from three sides at once. It’s too much, the Union regiments crumbles and runs away. McCook’s right flank is shattered.
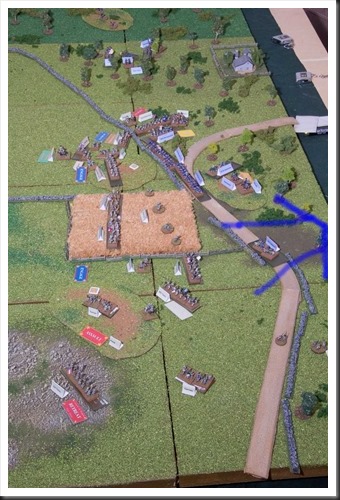
2018_Blog_183At the same time, 105th Ohio finally has enough. Just as they reach the road, they’re hit with accurate fire from rebel skirmishers and artillery. Reduced to below half strength, they fail their mandatory morale check and disperse. Their collapse panics the rest of their brigade and it retreats in disorder. Union left is no more.

2018_Blog_184

2018_Blog_185

Round 11 and it’s all over but the crying! Steward’s rebels slam into flank of 21st Wisconsin by sheer impetus of the charge that begun in previous round. Inexperienced Union unit (raised only month before and hardly even trained) breaks instantly and, unable to run away, simply surrenders.

Musings after the battle

Phew… in simple terms, what cracker of a battle!

Guys, by now I’ve been having American Civil War as special interest for over two decades and have been playing it for almost as long. During that time I have never experienced a game events of which corresponded so closely to the narratives of Shelby, Sears or Cozzens! And the ‘cinematic’ heroics which I imagined in my head as I rolled the dice and moved tin soldiers around… 105th Ohio’s stubborn refusal to break agains overwhealming odds, that disastrous salvo Tennesseans took as soon as they went over the wall, McCook being at exactly right place as the rebels rushed against his line, rebel sniper hitting Harris at worst possible moment… I honestly can’t recall when, or maybe even if ever, I had such great fun with a wargame as I did with this one!

This game did take 12 hours to complete, spread over course of four days. Let me assure you, it was a time well-spent! It was also a great learning experience. Playing slowly and without stress, I was able to check and double-check rules for all those quirky events that always take place in a wargame. This allowed me to really understand how this ruleset works, how different parts are linked together. As it turns out, “Guns at Gettysburg” is a damn clever little ruleset!

Allright, that’s the last post about Chaplin Hills scenario, I promise!
May 19, 2018

Chaplin Hills scenario–lull before the battle

Two days ago I was so proud of myself – ready with everything, all I needed to do was to deploy the troops on the table on the day of the battle. How hard could it be, right?

Well… Murphy was listening to my thoughts and decided to laugh in my face until morning of the battle. That would some two hours ago.

As soon as I deployed Confederate battery on their right flank, I realized that something was off with terrain setup. The battery was totally out of range, or more precisely, the hill it was deployed on was some 20cm too far back in relation with remaining terrain features. It was actually easy to explain and I had a feeling this would be an issue; my tiles are 30 x 30 cm, but the terrain map in this particular scenario is somewhat wierdly compressed in ‘depth’. Alright, time emergency adjustment – make necessary adjustments by moving some stuff forward. Problem – my tiles are still 30 x 30 cm, I needed to move stuff forward only 20 cm. Solution – demark Confederate map border with piece of red thread. Sometimes you really need to keep it simple. Smile

Next issue appeared while deploying Union troops. As it turns out, I misread orders of battles and 4th Kentucky mixed battery turned into an infantry regiment! Problem – somewhat to my surprise, I didn’t have enough Union artillery bases for deployment of yet another 3 gun battery. Solution – scavenge couple of guns from other batteries, H. and L. will have to keep number of pieces in each battery in their heads!

Note to self – paint more Union artillery!

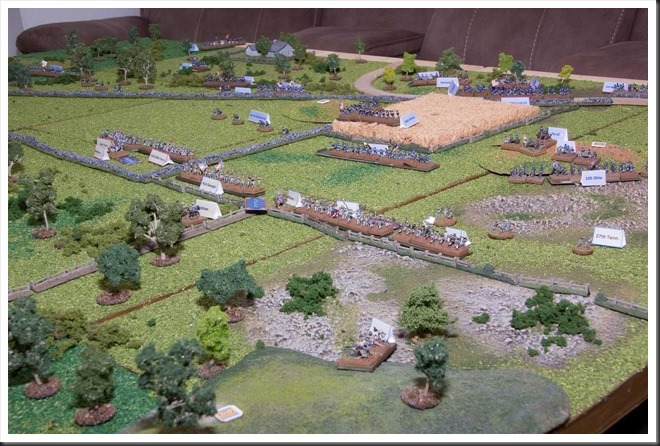
And so, here we are, now ready for battle for real! In case you wonder why only the Union army gets some close up attention in the pictures, the explanation is simple – see where the soffa is located. Smile with tongue out

2018_Blog_0872018_Blog_0882018_Blog_0892018_Blog_0922018_Blog_094

May 21, 2017

First impressions of “Chain of Command”

For the wargamers who just arrived from outer space, let’s start with a short introduction to “Chain of Command”. It’s one of the “newest” rulesets from Too Fat Lardies and it’s a WWII skirmish ruleset. One miniature represents one man and one vehicle or artillery piece model represents a corresponding single real world piece of equipment. The ruleset focuses on combat between forces of platoon size with some reinforcements. While it allows the player to directly control every individual figure, the basic manouver and fire units are squads of 8-12 men. Those can be further split into (usually) two teams, which is how most units of that size operated in real life. Specialized weapon teams, such as bazooka or medium machine gun teams provide additional firepower. Command and control is performed by ‘leaders’ of two types; junior leaders usually lead individual squads and weapon teams, while senior leaders provide control at platoon comman level, allowing coordination between individual sub-units of the platoon. Ruleset caters for support units in all forms and shapes – tanks, mortars, artillery (both on the table as well as off-board), engineers, etc are all handled. D6 dice is used throughout the ruleset.

“Chain of Command” has been around for a while now (about three or four years, I believe) and many reviews have allready been written about it, both in printed publications and online. So I will not try to reinvent the wheel by writing yet another lengthy review that will hardly add anything new to what’s already been said and written. If you’re interested in a detailed analysis, I recommend for you to listen to episode 106 of Meeples&Miniatures podcast or read an excellent review posted on Anatoli’s Game Room blog. Both of them provide a very good overview of this ruleset.

So what’s the point of this post of mine then? Well, I hope to provide a ‘rookie’ gamer’s initial impression based on two games I’ve run yesterday. In the first one I acted as Game Master, in the other one (enriched by my impressions of the first game) I took over one of the gaming seats.

The setup

Since it would be a first experience of the ruleset for all involved sides, I’ve picked up the most basic generic scenario that is included in the ruleset – an encounter between two patrols in no-man’s land. In this setup, the players start by establishing their initial zones of control with help of simple meta-game. Basically a bunch of markers are moved over the board until they come into 12’’ of one of enemy marker. Once this is done, players select their jump-off points in territory they control – computer game players can think of those as spawning points. These define where individual squads, teams and leaders can be deployed on the table.

To further simplify the task of ‘first game’, I decided to play on smaller area than recommended 6x4’ table. The game would be played on my kitchen table, which is only 5x3’. The terrain setup was my own creation – i basically threw whatever terrain I had available on the table with hope that this random arrangement would provide for a good game.

Finally, I decided to limit order of battle to a single basic platoon and no support units. So both sides (German and American) had their three squads consisting of an LMG team and rifle team to play with. Each of the squads was led by a junior leader. Furthermore, Americans had at their disposal two platoon leaders and a bazooka team, while Germans had a single platoon leader and a panzerschreck team.

CoC_First_Game_003

Game one

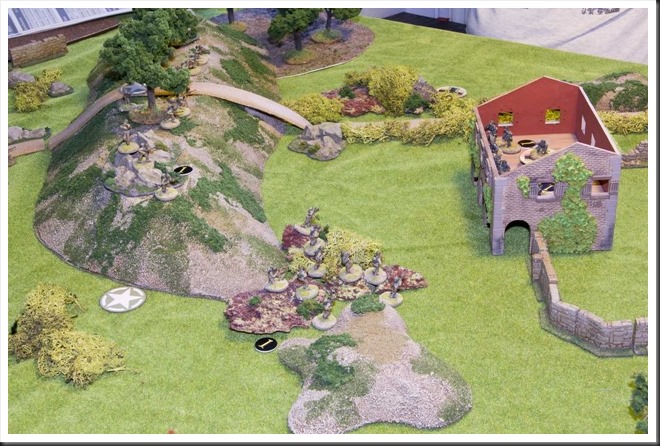
In our first game the Americans, played by T., managed to gain control both of the hill and the house in the initial phase. This gave him a huge advantage from the start and set the tone for the game. He deployed one squad in the house and the other two along the ridge of the hill. L. responded by deploying one of his squads in the hedges by the crossroad and the other one in the woods by the ‘northern’ foot of the hill (by the chairs in the picture above Smile). The MG team of that squad gained a foothold on the hill, deploying in the rock outcrops in its northern end. And that was it… both sides started to hammer each other, with Germans clearly getting the worst of it. After a fire-fight lasting over several phases, L. suffered eight casualties to two of T, the  machine gun teams of both of his deployed teams were wiped out and the remainder of the squad in the hedges by the road was pinned by T.s fire from the house. To put it plainly, he was screwed and he knew it. Thus, we ended that game.

CoC_First_Game_007

Game two

T. left our company by that time and L. and I gave it another go. Wiser by the experience, L. managed to claim the posession of the house in the initial phase of the game, while I grabbed the hill and the high ground to the south of it.

L. then proceeded by deploying a squad on second floor of the house and another by the wall outside the walled house court. I responded by establishing the line of fire along the ridge with one squad, deploying the second in the rough ground at the southern foot of the hill. I deployed my third squad behind the hill, out of sight. My plan was to move it around the hill and hit the house from the north. Once again, L. never bothered to deploy his third squad, probably waiting with it until he found out my intentions for the squad behind the hill.

CoC_First_Game_009

In some respects our game developed in similar manner to the previous. L. blasted at my guys in the rough ground, while I tried to hit him hard with fire from the hill. The pressure mounted on units on both sides, but yet again an impass seemed to occur almost instantly. After a couple of phases I grew tired of this static character of the game and decided to take a risk. I ordered the squad on the hill to fire suppressive fire at the Germans in the house – this is a temporary state where the incoming fire won’t cause any damage, but automatically reduces fire effectivness of any enemy units that are in the sector where suppressive fire is ‘applied’. This was a preparation step for my next action, which was a mad dash across open field toward the house by the rifle team of the squad in the rough ground.

CoC_First_Game_008

As Germans hunkered down under suppressive fire, the advancement was completed without any casualties. L. reacted by dropping a couple of grenades on my guys who were now huddling directly below, hiding behind the arcade walls of the house. My luck held and noone was hurt by the explosions. Naturally, as soon as I had the opportunity, I pushed on into the house. A vicious close combat for control of the house now took place… with disastrous consequences for the my side. Once the dust settled, six out of my soldiers were dead, with the sole unhurt man trying to patch up his wounded leader. Normally, such outcome would rout the survivors, but considering the enclosed surroundings we agreed that my survivors were now POW;s.

L.s triumph came however at a cost of three casualties and a wounded squad leader. Another round of whittling fire from the hill completed the grim job, breaking the German squad and forcing them to flee the house.

At this time we were at it for five hours and were more than satisified with the entertainment of the day. Thus, the second game also ended inconclusively.

Musings after the battle

After a single evening, it is far too early to say anything definite about this ruleset. But there is a couple of things I can say with conviction even after this brief exposure.

  • First and foremost, I am not at all surprised that so many people have been raving about ‘Chain of Command’ over last couple of years. It is a cracking ruleset and I will definitely invest much more time and effort into it.
  • In one rather important respect, ‘Chain of Command’ seems to be a very different beast when compared with other similar rulesets (‘Arc of Fire’ and ‘Bolt Action’ comes to mind). Let me explain.

    Over the years, I have learned to identify (and also exhibited myself) in gamers a phenomenon that I believe can be called ‘a stress cone’ – once a player sets his mind on a ‘target’, be it an enemy unit or a specific location, its destruction must be accomplished. And as the game progresses, this target increasingly becomes the sole focus of gamer’s attention. When this happens, a certain blindness to alternative solutions seems to occur. Flanking manouvers, an often valid option of breaking of contact and re-deployment or employment of less obvious assets is no longer considered – the initial goal must be accomplished. What’s even more important, it must be accomplished by direct assault and destruction by fire or close combat. To an unengaged observer, such behavior may seem odd, sometimes even bisarre. But if you think about it, we all occasionally exhibit it and many of us much more often than not!

    So what does this have to do with ‘Chain of Command’? Well, in most wargame ruleset, the initial phase of the game consists of manouvering the units into contact with the enemy. As this takes time, it also allows players to logially consider their options. Once the units come into contact and ‘combat’ starts to happen, player’s attention shifts to the actual action. He may then enter further and further into this ‘stress cone’ I’ve mentioned above. What seems to be special about ‘Chain of command’ is the fact that with this ruleset, the opposing units can be deployed pretty much on top of each other directly at the start of the game. And indeed, this is exactly what the designer of the ruleset states – a game of ‘Chain of command’ starts with opponents already in contact with each other! In other words, players are placed immediately at the small end of the ‘stress cone’ with consequence of ‘shootout’ games being a very tangible possibility if one is not careful and remains cool-headed. But if a player manages to keep his cool and remembers the simple fact that you don’t have to shoot at an enemy as soon as he’s visible, this ruleset has a possibility to provide a damn realistic experience of low level combat in WWII setting.

Allright, enough of ‘deep thoughts’ for this time around. Let me round this post up with repeating the sentiment that ‘Chain of Command’ seems to be an excellent ruleset. If you haven’t yet, you should definitely give it a shot (pun intended). Smile

September 10, 2016

Here we go again

Last Sunday H. decided to grace me with a visit. Naturally he insisted on dragging his unrully Saxons along with him. My Britons filed a strongly worded complaint to these plans and another clash in our semi-dormant Dux Britanniarum-campaign became unevitable.

Yeah, its’ been a while since I’ve hosted a proper game!
We’re still dipping our toes in the pool when it comes to Dux Britanniarum and trying out different scenarios that are included. In our previous games the games focused on some sort of loot – either plunder of a village or getting away with stuff already grabbed before the encounter in the game. This time around we choose a scenario that is a bit different from the rest of the lot included in the rulebook – a Briton patrol consisting of two warrior groups and an officer are returning from an uneventful stroll around the countryside. The rest of the Briton army is camped around the watchtower at the other end of the table, which also doubles as the ‘panic room’ for the patrol. Saxons have apparently gotten hold of playbook of South-American drug cartels (or would it be the other way around?) and figured out that snaching a noble could render neat little profit without having to deal with angry peasants and sniveling kids.

With a lot of random setup elements in the initial deployment as well as a terrain deployment controlled by players intending to block movement paths or trying to ensure escape routes, there seems to be a lot of replayability in this one.

Initial deployment

The terrain placement would obviously play a significant role in this scenario and it took us a while before we were done with all the sneaky shuffling around of bogs, rough patches, woods and hills. We agreed that all terrain features with the exception of stand alone trees, were medium difficulty terrain. The steep hill-side was impassable.

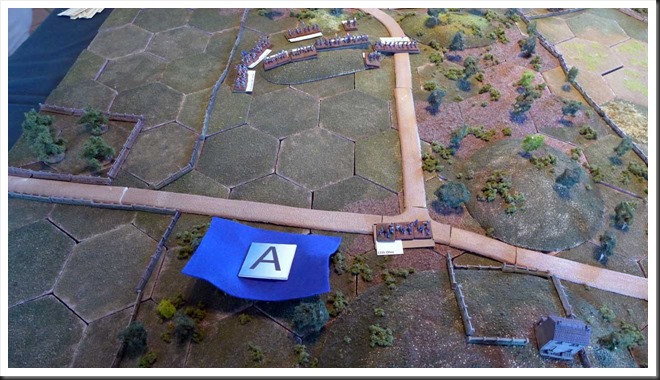
Next, I placed my units on the table. My forlorn patrol was allowed to move a bit towards safety of the building that proxied for the watch tower (future terrain project?), while the rest of my troops was deployed around it. Saxons had to roll for their entry edge, as well as how many units would enter on first round. H. promptly rolled a six, which meant that all his scoundrels would pour onto the table without any delay.

DuxGame4_001

DuxGame4_002

DuxGame4_003

The game

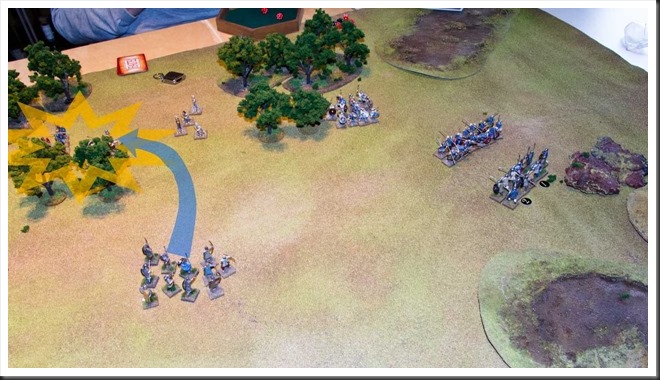
Plans, plans, plans… Well, the obvious part of my game plan was to make the patrol move as quickly as possible and hope H. wouldn’t catch them. What to do with the troops around my base was a bit more of a challenge, mostly created by myself. In deployment phase I was a bit flippant and spread individual groups around the deployment area – you know, ‘we are resting and doing nothing’-thing. Once the game started, I  realized however a bit too late that this dispersion gave H. an unintended advantage. It would now take time for me to gather everyone together and time was something I didn’t have in this game. By that time it was too late for regrets and I had to adapt to the situation I’ve decided to send my elites and archers under command of Noble on a dash toward the patrol as some sort of quick reaction force. In the meantime I would use my Lord to herd together my levies and when ready, try to get behind the Saxons, wherever they may be at that time.

H. must have read my mind and split his force in three groups – his two groups of hearthguard and two warrior groups set were arranged in separate formations and set of in a run toward their intended prey. Remaining warrior group, its numbers increased to eight warriors after his previous successful raid, accompanied by his archers turned toward my base in a clear attempt to secure the flank of main force.

DuxGame4_004

After a couple of rounds the character of the game started to take shape. Personally I suffered from a brain-freeze and threw my patrol into rough terrain in front of them, not only unnecessarily slowing them down, but also giving the a couple of Shock points. Really dumb move – I should have either rushed to the right of these boulders or rushed to the top of the hill, gaining superior defensive position. My choice now guaranteed that H. would catch my patrol detachment in the open. This meant forming a shieldwall and waiting for the onslaught of a shedload of now clearly visible horde of screaming Saxons, quickly closing the distance.

At the other end, my peasant levies tried their best to gather together, failing miserably, with one group being too fast for their own good and the rest dragging their feet. The ‘fast’ group ended up dangerously close to H.’s ‘security force’, which pounced on them without delay. Three peasants promptly went down in the violent melee that followed… but to everyone’s surprise, two Saxons also met their end in this initial clash! Unexpected casualties seemed to have taken a bit the fight out of the remaining Saxons, who probably expected some easy killing but met their match.

DuxGame4_005

This initial contact also put some ideas into my head – my rescue force was now about same distance from the position of my now stationary patrol as it was from H’s flank group. Due to its separatin, it presented a juicy target – with my peasants in front and comanipulares jumping them from the rear, they’d surely be dead meat! Said and done, I diverted my rescue force from the initial destination. The plan was now to wipe out these separated Saxons first and proceed with rescuing the ambushed patrol if there was still time for that. And if I didn’t make it in time? Well, eye for an eye, mate!

My decision shaped the game into its final form, consisting of two separate actions. The encounter between H.’s flank party and my comanipulares asssisted by a levies shieldwall was a one-sided affair. The outcome was assisted by H.’s consistently bad luck with dice rolls in this fight. His warriors took their time dying, but die they did, one or two at a time! The few survivors finally had enough and broke down, trying to make it to the edge of the board. In this they failed and were unceremonously dispatched by their pursuers. The noble leading this unlucky group managed to dodge all the blows (and there were many!) to the very end and was finally allowed to flee as last man standing. For me, the cost was one slain comanipulares – all things considered, a decent payoff.

DuxGame4_007

The main event was however the last stand of my warriors. And indeed, it was a last stand worth of songs praising this group of stalward heroes! SmileOver five rounds they stood their ground, not budging an inch, slugging it out with the best H. could throw at them. Over the course of this fight there were very few casualties, with just one man going down on each side, and my noble, leading by example, suffering a honorable wound. In the end, the fight was decided by the Shock mechanism, which dictates that each two points of Shock take away one attack dice for the inflicted group of figures. As the fight progressed, my shieldwall formation absorbed all but one kill result H’s hearthguard managed to score, but my Shock points increased steadily. When H’s warrior formation, which lagged behind, finally slammed into the side of my shieldwall, the jigg was up due to a scenario special rule, which said that if Saxons had three times attack dice my force could muster, my lads would give up. And that’s precisely what finally happened – abandonded, obviously in despair and completely exhausted, my warriors realized that further resistance was futile and laid down their arms. But they never broke!

DuxGame4_008

With the entire patrol in the bag, H. declared that he would be quiting the field. This he was allowed to do without any challenge on my part – the distance to the edge was too short and even if I managed to get to his main force before it left the table, it would be in disorganized manner. I would be asking for further losses, so it was better to bite the bullet and wait for the inevitable ransom demand.

Post-battle

In Dux Britanniarum, each scenario is set in a simple campaign setting. Once a game is finished players compare their results – were scenario conditions fulfilled, how many loses were suffered by each side, were any Nobles wounded or killed and so on… This comparison decides who won the game and how much of a success it really was. In this case, the destruction of H.’s warriors on the flank minimized the level of his victory to a rather phyrric victory. But a victory it was nonetheless and now he has enough money to advance career of his warlord to the next step in the overall campaign.

Musings after the battle

Well… there were moments in this game where I feared it would turn out into a frustrating, one-sided affair leaving bad aftertaste in loser’s mouth. But in the end it turned out to be a true nail-biter that could literally turn either way due to a single dice roll! Also, the rules are rock-solid in every respect, with combat mechanism actually surprising me with its, in my opinion at least, quite ‘realistic’ outcome in both main fights of this game. The post-game phase is also a bit of a blast with its capability to reduce a seemingly very sucessful encounter into a sour grape.

Two events that took place during the game require a further analysis. The first took place in final phase of the massacre of H.’s flanking force. The ruleset says that Nobles don’t suffer hits in normal way, instead a simple check is made whenever a group to which the Noble is attached suffers casualties. If a roll on a D6 is equal or less than the number of kills suffered by that group in a fight, the Noble takes that hit instead. In our game, H.’s Noble managed to avoid damage throughout the game and in the end only he and one last warrior was still standing. Three kill hits were dealt against them in combat round that followed. Common sense says that both men were hacked to pieces. But if rules are applied in ‘rules lawyer’ manner (which we chose to do), all these hits would be absorbed by the ‘last’ warrior and a check with a D6 would follow, with a result of ‘1’ resulting in a wound to the Noble. Our check left H.’s Noble unscathed and a lucky card draw allowed him to escape the field. I’m not entire sure how I feel about that outcome, as I would have loved to finish the man! Smile

DuxGame4_009

The other curiosity occured due to scenario conditions. As already mentioned, the ‘main event’ ended with my Noble and eleven of my warriors being taken prisoner. This event posed a question that is unaswered by the ruleset – how were these prisoners to be regarded in terms of loses in post-battle phase? The question is not trivial – a loss of eleven men could be a very significant factor when deciding level of victory, which in turn can have impact on development of the campaign. The noble will probably be ransomed, but would the British lord care about paying for captured warriors? Maybe, but would the Saxon chieftain want to release them? They would probably be worth more on slave market somewhere in Europe. In the end we decided that everyone in captured party had to be considered as a loss. It would however be nice to hear opinions of other players about this situation.

DuxGame4_010

All the ambiguities nonewithstanding, the fact remains – Dux Britanniarum gave us another excellent game and that’s the important thing. Also, with H. having successfully amassed wealth necessary to proceed in the social meta-game, we will now be able to expand number of troops in our games.

May 14, 2016

Iuka Redux

As promised, here’s the AAR of the second take of Iuka scenario, this time with IABSM turn sequence and a bunch of other rules applied correctly. For the background information about the scenario and home rules in play I refer to the first report, since I haven’t changed anything in that department. It is however worth repeating that I planned for the game to run for fifteen rounds, with random extension of of between one and six rounds just to keep everyone on their toes.

This time around it would be a one on one affair, with L. yet again taking the role of Confederate commander, while yours truly would take over the Union troops. Poor bastards…

The plans

It became obvious rather quickly that L. intention was repeat his shock and awe aproach and run over the Union troops to his front with a bold frontal charge with one of his brigades, while the other one kept my flanking force at bay.

I must admit that I did spend a bit of thought on my initial deployment in the time that passed since the first game. I finally came to the conclusion that the original plan of HĂĄ. was a pretty good one considering the initial deployment of troops and restrictions on movement imposed by terrain. I did however decide to make one major change – the first brigade of my ‘front’ force would take position at the edge of the woods at the left edge of the road. The second brigade would however not march up the road, but move quickly over the open field on my right flank, then turn left, traverse the woods and smash into the flank of Rebel forces which I suspected would attempt to repeat the events of previous game. The flanking column on the far side would at the same time try to push as hard as they could manage against L.’s blocking force.

The game

Right, let’s move over to the pictures.

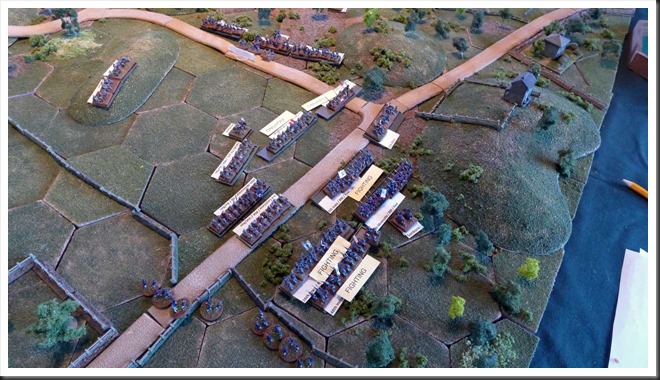
P1020825We start the game somewhere around turn six or seven. L.’s first brigade has been spotted while still deploying for their intended frontal charge. My own troops are by now safely tucked away in the woods. The attached medium artillery battery is deployed from its blind at the road fork, since its unable to enter difficult terrain As it turned out, this prompt deployment played siginficant role in the events that followed, since this battery took rather severe toll on two of the Confederate regiments in its front and delayed their advance for a crucial round or two.


P1020833Couple of rounds later… With L’s assault on its way, I took the opportunity and unmasked my first brigade. Its position on the edge of the woods and supports to the rear would give them a bit of a bonus if Rebels managed to get that far. The effect of the fire of my artillery is already visible, with Confederate left flank starting to drag a bit. Also, it seemed like a good idea to move my skirmishers into a position that would enfilade approaching rebels.

The arrow illustrates my ‘cunning plan’ and the path I intended for my second brigade in its approach toward the enemy.


P1020837A bit more complete picture of the situation somewhere in the middle of the engagement. As can be seen, the situation on the flank is quite similar to that which developed in the first game, with both sides having difficulty deploying troops effectively. The major difference was that use of blinds in this game allowed me to freely deploy the artillery attached to that column where I needed it the most, in this case on the road. Once deployed, it started blasting away at the rebels in front of it, with considerable effect I may add. It actually managed pushing L’s blocking force back a bit all on its own.


P1020842There was however never any doubt that the main engagement would once again take place at the crossroads which were the target of Confederate charge. Despite suffering serious casualties on their way in, once in contact, the rebels had no problems mauling the green Union regiments trying to oppose them. Initial contact was made on my left flank, due to my artillery battery making the rebels to pay dearly for every step they took and temporarily halting their advance. However, where the contact was made, the rebels threw the Union regiment that took brunt of the charge back into the woods, pulling their supports in second line with them.

On the positive note my second brigade has now reached jumpoff position for its own assault. Also, the fire of my skirmishers on extreme left flank of my defensive line was surprisingly effective.

P1020843Whatever optimism I was able to muster from the butcher’s bill payed by the rebels during their advance was sapped away over next couple of turns. L’s seemingly unstoppable grey steamroller smashed into my line across the entire front, with disastrous consequences. My entire brigade was prompty routed, while the artillery battery which punished Confederates so severly was overrun and captured. It seemed like a repeat of L.’s charge in the first game. And indeed it was – once routed, my broken brigade got an unexplainable break and a chance to recover due to lucky unit activation sequence. This was helped by a quirk in TCHAE rules set, which I believe we run into for the very first time - routing troops move fifty percent quicker than troops which are in order. This allowed for my broken brigade to get away from their tormentors for a little while. Next a lucky/unlucky draw of activation chips allowed me to recover most of the regiments (one regiment and crews of the overrun battery run off the table edge and, I presume, of the face of the earth as is custom in tabletop wargames! Smile).

Also, the casualties that L. suffered in his brave, but perhaps a bit reckless advance did start to have tangible consequences -his best regiment having suffered more than 50 percent casualties became permanently defeated, while another was just two casualties from reaching same state. In plain language, two out of L.’s regiments had quite enough excitment for the day.


P1020850Meanwhile, on the other side of the battlefield, things took remarkably similar shape as in the first game. The activiation chips for forces involved here were few and far between, making any decisive action impossible.

By now we have reached round fourteen out of ‘regular’ fifteen and L. decided to call it a day. Somewhat exhausted after over four hours of gaming time, I readily agreed.

P1020853I was however a bit curious about how things would turn out if we continued and decided to play the game to its conclusion on my own. It took me a week to find the time and energy, but today I finally run the last couple of rounds.

The situation at the time L. and I decided to call it a day was rather peculiar. Union brigade on the receiving end of L.’s bold but costly charge was decidedly shaken, but still useable. At the same time my second brigade was finally in the position for its own assault into the rear of L.’s decidedly bloodied assault force. Aware of that fact, he switched the orders of his second brigade, calling upon it for support. Also, his artillery was in perfect position to blast into the backs of my ‘rescue force’ as soon as it came out into open. So the situation on the battlefield looked like a blue-grey-blue-grey-blue sandwich, with each layer posed to attack somebody.

Before taking on the role of CinC for both sides, I decided that Confederate artillery on the high ground could not be ignored by Union side. I therefore split my second brigade into two parts – two regiments were to advance against Rebels to the left, while the remaining regiment and skirmishers would engage the artillery batteries to the right.

The first two rounds (final one of ‘ordinary time’ and first bonus turn) went pretty well for boys in blue. Rebel guns weren’t silenced, but I did manage to mask them and cause some casualties among the crews. Also, my ‘assault force’ of two regiments seemed to gain upper hand against the single Rebel regiment that opposed them. Then second bonus round started and ended abruptly with first activation chip drawn being a ‘Coffee break’. This was followed by a roll of six on a check for next bonus round, bringing a rather anticlimactic finalĂ© to this game.

Musings after the battle 
Right… let’s start with a quick explanation regarding the reason for me and L. wanting to replay this scenario. As already stated, first time around I bungled several crucial sections of the ruleset, such as sequence of play and what ‘mandatory’ effects close combat had on participants. I also managed to ‘forget’ the fact that units can move multiple times under certain circumstances and refrained from using the ‘blinds’, which theoretically at least allowed for more rapid movement. L. and I suspected that if the ruleset was applied correctly and with the blinds in play, we’d be able to move more often, providing a more rapid game.

It is safe to say that our expectations were not met – the contact between L.’s first brigade and HĂĄ.’s defening troops in first game took place in round eleven, in our game in round ten. The action on the flank was as inconclusive as in the first attempt. My flanking force arrived to its jump-off position about the same time as it arrived to HĂĄ.’s rescue in previous game. In other words, correct use of movement rules and taking advantage of supposed advantages of ‘blinds’ had no effect in this particular game. On the other hand, applying correct turn sequence certainly did make some of the rules more logical, but without influencing the ‘feel’ or course of the game in any significant manner. L.’s assault was in most respects a repetition of what happened in our first game, main difference being that he took much more severe casualties while charging my line. This was due to my deployment of troops, not because of the ‘corrections’ to the rules we used this time around.

The ironic thing is that paying careful attention to the rules in TCHAE led me to a couple of new insights about this ruleset and none of them is very positive. The ‘blinds’ mechanism, while providing intended fog of war, is also in my opinion something of a can of worms as soon as partial deployment of units is attempted. It is also the only the ruleset I know of where line of sight rules are not clearly defined. This omission forces players to make their own judgement calls when trying to comply with restrictions applied to multiple unit moves in same round. Also, both L. and I were a bit dumbfounded by realization that movement rates between line and column formations (for units deployed on the table) are exactly the same. I’m sure that the rules designer has good reasons for this decision, but the explanation for this rather odd choice would be welcomed.

I’ll be frank and admit that all the ambivalencies and question marks that pop up every time I play a TCHAE game are starting to bother me more and more. At the same time it is without a question a tabletop games ruleset I am most familiar with and therefore most comfortable with. The dilema I find myself with is  therefore somewhat peculiar – do I stick with TCHAE despite all of its annoyances or do I, for lack of better word, dump it and start hunting for a replacement ruleset?

Now, where did I stash that copy of ‘Guns at Gettysburg’…