Showing posts with label Dux Britanniarum. Show all posts

February 14, 2018

They’re bringing carts now!???

Well, it would seem so, Saxons have finally figured out that carts and loot fit together as hand in a glove! Smile

Seriously though… one of generic raid scenarios in ‘Dux Britaniarum’ requires three carts of some sort. With this in mind, I’ve had a quick look around for something suitable. Offering from 4Ground was very much to my liking – their cart is made from laser-cut MDF, thus cheap as dirt and shipping it over the pond wouldn’t cost me my shirt neither. Also, those guys at 4Ground seem to be clever chaps and realize that something must pull those carts around. And so, they are kind enough to offer suitable draft oxen minis, sold in pairs.

Don’t remember how long it took for the envelope (yes, envelope, apparently 4Ground took the page from IKEA’s operations manual), but it didn’t take many days before my carts arrived to me. Here’s what I’ve got, in three sets.

2018_Blog_009

2018_Blog_015

First a couple of words about oxen minis. They were all ‘business’, but required some serious cleaning up and putty to cover up some serious holes in the casts. Also, as can be seen in the pictures, heads are separate and the fit isn’t the best I’ve ever seen. Once the heads and bodies were glued together, it became apparent that something had to be done about the gaps around the neck. Lucklily that’s what green stuff is made for.

2018_Blog_020

Carts, on the other hand, could be assembled without any problems. In fact, I glued them together while watching a movie and was done before it was finished. Really simple assembly was made even easier by a nice, easy to understand manual.

The paint job was also a pretty straightforward job. With carts, I started with couple of base coats of burnt umber. Then I proceeded with successively lighter coats of burnt umber and white. I finished with couple of black, brown and green washes.

With oxen, I first found couple of reference pictures of the real things – I was a bit surprised over variety of “cammos” that oxen come in. In the end, I went with dark brown/cream white “ambush scheme”. Open-mouthed smileI’ve also decided to play around with paints and made a very first attempt at wet blending. Not sure how successful I was, but I think I managed “game table” quality. But what do I know, judge for yourselves.

Anyway… I must say that I am quite happy with my first experience of laser-cut MDF and 4Ground. If you need a couple of carts to move your loot quicker around the table, I can recommend this stuff as affordable option.

2018_Blog_028

2018_Blog_031

2018_Blog_033

June 24, 2017

Proving the theory

And so, finally, the day of the first outing for my newly painted Saxons have arrived.

With H.’s offensive on kingdom of Rhegis having slowed down to snail pace, L. decided to see if his tribe wouldn’t have better luck a bit further south, in kingdom of Caer Gynntguic. With his bunch being freshly painted and this being his outing with Dux Britaniarum rules, I decided to keep things simple and let him lead a basic raid on a village. The Saxon goal in this scenario is quite simple – run into individual the village, search the houses, find the loot on a roll of a six, grab the loot, run back home. Oh yes… try not to get killed in the process, but that’s optional. For Britons the objective is also pretty straightforward – kill’em all.

The plans

Dux_20170621_004

L.’s entry point in this scenario was from the far edge of the table. He was lucky enough to get three rounds of movement before my troops arrived on the table, unlucky to find out once I got there, I had all of my troops with me. This fact must have influenced his thinking, as only one group of warriors and a leader was sent into the village in search of the ‘treasure’, potentially slowing down his ‘search for treasure’ rate. Remainder of his raiding party – two units of hearthguard, two units of warriors and the bowmen – set course straight for my guys.

Dux_20170621_005

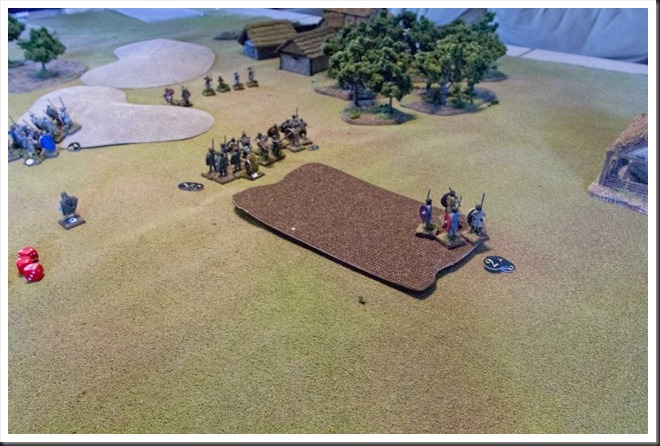
Just a couple of rounds into the game, the lines were drawn in the sand, traditional greetings in form of insults about relatives and personal hygene were exchanged… and a bit of a crisis materialized for my Britons. As can be seen in the picture, I was a bit too eager to get into contact with L.s hearthguard and exposed my flank to his other group of warriors. L. didn’t fail to notice my predicament and did actually try to smash into my exposed flank, but his dice roll for movement turned out to be inadequate for the task. His failure with the movement dice roll allowed me to bring up my peasant levies, grouped in a single large formation. By pure luck, I managed to avoid a potential disaster.

A quick clarification is necessary at this point – as it turns out, I had a truely crappy ‘photo day’ during this game and vast majority of pictures taken during the game have turned out to be unuseable. Because of that fact, the most vital part of this game has to be narrated without any visual aids.

Basically, what happened was this – L., tempted by a good set of Fate cards, smashed his hearthguard into the shieldwall in front of them. He ignored my commanipulares on the left flank and focused his effort on my warriors in center and the right. It was a pretty even and prolonged fight in which L. managed to break my warrior group on the right flank. In the end though, the Shock points mounted up for him and his front rank broke rank and fled. Remainder of his hearthguard gave it one more try, but it wasn’t enough. Once his chief was wounded, they followed the example of their comrades and withdrew in orderly fashion.

His two units of warriors engaged my other shieldwall, consisting entirely of peasant levies. Surprisingly, here the fight was rather onesided – both sides suffered some casualties, but the Shock caused the Saxons to break contact almost instantly after first clash of arms.

Dux_20170621_017

The picture above shows the situation after these dramatic events. L., unwilling to give up, charged the British warrior group that broke rank in fight with his hearthguard with what remained of his own warriors and actually managed to put them to flight. This success exposed them however to an assault by my peasants, who managed to maul them rather badly.

Dux_20170621_007

Meanwhile, L’s raiders in the village searched freneticaly for anything worth bringing back home. House after house was ransacked, but nothing even remotely shiney could be found.

Dux_20170621_021

With his hearthguard catching a breath at safe distance from what remained of my ‘main’ shieldwall and his search in the village turning up nothing of value, L. made a rather surprising decision to make one final attempt to break my levies. With just four warriors, he smashed in the middle of their shieldwall and actually managed to split it in two. This was however the high watermark of his effort – what remained of my peasants turned onto his warriors like mad dogs, or, at least they did so in my imagination. To be truthfull though, they didn’t manage to do much damage. They did however manage to convince L. about general unhealthiness of his current situation. His Saxons came to sensible conclusion it was best to break contact.

Dux_20170621_023

At this time the game was at a rather peculiar stage. Both L. and I did loose a formation of warriors. L’s hearthguard had a shedload of Shock points to deal with, but was otherwise still combat-worthy (one of his groups lost three men, the other was untouched). L. also had one completely fresh Warrior group in the village. From my perspective, the situation wasn’t that rosy neither. My peasant levy was still alive, but pretty much in shambles. My commanipulares didn’t suffer any casualties, but they were now supported only by a single group of four warriors; these guys would not stand for long if L. decided to attack. In other words, this fight was far from over!

But… as so often is the case in our hobby, real life clock and exhaustion took over. We’ve been at it for almost five hours and L. made the sensible decision to call it a day despite the fact that he didn’t manage to find anything of value in the village.

Musings after the battle

Let’s start with the obvious – the Saxons, newly painted as they were, never really had a chance in this game. The old wargaming truism has been proven yet again! Smile

If I am to be serious though, this game of ours was quite fascinating for me for two reasons. First of all, it was rather entertaining to see how different playing styles of H. and L. shaped the course of the game in very different ways. With H., I can usually assume that the Saxons will act cautiously and, for the lack of better word, rationally. L. explained to me later that he wanted to explore the ruleset and therefore acted consciously much more aggresively, seaching for a fight wherever it could be found. Thus, he took risks I’ve never experienced in my games with H. It has to be said that these risks did pay dividents, most important of them being the fact that he managed to split my levy shield wall with just four warriors accompanied by a leader.

Which brings me to the second reason this game was also a valuable learning experience. In Dux Britaniarum, a formation can be created by groups of warriors being formed either side by side or in two ranks, one behind the other. If a formation consists of two groups, they can be formed like this:

XXXOOO or XXXXXX
XXXOOO    OOOOOO

The difference between these two setups is that side by side groups always take equal shares of potential hits, while in ‘one rank behind the other’ setup the front rank absorbs all hits until their number dwindles to less than half of their comrades in rear rank. Then they shift place.

In our game, I played with groups side by side, L. set up his formations in two ranks. This was new experience, because H. usually preferred same setup as I did.

Why do I mention this? Well, for the first time, I had the opportunity to see the real differences in these two formation variants and they do add some surprising complexity to the ruleset. The advantage of the ‘side by side’ formations is that all involved groups support each other by division of possible hits. But this also means that all groups accumulate the Shock points, not necessarily at equal rate. It seems that one of the groups will always be ‘unlucky’ and accumulate more shock points than everybody else. In the end this will result in their rout, which in turn will split the formation into smaller components.

‘Two ranks’ formation seems to have their own set of pros and cons. As only the front rank absorbs all the hits, their comrades at the back are ‘protected’, at least at the beginning of an engagement. But the almost ‘manipular’ possibility to switch positions once casualties start to mount up seems to me rather unlikely – rather, the front rank wil suffer casualties and shock points and at critical point they just as likely break instantly, leaving their buddies to face the opponent all on their own. This is what happened in case of L’s hearthguard’s attack – his front rank took all shock points and by the time they lost half of their numbers, it was too much for them and they run away.

My point with this rather too long ‘analysis’ is that there are hidden depths in this deceptively simple set of alternatives for formation setup and I’m not sure how to deal with them. Further games seem to be necessary to explore this topic further! Smile

September 10, 2016

Here we go again

Last Sunday H. decided to grace me with a visit. Naturally he insisted on dragging his unrully Saxons along with him. My Britons filed a strongly worded complaint to these plans and another clash in our semi-dormant Dux Britanniarum-campaign became unevitable.

Yeah, its’ been a while since I’ve hosted a proper game!

We’re still dipping our toes in the pool when it comes to Dux Britanniarum and trying out different scenarios that are included. In our previous games the games focused on some sort of loot – either plunder of a village or getting away with stuff already grabbed before the encounter in the game. This time around we choose a scenario that is a bit different from the rest of the lot included in the rulebook – a Briton patrol consisting of two warrior groups and an officer are returning from an uneventful stroll around the countryside. The rest of the Briton army is camped around the watchtower at the other end of the table, which also doubles as the ‘panic room’ for the patrol. Saxons have apparently gotten hold of playbook of South-American drug cartels (or would it be the other way around?) and figured out that snaching a noble could render neat little profit without having to deal with angry peasants and sniveling kids.

With a lot of random setup elements in the initial deployment as well as a terrain deployment controlled by players intending to block movement paths or trying to ensure escape routes, there seems to be a lot of replayability in this one.

Initial deployment

The terrain placement would obviously play a significant role in this scenario and it took us a while before we were done with all the sneaky shuffling around of bogs, rough patches, woods and hills. We agreed that all terrain features with the exception of stand alone trees, were medium difficulty terrain. The steep hill-side was impassable.

Next, I placed my units on the table. My forlorn patrol was allowed to move a bit towards safety of the building that proxied for the watch tower (future terrain project?), while the rest of my troops was deployed around it. Saxons had to roll for their entry edge, as well as how many units would enter on first round. H. promptly rolled a six, which meant that all his scoundrels would pour onto the table without any delay.

DuxGame4_001

DuxGame4_002

DuxGame4_003

The game

Plans, plans, plans… Well, the obvious part of my game plan was to make the patrol move as quickly as possible and hope H. wouldn’t catch them. What to do with the troops around my base was a bit more of a challenge, mostly created by myself. In deployment phase I was a bit flippant and spread individual groups around the deployment area – you know, ‘we are resting and doing nothing’-thing. Once the game started, I  realized however a bit too late that this dispersion gave H. an unintended advantage. It would now take time for me to gather everyone together and time was something I didn’t have in this game. By that time it was too late for regrets and I had to adapt to the situation I’ve decided to send my elites and archers under command of Noble on a dash toward the patrol as some sort of quick reaction force. In the meantime I would use my Lord to herd together my levies and when ready, try to get behind the Saxons, wherever they may be at that time.

H. must have read my mind and split his force in three groups – his two groups of hearthguard and two warrior groups set were arranged in separate formations and set of in a run toward their intended prey. Remaining warrior group, its numbers increased to eight warriors after his previous successful raid, accompanied by his archers turned toward my base in a clear attempt to secure the flank of main force.

DuxGame4_004

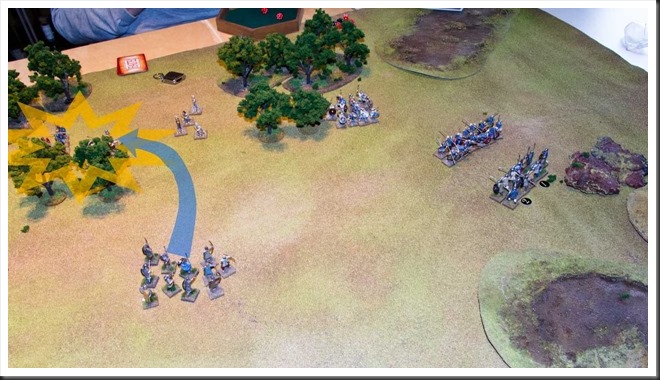
After a couple of rounds the character of the game started to take shape. Personally I suffered from a brain-freeze and threw my patrol into rough terrain in front of them, not only unnecessarily slowing them down, but also giving the a couple of Shock points. Really dumb move – I should have either rushed to the right of these boulders or rushed to the top of the hill, gaining superior defensive position. My choice now guaranteed that H. would catch my patrol detachment in the open. This meant forming a shieldwall and waiting for the onslaught of a shedload of now clearly visible horde of screaming Saxons, quickly closing the distance.

At the other end, my peasant levies tried their best to gather together, failing miserably, with one group being too fast for their own good and the rest dragging their feet. The ‘fast’ group ended up dangerously close to H.’s ‘security force’, which pounced on them without delay. Three peasants promptly went down in the violent melee that followed… but to everyone’s surprise, two Saxons also met their end in this initial clash! Unexpected casualties seemed to have taken a bit the fight out of the remaining Saxons, who probably expected some easy killing but met their match.
DuxGame4_005

This initial contact also put some ideas into my head – my rescue force was now about same distance from the position of my now stationary patrol as it was from H’s flank group. Due to its separatin, it presented a juicy target – with my peasants in front and comanipulares jumping them from the rear, they’d surely be dead meat! Said and done, I diverted my rescue force from the initial destination. The plan was now to wipe out these separated Saxons first and proceed with rescuing the ambushed patrol if there was still time for that. And if I didn’t make it in time? Well, eye for an eye, mate!

My decision shaped the game into its final form, consisting of two separate actions. The encounter between H.’s flank party and my comanipulares asssisted by a levies shieldwall was a one-sided affair. The outcome was assisted by H.’s consistently bad luck with dice rolls in this fight. His warriors took their time dying, but die they did, one or two at a time! The few survivors finally had enough and broke down, trying to make it to the edge of the board. In this they failed and were unceremonously dispatched by their pursuers. The noble leading this unlucky group managed to dodge all the blows (and there were many!) to the very end and was finally allowed to flee as last man standing. For me, the cost was one slain comanipulares – all things considered, a decent payoff.

DuxGame4_007

The main event was however the last stand of my warriors. And indeed, it was a last stand worth of songs praising this group of stalward heroes! SmileOver five rounds they stood their ground, not budging an inch, slugging it out with the best H. could throw at them. Over the course of this fight there were very few casualties, with just one man going down on each side, and my noble, leading by example, suffering a honorable wound. In the end, the fight was decided by the Shock mechanism, which dictates that each two points of Shock take away one attack dice for the inflicted group of figures. As the fight progressed, my shieldwall formation absorbed all but one kill result H’s hearthguard managed to score, but my Shock points increased steadily. When H’s warrior formation, which lagged behind, finally slammed into the side of my shieldwall, the jigg was up due to a scenario special rule, which said that if Saxons had three times attack dice my force could muster, my lads would give up. And that’s precisely what finally happened – abandonded, obviously in despair and completely exhausted, my warriors realized that further resistance was futile and laid down their arms. But they never broke!

DuxGame4_008

With the entire patrol in the bag, H. declared that he would be quiting the field. This he was allowed to do without any challenge on my part – the distance to the edge was too short and even if I managed to get to his main force before it left the table, it would be in disorganized manner. I would be asking for further losses, so it was better to bite the bullet and wait for the inevitable ransom demand.

Post-battle

In Dux Britanniarum, each scenario is set in a simple campaign setting. Once a game is finished players compare their results – were scenario conditions fulfilled, how many loses were suffered by each side, were any Nobles wounded or killed and so on… This comparison decides who won the game and how much of a success it really was. In this case, the destruction of H.’s warriors on the flank minimized the level of his victory to a rather phyrric victory. But a victory it was nonetheless and now he has enough money to advance career of his warlord to the next step in the overall campaign.

Musings after the battle

Well… there were moments in this game where I feared it would turn out into a frustrating, one-sided affair leaving bad aftertaste in loser’s mouth. But in the end it turned out to be a true nail-biter that could literally turn either way due to a single dice roll! Also, the rules are rock-solid in every respect, with combat mechanism actually surprising me with its, in my opinion at least, quite ‘realistic’ outcome in both main fights of this game. The post-game phase is also a bit of a blast with its capability to reduce a seemingly very sucessful encounter into a sour grape.

Two events that took place during the game require a further analysis. The first took place in final phase of the massacre of H.’s flanking force. The ruleset says that Nobles don’t suffer hits in normal way, instead a simple check is made whenever a group to which the Noble is attached suffers casualties. If a roll on a D6 is equal or less than the number of kills suffered by that group in a fight, the Noble takes that hit instead. In our game, H.’s Noble managed to avoid damage throughout the game and in the end only he and one last warrior was still standing. Three kill hits were dealt against them in combat round that followed. Common sense says that both men were hacked to pieces. But if rules are applied in ‘rules lawyer’ manner (which we chose to do), all these hits would be absorbed by the ‘last’ warrior and a check with a D6 would follow, with a result of ‘1’ resulting in a wound to the Noble. Our check left H.’s Noble unscathed and a lucky card draw allowed him to escape the field. I’m not entire sure how I feel about that outcome, as I would have loved to finish the man! Smile

DuxGame4_009

The other curiosity occured due to scenario conditions. As already mentioned, the ‘main event’ ended with my Noble and eleven of my warriors being taken prisoner. This event posed a question that is unaswered by the ruleset – how were these prisoners to be regarded in terms of loses in post-battle phase? The question is not trivial – a loss of eleven men could be a very significant factor when deciding level of victory, which in turn can have impact on development of the campaign. The noble will probably be ransomed, but would the British lord care about paying for captured warriors? Maybe, but would the Saxon chieftain want to release them? They would probably be worth more on slave market somewhere in Europe. In the end we decided that everyone in captured party had to be considered as a loss. It would however be nice to hear opinions of other players about this situation.

DuxGame4_010

All the ambiguities nonewithstanding, the fact remains – Dux Britanniarum gave us another excellent game and that’s the important thing. Also, with H. having successfully amassed wealth necessary to proceed in the social meta-game, we will now be able to expand number of troops in our games.

July 31, 2016

Trying to turn things around

Well, with first seven months behind us, it is safe to say that 2016 shapes out to be a really slow wargaming year for me! This in itself is a bit of a paradox – after all, I’ve managed to finish the “basic” setup for ‘Charlie don’t surf’ earlier this year. Funnily enough, after just two games, I seem to have run out of steam (or interest) in regard of Vietnam and can’t be bothered to set up another game! Rest easy though, I just need a breather and more fun in the jungle will surely commence in a couple of months or so…

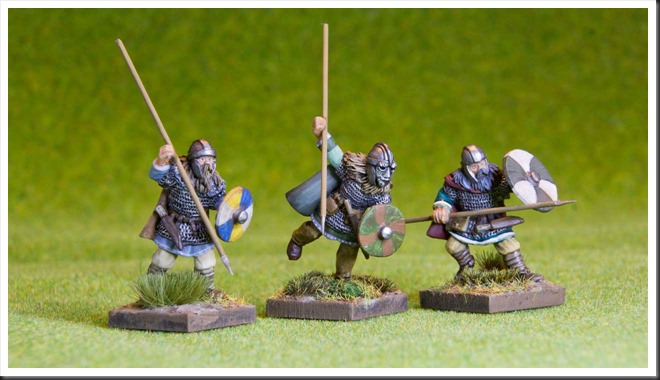
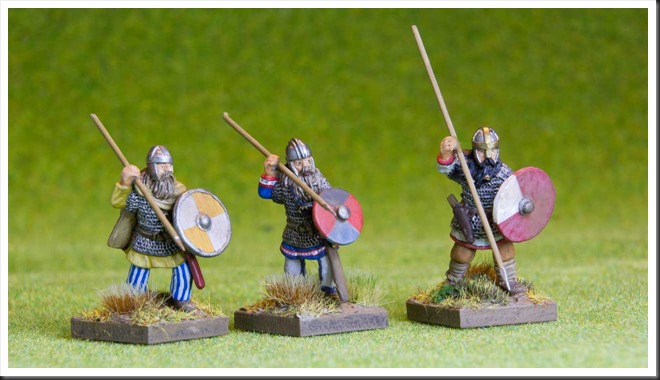
Meanwhile, over last couple of months my focus shifted almost exclusively to my bunch of jolly Dannish imigrants preparing for their first ‘Dux Britaniarum’ tour of British shores. Just to recapitulate – last time I reported about this project, I was done with all of the rabble, eh… common warriors. Next in cue were the chaps arranging the whole trip as well as their closest buddies, aka hearthguard. In other worlds, I had to work my way through a pile of figures in chainmail and with spangenhelms. Some hangarounders with bows and arrows also managed to get some paint on them and voila, second project of the year is completed!
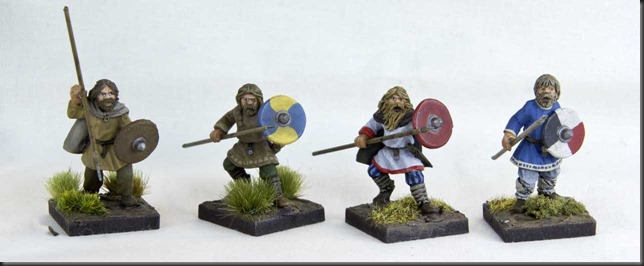
For those interested – this lot is a mix of minis from Footsore Miniatures, Westwind Productions and Gripping Beast. They all mix together rather well, with Footsore Miniatures and Gripping Beast being very similar in size and ‘heft’. Minis from Westwind are a rad chunkier, but once placed on the table with the the rest of their brethren, it’s impossible to see the difference from a meter apart. All minis were fun and easy to work with. I must however give the honorable gold star to sculptor from Footsore Miniatures – his stuff has definitely most ‘character’.

Last couple of pictures are ‘graduation snapshots’ for the whole lot just before their first trip to the ‘other side’. I must confess that I’m quite stoked over whole bunch, but that’s hardly a surprise, is it?

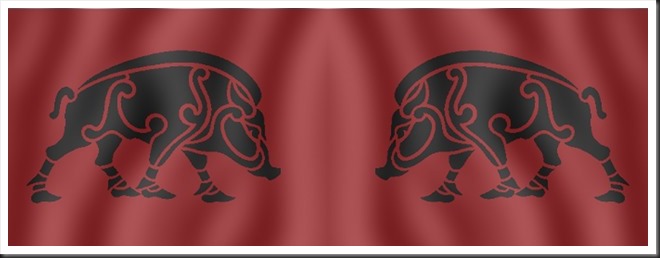
Finally a couple of words about the banner of my raiding party. It’s a simple thing – I found the boar shape on the Interwebs and gave it a quick once-over in Photoshop. Not the quality of Little Big Men Studio, but it will do. If you feel like using it, you can grab it at the bottom of this post.

Saxons_20160731_003

Saxons_20160731_004

Saxons_20160731_006

Saxons_20160731_009

Saxons_20160731_010

Saxons_20160731_012

Saxons_20160731_016

Boar Flag Final

March 08, 2016

Early Saxons, 2nd batch

Well, spring is aproaching and appropriately enough, last weekend I finally finished the second batch of my early Saxon migrants intended for ‘Dux Britaniarum’.

This time around, it’s a mix of miniatures from West Wind Productions and Footsore Miniatures. As can be seen in the pictures, it is quite impossible to distinguish which figure comes from what company, the two ranges mesh together perfectly both bulk- and height-wise. At the same time I have to admit that I do prefered to work with miniatures from Footsore, simply because the sculpts from that company are absolute blast to paint. Sculptor’s attention to small details and choice of poses make painting them a lot of fun. Having said that, I must add that the grand total of sixteen exchangable heads available for West Wind’s Early Saxon range was very appreciated. I strongly recommend getting the extra sets of heads if you’re buying Early Saxons from West Wind Producers.

Next up, the final batch of Saxons; another group of heavies (this time around from Gripping Beast), leaders and archers. With the pace I’ve been holdning over last couple of months I should be done with them some time around Christmas!

EarlySaxons_Batch2_001

EarlySaxons_Batch2_005

EarlySaxons_Batch2_010

EarlySaxons_Batch2_014

EarlySaxons_Batch2_017

November 12, 2015

New recruits for Dux Britanniarum

Some of you perhaps remember the budding ‘Dux Britanniarum’ campaign that I and H. started about two years ago. Last encounter took place about a year ago, but neither the campaign nor the ruleset has been forgotten by me. Unfortunately, real life pushed itself in repeatedly into both mine and H.’s life and it will probaly be a while before next clash between his Saxons and my Britons.

Luckily though, a number of my buddies expressed a desire to try their luck as Saxon warlordings looking for better life on British shores. There was only one problem – H. controls his Saxons with an iron hand and won’t allow anybody to lead them in battle. Thus, the only way to enable my other friends to be bashed and sent packing by my Britons was to paint up a bunch of Saxons they could lead to the inevitable slaughter.

As always, buying the miniatures is only the first step. Next, they have to be painted and it took me forever to get going with this project. Now however the first bunch is ready and spoiling for their first visit to British Isles.

Couple of words about the miniatures – this lot was bought from a company formerly known as Musketeer Miniatures. These days though the company calls itself Footsore Miniatures. Absolutely lovely minis they are and a pure joy to paint. Recommended without any reservations!

EarlySaxons_Batch_I_010

EarlySaxons_Batch_I_014

EarlySaxons_Batch_I_016

April 08, 2014

Yippie, the Saxons are Back!

Wait, what did I just say? The Saxons are back? Oh, shit!!!

Yes, almost exactly a year after last Saxon raid, H. apparently run out of cow meat and decided to return to the British coast to have another go at it. This time around his goal was a church conveniently located near the coast. Even more conveniently, the church in question was fully stocked with enough loot to justify the travel expenses for H.’s merry Saxon band.

The initial setup

Gods certainly smiled at H. during the generation of the field and initial dispositions. The church was placed in the middle of the board, while entry point of my brave Britons was decided by a dice roll to be on the exactly opposite side of that of Saxon entry point. If that wasn’t enough, the raiding Saxon party obviously arrived without being noticed and was given three movement rounds before I was allowed to make an appearance with my vanguard force.

All said and done, this one seemed like a Saxon cakewalk.

The game

H. didn’t waste any time and rushed in the direction of the church at full speed. Two of his units accompanied by a leader barged into the church, giving the resident priest barely enough time to grab the crucifix of the wall and make his getaway. The rest of H.’s band decided to wait outside and keep watch for the inevitable arrival of local Briton response team.

IMG_1206

IMG_1207

IMG_1212

In my first turn I was allowed to deploy only three out of six of my bands and opted for leaving the peasants behind. Thus, my hearthguard and warrior bands became the first wave, while the levy brought up the rear. The warriors moved very quickly… as it turned out, some of them were too quick for their own good. Unwisely, my two warrior groups rushed ahead of the hearthguard elites (not very odd if you think about it, chainmail isn’t made by Nike!) and had barely time to set up a shieldwall (very nice card!) before they were jumped by H.’s horde of elite troopers. The fight was brief, but decisive nonetheless – five out of my twelve warriors were unceremoniously butchered before the rest broke rank and scurried away, followed by scornful Saxon yells. Round one of the contest went without a shadow of a doubt to H.

IMG_1219

IMG_1223

IMG_1224

Things were about to get worse as my peasants froze in their tracks by the sight of a single group of Saxon warriors appearing in front of them. I had the advantage of numbers, but peasant levies are really like lambs being led to the slaughter when confronted by better troops. Having already suffered five casualties, I was unwilling to take any chances and a confidence-busting shieldwall was promptly set up. This act gave my peeps decent protection, but also effectively immobilized them as levies in sheldwall can only move 1D6 inches and only straight forward. In other words, my force was now split in two!

By the same time my decimated warriors found their way back to my hearthguard group and formed another shieldwall. This formation then proceeded advancing toward the Saxon horde in front of them, me fully intending to charge the enemy as soon as I was close enough. H. would however have none of it. With peasants cowering behind their shields, he swiftly moved the group that threatened them into perfect position for a flanking attack in case I would engage his main host. In response, I broke up my formation and rushed toward the H.’s flanking group with my hearthguard warriors. Imagine what… the sneaky git played a card of his own, allowing his exposed rabble to scurry away all the way back to his main group of warriors!

IMG_1228

In next turn the starring match was resumed – H.’s force consisting of his chief, another leader and fifteen warriors vs. my host of chief, another leader and eleven warriors. Numerical advantage was at H.’s side. Furthermore, I had blown my card hand in previous rush. On the other hand, my guys were protected by their shieldwall. Saxon standoff, anyone?

While the events above took place, the Saxons in the church frenetically looked for the loot and apparently couldn’t find anything even remotely shiny!  The condition for finding the loot were two rolls of six on three dices they had available to them (one dice each for two groups and one for the leader. Five rounds into the search… not a single six was rolled. Then… boom… first one, then another result of six and the Saxons were good to go back home.

IMG_1216

Personally I was more than ready to say ‘Good riddance and may your boat leak like a sieve’ at that point – the cost of breaking through the mass of warriors in front of me seemed to high. H. could have made clean getaway, but the temptation of superior numbers must have been too much for him. Even as his looting party run away with the booty, he charged my formation… and was soundly repulsed. Strength of the shieldwall proved its superiority yet again and the Saxons bounced back, leaving three of their comrades dead on the field.

IMG_1230

IMG_1233

This proved to be enough excitement even for H. and we agreed to call it a day.

And so, the Saxons won again, giving H. enough hard cash to pay off his boss and advance on Saxon social ladder if he chooses to do so. Perhaps even more importantly, the bastard is becoming famous and will have two additional warriors in his next visit to Britain.

I should have slaughtered his host when I had a chance. Luckily there is always the ‘next time’!

Musings after the battle

Two note-worthy observations; First of all, this game was perhaps the most smooth-flowing and ‘logical’ I have ever played in all my wargaming years. The rules are rock-solid, simple to understand, easy to remember and very clear in most circumstances. This in turn allowed us to play in extremely rational manner. Both H. and I constantly evaluated pros and cons before committing to violence, which is a phenomenon I haven’t seen in many games.

Second, and I guess it’s a repetition of my previous opinion – the campaign setting makes all the difference. Both H. and I agreed in the opinion that if it weren’t for the possible future consequences, we would not hesitate to try to beat each other into pulp. But since the consequences of a defeat carry a potentially disastrous penalties, both of us acted much more carefully than we’d do in a ‘one off’ scenario.