Showing posts with label Ruleset review. Show all posts

June 17, 2014

Those pesky victor formations

One thing in Check Your Six that I have noticed players have notoriously problems with is formation flying. V- or Vick-formations seem to be especially difficult to master. This post is intended to give couple of pointers that will hopefully make this task a bit easier.

First, let’s start with the rule itself. In CY6, airplanes can fly in formations and usually start in formations at the beginning of the game. The rule is actually quite simple – every formation has a formation leader and one or more wingmen. When in formation, only the move for the leader needs to be plotted. Once the leader is moved, the wingmen can use any turn manoeuvre turn available for their speed to move into the area defined as formation area. It’s starts at the hex where flight leader ends up and stretches in a diamond shape area six hexes deep and thirteen hexes wide (see quick reference sheet available at Check Your Six Yahoo user group for picture).

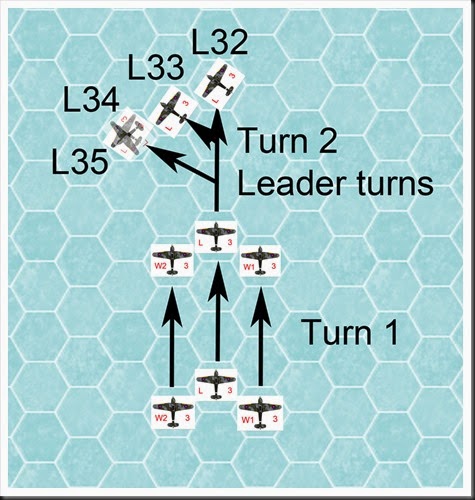
The difficulty of keeping a vic formation occurs when the leader makes a turn and especially if it’s a sharp turn. This means almost inevitably that one of the wingmen falls out of formation. The reason for it is quite simple – in the turn when leader makes the turn, all airplanes are flying at the same speed.

Same speed

Picture above shows a formation of Hurricanes. In Turn 1 all airplanes fly straight forward with speed 3. In turn 2, the leader makes a left turn. There are four possible manoeuvres and all of them will force wingman W2 to select a manoeuvre that, while keeping it in formation, will place it in very difficult position if he’s to keep formation in turn 3. The wingman W1, while mostly being able to stick in formation for at least another turn, will also have no choice but to get out of it’s assigned position in turn 2.

In real life, keeping the V formation was a difficult task in itself and because of that the formation was abandoned in favour of much more flexible rote formation. The difficulty with V formation is well represented in CY6, but it is not impossible to keep it within the constraints of this ruleset. To be able to do that you need however to plan one turn ahead and take advantage of the rule that allows wingmen to fly with speed one factor higher or lower than that of formation leader.

Adjusted speed speed

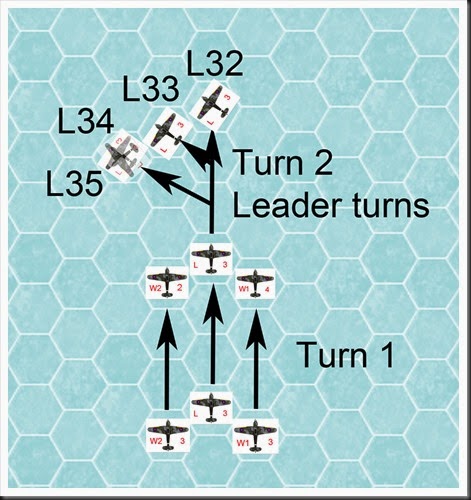
The situation in this picture is pretty much the same as in the first one. The only difference is that wingman W2 reduced his speed to 2 after first turn, while wingman W1 increased his speed to 4. The effect of this is apparent for anyone with manoeuvre chart for Hurricanes. For example, if the flight leader chooses to make turn L33, both of his wingmen will be able to stay in position. L32 and L34 will be a bit more difficult, but both wingmen will be able to keep up and get back into position in next turn. L35 is still problematic and if it’s necessary I’d consider announcing breaking formation at the start of turn 2.

Variations are also possible. For example if leader chooses L34, then probably the most optimal speed adjustment for wingmen is an increase to 4 for W2, while W1 stays at 3. This will give you a possibility for making an ‘overlap’ resulting in a switch of positions between W1 and W2, which in itself is historically incorrect, but which makes restoring proper V-formation in turn 3 quite easy to achieve.

February 03, 2014

Double-dipping ACW

After using ‘They Couldn’t Hit an Elephant’ exclusively for my ACW games for last couple of years, taking the plunge and trying out another ruleset wasn’t an easy decision. At the same time, as I mentioned in my post about the re-fight of the action at Shiloh Church, I’ve reached to a point where I was ready to try something new. Thus, enter ‘Black Powder’.

‘Black Powder’ has been around for couple of years now and I’m sure that it has been reviewed and analysed to pieces on other sites. Therefore, it hardly needs an additional introduction here. Instead, I’ll try identify its pros and cons in a comparison with ‘TCHAE’.

The game
Since the primary purpose of the game was to give ‘Black Powder’ a good work-out, I put together a fictional scenario with one side acting as numerically inferior defender holding excellent defensive position. The attacker, enjoying almost double numerical superiority, would be challenged not only by the opponent holding high ground, but also by quite rotten terrain – woods, gullies, a stream, swamps and build up areas. In other words, I took out all my terrain and tried my best to put together the nastiest possible terrain configuration allowed by my collection.

In tests of this type, I don’t care much about victory conditions, but for the sake of argument I arbitrarily decreed that all three hills in possession of the attacker would gain him a decisive victory, two hills granted minor victory, anything else was a defeat.

How it played

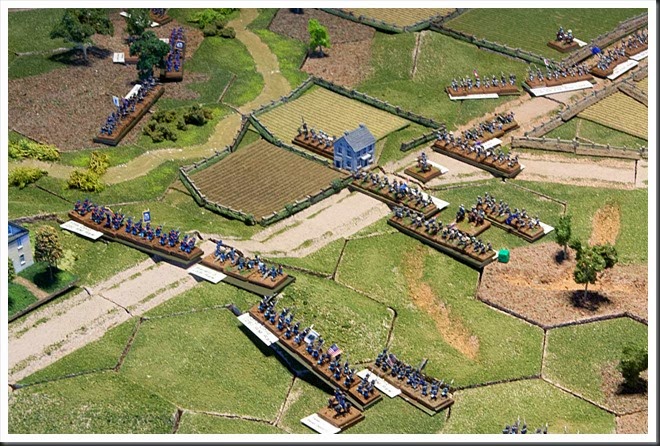
L., having graciously accepted the command of the attacking Confederate force, started out of board. His brigades were to enter in succession along the two two roads crossing the field of battle. It took but a couple of rounds for one important fact to dawn on us - the importance of command ratings of individual brigade commanders revealed itself. Commander activation in ‘Black Powder’ is based a roll of 2D6 against officer’s command rating, with the goal of rolling equal to or below that value. Dice result equal to or one below command rating allow single activation of units, while better results allow up to three activations. As it turns out, I decided to give all commanders rating of 7, which in practice means about 50 per cent chance of success… which in turn is quite similar to the success rate of unit activation in TCHAE with single ‘Tea Break’ card in the deck (if it’s played long enough Ler). Thus, somewhat ironically, the initial phase of the game reminded starkly of what both L. and I was used to see on the ‘TCHAE battlefield’ – Confederate advance was slow and spasmodic. Nature of the terrain that the rebels had to negotiate didn’t make things easier for L’s sluggish advance.

Over the course of the game, difficult terrain combined with rather mixed success rate of L’s activation rolls caused his units to become spread out along the roads and hinterland. This more or less negated the advantage of his superior numbers. At the time his foremost regiments finally came into contact with opposition, they were unsupported. Nevertheless, L. chose not to waste any time and he threw his regiments against my centre and right flank without any delay. Long range fire of my light artillery batteries was more or less ineffective, which was encouraging for this course of action. However, as soon as L.’s rebels came into small arms range, they became quickly embroiled in intense firefights and more often than not, disrupted by increasingly effective fire of Union troops. After a couple of rounds, as the effect of this two-way fusillade  started to take its toll, another conclusion could be drawn about ‘Black Powder’ – it doesn’t take much to simply blow away complete regiments in this game, especially if one enjoys a bit of luck as I did at that moment.

Following sequence repeated itself in both places where L. attempted to close on my position – as his foremost regiments came into range of my small arms, they deployed into line and engaged the enemy while remaining regiments attempted to deploy on their flanks. Unfortunately, L’s front regiment was invariably opposed by two of my own regiments and supporting artillery, which at that range became rather more effective. Ensuing firefights resulted on all occasions in either a throwbacks or complete destruction of confederate regiments. Compared with TCHAE where individual regiments are usually very resilient and can at least initially withstand being battered by superior numbers, units of regimental size in games governed by ‘Black Powder’ seem to be more brittle and give way much quicker.

Having realised that fact, L. subsequently exercised a bit more patience, which paid off couple of turns later when he mounted successful charge against my position on the big hill in the centre. The result was something of a mixed bag – I lost an artillery battery which auto-broke (!!!) and my line was pushed back. This feat did however cost L. another regiment shot to pieces and removed of the table.

This rebel charge was the high point of the game. We did continue for a couple more rounds, but with L.s continued bad luck in his activation rolls for brigades on his right and Union troops executing a veritable massacre on his disorganized troops attempting to cross the stream on the left, we decided to break off the engagement at at that time.

IMG_1347Start of the game

IMG_1349Confederate troops preparing to charge centre of Union line. A fumble by Rebel CinC delayed this action by couple of rounds.

IMG_1350Situation in the middle of the game – disjointed attacks by Rebels at different points of Union line, all defeated by concentrated firepower.

IMG_1353Throughout the game, Federal troops on the left flank poured in salvo after salvo into the flank of Confederates in the centre. Rebel attempt to carry their position was disjointed and easily repulsed as individual regiments were thrown into disarray and repulsed by accurate rifle fire.

IMG_1367Climax of the game – brave rebel charge up the middle hill.

Musings after the battle
Even based on this single trial game, it is safe to say that ‘Black Powder’ is a completely different animal than ‘TCHAE’. The most prominent difference lies of course in the fact that ‘TCHAE’ is hard-wired for a American Civil War. ‘Black Powder’ on the other hand is obviously something of a toolbox, a Jack all trades, trying to cover long time-span and conflicts of different nature. The toolbox aspect of this ruleset is perhaps most evident in its command&control system relying on 2D6 rolls against command rating of individual brigade commanders. In this game all our commanders had a rating of 7; a simple adjustment of this one variable to 8 increases the chance of brigade activations from around 50 percent to close to 75 percent – a difference which would most probably provide a game with completely different tempo.

Another difference between TCHAE and Black Powder can be found in how the two rulesets treat individual regiments. Once again, the morale, behaviour, movement rates, formations, equipment of regiments in TCHAE are tailored for ACW and only for ACW. ‘Black Powder’ on the other hand is far more generic, with basic ‘out of the box’ units being rather bland and undistinguishable from each other. The ‘flavour’ of a particular conflict is added to them with help of by around 30 optional special rules. Those rules can be “bolted on” to individual units giving the units special abilities alternatively handicapping them in varied ways and making them more ‘true’ for the period or even individual battle. In our game we had a bit of fun and rolled a D6 for each individual unit. On a roll of 6 the controlling player was allowed to select one characteristic for the unit, on a roll of 1 the opponent had that pleasure. The effects of our choices on the battlefield were quite amusing on a couple of occasions. I think that this feature of “Black Powder”, when treated a bit more seriously, can provide a bit of entertainment all in its own right; finding the right combination of characteristics for a particular period or specific battle could be quite a challenge.

The most obvious difference between TCHAE and Black Powder is easily identifiable – individual regiments are in Black Powder infinitely more fragile than in TCHAE. Not only do they seem to break quicker, but when they can break in a blink of the eye. In TCHAE, the commander has plenty of time to spot and react to a crisis. In Black Powder a gaping hole in the line can appear due to a single bad dice roll. This difference is in my opinion very important and will probably take a while for me to get used to. I also dare to say that because of this characteristic, Black Powder will render very different games than TCHAE. I suspect that once command rating of the leaders is increased to 8 or even to 9, the games with ‘Black Powder’ will be significantly quicker and much more dramatic than TCHAE games. This means being able to play even large games to a conclusion in a single evening, something that so far has been a rarity in my wargaming ‘career’. On the other hand, I can’t help but worry that these potentially fast and furious games won’t have much in common with historical ACW battles , which more often than not were slow grinding affairs.

In other words… further testing is required and will take place in near future!

September 30, 2013

First WhifF of Black Powder

A lot of ‘firsts’ this month, it would seem! Couple of weeks ago I’ve gotten the opportunity to get the first taste of ‘Bolt Action’ and last weekend it was its sibling’s turn to try to impress me.

Now, ‘Black Powder’ has been around for quite some time, and a compulsive ruleset hoarder that I am, I have acquired it pretty much as soon as it was released. Since its arrival at my doorstep, it’s been gathering dust on my Ruleset bookshelf until last month, when L. discovered it along with the ‘Raid on St Michel’ mini-campaign booklet from Caliver Books. At first sight, it’s a rather attractive combination and Unlike me, he has the miniatures and terrain suitable for the period and seeing an opportunity to use them, he quickly commandeered both books.

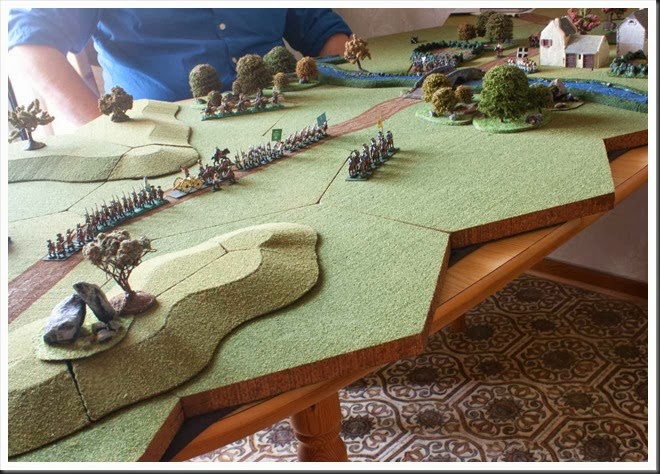
It took an additional couple of months before L. was ready with  his preparations, but last weekend T. and I were summoned to face off in initial clash of the above-mentioned campaign. Once at L’s place, we received our orders; I was to assume command of a vanguard force tasked with a quick capture of a bridge, thus making it possible for the rest of the army to get over the river. Three infantry regiments of various quality, two cavalry regiments, an artillery battery and some light infantry rabble were made available for me to complete the task. T.’s force was nominal – two infantry regiments, small cavalry force (reinforced in the middle of the game) and an artillery battery would try to do their best to stop me in my tracks.

The game

I won’t spend much time on the game itself – it was a small affair and both T. and I knew that its outcome was pretty much a foregone conclusion, mostly due to my superior numbers. At the same time, for the very same reasons, the scenario was a perfect test bed for us getting acquainted with the ruleset, which previous to this game was completely unknown to both of us.

IMG_1098

Let’s make a rather long story short… My advance toward the bridge was veeery plodding, in equal parts thanks to ‘Black Powder’s’ rather arbitrary unit activation system and dismal quality of my commander. This gave T. plenty of time to bring up his paltry force into position. After a while both sides faced of each other over the bridge, which caused my commanding officer to enter a comatose condition. Turn after turn, I failed to activate even a single unit. It is therefore hardly surprising that when the dice finally allowed me to act, I sent my best cavalry regiment over the bridge with every intention of smashing into smithereens whatever stood in their path.

IMG_1103

Well… off they went, only to be promptly disrupted by a well aimed musket salvo from T.’s militia while still on the bridge. A long delay and couple more disruptions followed, but when I finally reached that pesky regiment barring my way, I had all reason to believe that I would instantly punch my way through their lines. Imagine my surprise when the melee that followed spanned over five (!!!) rounds, before being decided in my favour. While that rather odd clash of arms run its course, L. was generous enough to allow me to push my infantry to the other side of the bridge, even though it was really blocked by my cavalry, still stuck in column formation.

IMG_1104

Once my infantry was on the other side of the river, the game was in most respects over and done. T., unable to stop me, ordered a slow retreat for those of his units which were still on the field (that stubborn militia regiment, once defeated, actually ‘vaporised’ into thin air) to the high ground nearby and I was quite satisfied with just the fact that I was finally in possession of the bridge. It was as good time as any to call it a day.

Musings after the battle

Just like in other aspects of life, when it comes to rulesets, sometimes things just “click into place” pretty much from the start. For me “Check Your Six” and “I Aint’ Been Shot Mum” are perfect examples of such rulesets – things just immediately felt right! Then there are rulesets that take a little time to get used to before their potential can be properly appreciated – “Dux Britanniarum” is the most recent experience of this type for me. And then there are rulesets that give you that feeling that something just doesn’t fit. I’m afraid that “Black Powder” may very well be one of those rulesets for me.

Now, let me say this – it is far to early for me to make an authoritative judgement of any kind regarding “Black Powder”. I am yet to read it (once in L’s hands, they are surprisingly hard to reclaim) and we have played only a single game with it (with all misunderstandings and messed up rule interpretations such games are usually plagued with). Furthermore, the scenario we played was rather small and if I understand things correctly, the ruleset is intended for large engagements. In other words, I am hardly in a position where I can dismiss “Black Powder” as a bad ruleset. Quite contrary, I am happy to say that in some respects “Black Powder” is rather likeable. Its core mechanics seem to be simple and based strictly on D6 dice, which makes the ruleset almost instantly playable for most people with basic wargaming experience. Also, it seems to be rather quick – a quality claimed by many rulesets, but provided by far fewer!

At the same time, I can’t disregard the fact that I found some of the rules that are defining for the “feel” of “Black Powder” to be either annoying or worse, not really “anchored” in my perception of black powder era battlefield. Until I actually read the rules and try to grasp designer’s philosophy, I won’t go into further details of that statement. But there is no denying the fact that first “Black Powder” whiff of mine left me rather underwhelmed.

Next game in our campaign is to take place in a couple of weeks. Rest assured that next post about “Black Powder” will be posted shortly afterward.

June 30, 2012

Review of Morituri Te Salutant

In search for perfect gladiatorial ruleset

MTSSome two years ago, tempted yet again by my chronic OLS-syndrome ('Oh, look... shiny!!') I impulsively bought a bunch of gladiator minis from Crusader miniatures. Of course the figures all by themselves, nice as they were, were pretty useless without a ruleset. And so, the hunt for yet another 'holy Grail' begun. In other words, I made a quick search on TMP and based on repeated recommendations of fellow wargamers, I decided that ' Morituri Te Salutant' is probably the best fit for my expectations. The fact that the ruleset is available as downloadable PDF from Black Hat Miniatures made the decision even easier- I'm a sucker for instant gratification of rulesets in PDF format.

Essentials of Morituri Te Salutant

Morituri Te Salutant (I will call it MTS from now in) covers single combat, combat with multiple participants, fights against animals and even the rather uncommon combat between mounted gladiators. It provides profiles for a grand total twelve gladiatorial types and four animals. In other words, whatever type of Roman festival tickles your fancy, you can recreate it with help of this ruleset.

Combat and movement mechanism - the obvious heart of a gladiatorial ruleset - may give an initial impression of complexity, but is in fact very simple. It uses hexagons for movement, facing, zones of control and ranges. Each gladiator type has a specific list of "moves" from which player can select his single action of the turn. Once everyone has secretly picked their action, it is time to decide the order in which gladiators will act in current turn. This is done based on the initiative for the turn, which is calculated individually for each participating figure. Initiative consists of three elements - basic initiative of the gladiator type (the heavier gladiator type, the lower initiative), initiative factor of selected action (which varies depending on complexity of the move and possible damage the move can cause) and finally a dice roll intended to add an element of randomness. In one vs. one combat, player with initiative can decide whether to go first or second, in combat with multiple participants, the sequence follows the initiative order.

Actual combat is resolved in two steps. First, provided that the opponents are in range, selected moves are checked against each other on a combat matrix. Some moves will cancel each other out with no possibility for damage, while other will provide one of the combatants with an opportunity to strike a damaging blow. On occasions where both combatants have a chance to hurt the opponent, the gladiator with higher initiative gets to strike his blow first.

There is a total of fourteen attack types (not counting those available only to the animals), so there is a lot of variation. Tactical flexibility is added by the fact that most "moves" also have an alternative, which can be switched to if the original selection is disadvantageous or simply doesn't make sense. Also, selection of some moves can prohibit selection of other moves in following turn.

If combat matrix indicates that a damage can be achieved on an opponent, the actual effect is determined by a roll of a D20. Selection of the "move", armor (there are four degrees ranging from unarmored to heavily armored) and condition of the opponent (for example down on the ground or stunned) dictates the difficulty of the strike and how severe damage the damage will be, if the attacker strikes true. The higher the dice roll, the more damage is inflicted by the successful attack.
Damage model is rather nifty. If a blow is finds its mark, the resulting injury can be of five different degrees of severity: stun, nick, cut, wound and a immediately mortal blow. Severity of that last one is self-explanatory, stuns are temporary, the remaining three render the recipient successively less effective - for example his initiative may be lowered or it may become more difficult for him to strike a blow.  Depending on state of the gladiator and severity of damage, there is also an increasing chance for him falling down to the ground.

It is worth pointing out that there are no hit locations in MTS. Instead, different types of damage are cumulative - three nicks result in one cut, three cuts render one wound, three wounds kill the hapless victim. In other words, if a player feels especially cruel, he can dispatch his opponent through 'death by thousand cuts'... or more precisely 'death by nine nicks'.

The “chrome”

Beside the basic rules covering the combat, the ruleset covers all the aspects of gladiatorial combat, such as begging the crowd for mercy, possibility to trip over bodies of other combatants, fumbling and dropping/picking up equipment from the ground.

The most important "add-on" consists of a truly superb set of campaign rules, which allows the players to run their own gladiatorial school. Campaign game provides a very nice setting for the fights - gladiators that manage to survive gain experience and special skills and most successful can become very formidable beasts indeed. Furthermore, a campaign adds a rather ingenious economical aspect to the game, which makes it important not only to win the fights, but also to profit from them. Betting on individual fights and trading gladiators is not only all allowed, but encouraged.

How does it really work?

On paper,  MTS offers me everything I could ever wish for from a gladiatorial ruleset. In practice, my experience turned out to be of somewhat mixed variety. So far, I've made two attempts at running a campaign with two friends of mine. Both of them run out of steam after first session. The meta-game aspects work brilliantly - it is great fun to judge chances of one's own gladiators in different bouts and decide whether to participate or wait for better chance. I imagine that this part of the game becomes even more entertaining if the campaign gains momentum, thus allowing some gladiators to become more skilled, valuable and perhaps most importantly, treasured favorites of their "owners". I would also imagine that this part of the game only becomes better with higher number of participants.

Unfortunately, the "fighting" part of the ruleset had so far failed to impress me. My main issue is connected to the randomness of the combat system. With its wide selection of attack moves and interesting features such as different move "speeds" influencing the initiative or possibility to switch to an alternate action, one would expect that a player who'd taken time to learn the finesses of the system should gain an advantage. The games I've participated in have so far failed to support this expectation and left me with the impression that despite all of its finesses, combat system of MTS is in essence an advanced variant of 'rock, paper, scissors'-game combined with a dice rolling element.

Based on my admittedly limited experience, fights in MTS seem to come in three different variants. Some fights end abruptly with clean thrust through the heart of one of the gladiators. Other games can dragon and on, with neither of the combatants being able to make even a scratch on the his opponent. Most often though, the fights developed in easily recognizable pattern, with some random nicks rendering one of participants less effective, which in turn, sooner or later gave his opponent a chance to score a disabling blow.  The key word in all cases is "random" - as far as I could see, there was very little skill involved in gaining the advantage, it was the lucky dice roll that decided who gained the upper hand.

Thumb up or thumb down?

I must admit that MTS didn't live up to my rather high expectations. On one hand it is a marvelously complete and imaginative ruleset, covering wide variety of gladiator types and providing a superb campaign setting for the fights in the arena. On the other hand, I can't say that I am overjoyed with its combat system relying to such high degree on pure, dumb luck. It may very well be the fatal flow that will finally make me dump MTS into the paper bin... but not just yet. The reason for my reluctance of abandoning it is quite simple - despite my critique, it is still the best gladiatorial ruleset I have found so far.

February 04, 2012

Troops, WEAPONS & Tactics – First Impressions

In this post I refer on several ocassions to the ruleset “I Ain’t Been Shot, Mom”. It is important for me to clarify that all of those references are done in respect of second edition of that ruleset. I am aware of the fact that a third and strongly redone edition of IABSM has been recently released by Too Fat Lardies. I am however yet to aquire that updated version and am thus unfamiliar with its contents.

Troops, Weapons & Tactics or TW&T is a ruleset for low level combat during World War 2 from one of my favorite game designing companies, Too Fat Lardies. If you are thinking “But Too Fat Lardies already have published a rather popular ruleset for low level combat during World War 2, it’s called I Ain’t Been Shot Mum”, then you are correct. What’s more, if you after a quick glance at the contents of TW&T say “Heck, this reminds me of IABSM quite a lot!”, you will also be 100% correct. The fact is that it is hard not to regard TW&T as a very close sibling of IABSM and those who are familiar with IABSM will immediately feel right at home with TW&T.

TW&T and IABSM - what’s the same?
For those not familiar either of the two rulesets, here’s a quick overview of main features shared by both of them:

  • Card-driven game mechanics. Each unit and leader is represented by his own card - once a card is drawn, unit or leader is allowed to act. Additional cards depict national characteristics, random events, etc.
  • All units start the game as unspotted and are represented by blinds (generic markers). Units under blinds enjoy some advantages, but operate under certain restrictions. Individual units are deployed on the table either voluntarily or when they are spotted by enemy.
  • Basic actions for units are spotting, movement, spotting.
  • Every unit has an inherent number of so called initiative dices, usually 3D6. Those dices are used by active unit to perform one or more actions when unit’s card comes up or if it’s activated by leader. For example if unit wants to move short distance, two out of its three dices can be rolled, the result indicates the distance in may move. One initiative dice remains to be used for something else.
  • Casualties are represented by kills (one kill = one figure) or by suppression points (called wounds) that affect the effectiveness of the unit.
  • Leaders, aka “Big Men”, may be used in different ways, for example to generate momentum for own side’s actions, improve effectiveness of individual unit or rally a unit by removing their “wounds”.
  • A game turn ends when a so called “Tea Break” card is turned over. When that happens, all units that didn’t have their card played or have unused initiative dice may perform a limited set of actions. Once that’s done, the turn ends, all cards are reshuffled and next turn begins.

TW&T and IABSM - what’s the difference?
As far as I can see, there are three things that make TW&T into a beast that is significantly different from IABSM.

The first of those differences lies in the way infantry units are represented on the table. Both rulesets try to depict low level engagements, with squads as basic manoeuvre units. However, in IABSM the representation of units is rather generic - a platoon consists most often of three or four squads, with no distinctions between them except perhaps number of soldiers in each of them. In TW&T, the platoons and squads are modelled in much more detail. Platoons consist not only of its squads; their HQ and support elements are also represented as separate entities. Squads are split into their sub-elements (most often squad leader as a Big Man, a rifle section and automatic weapon section). Squads of different nationalities can therefore be differentiated better than in IABSM. For example, German squad with MG42 LMG and bolt action Mausers has different characteristics than American squad with M1 Garands and a BAR as squad support weapon. Thanks to the higher “resolution”, players can now act more realistically with their squads and apply same doctrines that were used in real life.

This low granularity of TW&T is also reflected in changes of the card activation system. In IABSM, a card usually activated an individual leader or a platoon, thus allowing the user to act with all of its squads at once. In TW&T each squad has its own card.

Role of Big Men in TW&T is very different from that in IABSM. In IABSM, they are an abstract construction derived from qualitative differences between command&control of different units. Those differences are handled mainly by making different number of Big Men available on the table, but the ruleset does not attempt to recreate real command structures. In TW&T on the other hand, Big Men are directly anchored with “reality", so number of officers and NCO:s (i.e. Big Men) on the table is exactly the same as it would be in real life. Each squad has its own leader, each platoon has a platoon commander and so on.

The “improved realism” of command structure in TW&T doesn’t end with correct depiction of command structure. Each Big Man in TW&T is graded in four levels, with level 1 being the lowest. When Big Man’s card comes up, he is then able to perform at minimum one, but possibly more actions in that turn. Actions available for Big Men can be split into two groups - personal (such as moving from squad A to squad B, directing fire of a machine gun or giving a pep talk to a rifle section under heavy fire) or unit activations (making them use their dice for spotting, shooting or movement). His chance for multiple actions and how many of them will be available at the time his card turns up are decided by his level in combination with luck in the draw of cards. I won’t go into details of this game mechanism, but I must say that it is rather ingenious.

Last noticeable difference in TW&T when compared to IABSM lies in the fact that when a unit card comes up, it can shoot and spot, but is only allowed to move if it is activated and ordered to do so by appropriate Big Man. In other words, squads cannot normally move on their own initiative. This seemingly small change, in combination with the way Big Men operate in TW&T, has in my opinion dramatic implications on the gameplay. In fact, I would like to go as far as saying that thanks to the introduction of this restriction, the “missing link” of IABSM has finally been put into place.

Let me explain what I mean. My understanding is that the main purpose of Big Men both in IABSM as well as in TW&S is for them to act as a motor providing the momentum for the units under their command. This goal (once again in my humble opinion), was never fully achieved in IABSM, mainly because of the limitations imposed on Big Men in that ruleset. However, in TW&T the Big Men are not only the sole “source” for unit movement, but what’s even more important, the differences in leadership quality of different Big Men also have a direct impact on reaction speed and degree of coordination between different units on the table.

Testing the new ideas
Characteristics of TW&T described above had a huge impact in the test game that T. put together for us last Sunday. The idea was to have two squads of British infantry make a sudden raid on a German communication bunker defended by a small garrison of second rate troops. British side had two leaders, one of grade 4 and one of grade 3. Their opposition consisted of second grade platoon with three squads without any automatic weapons, an MMG position and a couple of AA-guns. They were led by four Big Men, all of grade 2.

Our small test run turned out to be a perfect illustration of TW&T:s strenghs. Despite being inferior in numbers and being activated less often, British platoon was able to coordinate its actions much better than the Germans and overwhelmed opposing units with fire and manoeuvre one unit at a time. It also became clear that the activation system for Big Men has a bit of a nasty streak built into it - because of the way that game mechanism works, Big Men of higher grade “soak up” possibility for multiple activities for their counterparts of lower grade. This fact put the Germans at additional disadvantage, because German Big Men never had a chance to grab initiative (in form of multiple actions) and form a coherent defensive line before their individual squads were defeated.

WP_000032 Not the best picture quality, had to use my mobile phone

WP_000038 British patrol entering the enemy territory

WP_000036 Nearing the objective

Different strokes for different folks
My personal first impression of TW&T is mostly very positive. First of all, I am a huge fan of the stuff that comes from Too Fat Lardies and I always liked IABSM, even despite the flaws that I see in that ruleset. TW&T follows in its predecessor's footsteps, but manages to avoid the issues that always bothered me when I played IABSM. Overall, the game design of TW&T seems slicker and more coherent to me than that in second edition IABSM.

T. on the other hand didn’t like TW&T at all. His opinion was that the increased detail in depiction of the squad structure and its equipment didn’t contribute much to the fun, but made the game “plotty” and slow. He also expressed a worry about games demanding too much time and frequent down-times for “not active” players, especially in larger games. His objections against Tea Break card also remained unchanged (even though we played with two of those cards in the game deck).

In other words, the verdict over TW&T seems to be a one to one split decision. Considering the fact that I currently don’t have neither figures nor terrain for WWII games, I probably won’t have opportunity to play more of TW&T for at least a good while. But it may very well be so that TW&T will be the final straw that breaks my resistance against ordering a bunch of those 10mm Pendraken minis I’ve been glancing at so often over last couple of years.

Another painting project, in yet another scale? Oh…. thanks for that one, Too Fat Lardies! :-)

February 28, 2010

Battle of Belmont – take two

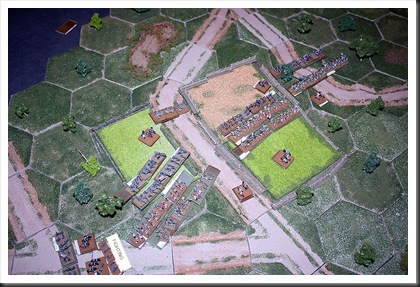
Last Sunday I had an opportunity to run Belmont again. I made small adjustments to the terrain - addition of one more row of hexagons in front of Confederate camp was the most significant – but otherwise it was exactly the same setup as in previous game.

IMG_0083-1
Terrain setup for second attempt at Belmont

More significant changes were made to OOB:s – I decided to drop rating of all units one step, which meant that almost all regiments became Raw. This is the lowest quality class in TCHAE and as it turned out, this change had significant impact on the game.

Since the first game showed clearly that the Union side had a very tough objective in this scenario, I asked L. to make a repeat appearance as general Grant. Confederate army was this time run by H. and P. taking one brigade each. H. also assumed the role of confederate CinC, general Pillow.

Different players – different battle

Second run of Belmont scenario was quite different from the game between me and L. Initial dispositions of Confederate forces were however rather similar to mine. The only difference of importance was the fact that H. decided to place his larger brigade in the field in front of the camp and retaining P.’s smaller brigade in the camp. It did however signal to L. that this time around the Rebels would probably be more agressive in their defence.

IMG_0085-1
Union brigades deploy for assault

L. remembered the difficulties he run into in his first attempt at Belmont and decided to concentrate his scant forces before assaulting the rebel line confronting him in the field. I have to say that his attack definitely had a proper ACW feel to it. He put two regiments in front, two regiments as supports, allowed time for short artillery shelling that disrupted one of raw Confederate regiments and then smashed his infantry into Confederate position in the field. Southerners did their best to stop that advance and did cause some casualties on the Union regiments, as they closed the distance. In the end however, the forward momentum of both Union brigades was unstoppable. In a matter of two turns, Confederates lost their artillery battery (more on that later), while all of their infantry was routed and running toward their fortified camp.

IMG_0091-1
Crisis in Confederate line

Then something strange happened – despite the complete chaos in the rebel ranks, a single round was all it took for their officers to stop the seemingly unstoppable rout. Somewhat unfortunate draw of cards (if seen from Union perspective) and a very opportune arrival of additional Rebel regiment helped to stabilize the situation even more. Regardless of the intervention of 'Lady Luck', all of us were very surprised by TCHAE allowing such easy recovery from a situation that seemed irrecoverable just two turns before.

By that time our game was nearing its end and it was quite evident that despite L.’s initial success, he would not be able to break the Confederate lines before the appearance of the rest of their reinforcements. H., emboldened by that knowledge and the fact that P.’s brigade finally came up to protect his right flank, decided to make the final effort before we called it a day. He threw his recovered regiments into an all or nothing assault against battered Union regiments, with mixed results. His raw units in the center failed miserably to make an impression on L.’s single regiment of better quality and routed once more. Assault on left flank fared much better and managed to push the blue line back in disarray.

IMG_0095-1
Final clash of the day

IMG_0096-1
End of the game from another perspective…
Just because I like that picture. :-)

All of us knew however that this last action of the day was unnecessary and should be considered more as a rules test than part of the game. The game was decided when initial Confederate rout was stopped on a dime – an event that for a moment made me doubt if I wanted to continue to use TCHAE as the ACW rules set for our group.

Musings after the game – improved and this time far to long

Until our last game, I was rather enthusiastic about TCHAE. Now however, I do feel that TCHAE does deserve some serious criticism.

Remember that Confederate battery that was lost in the initial contact with Grant’s force? What happened there was that the rebel battery was in front, while supporting infantry regiments were behind it. In game terms, the battery took the full brunt of Union assault. Despite my best efforts, we couldn’t find any rules that clearly covered a situation where artillery received infantry charge all on its own. In the end, after looong deliberations, we managed to interpret relevant rules and came to the decision that the battery was overrun and its supports had to retire. However, if I am to be perfectly honest, it was more common sense than the rules that guided us to this conclusion. Later, I posted a query about this issue on TFL Yahoo Group, which usually is great at clearing up this sort of questions. This time around, my question seemed to leave most members stumped. From that fact alone, I draw the conclusion that the part of TCHAE that deals with assaults could use some editing and additional explanations.

My main criticism is however reserved for the way in which TCHAE handles routs and rallies. Sunday’s game was the first time we had the opportunity to “study” TCHAE’s interpretation of this significant part of the game and unfortunately we weren’t very satisfied with what we saw.

Now, let me be perfectly clear here – I am fully aware that opinions of this sort are highly subjective and will differ widely from player to player. For that reason, let me explain how I understand the concept of rout: it is a state where majority or all soldiers of a unit no longer have the will to fight and are mainly concerned with their personal safety. Unit cohesion is dissolved and authority of the officers is reduced or maybe even disappears completely. In simple terms, units in rout run for their lives.

In game mechanics terms, it translates in my opinion into two things – any contact between routed unit and organized enemy reinforces the rout and will in the end lead to complete dissolution of the unit. Furthermore, a rally of a unit in rout state should always be unsure and under some circumstances even improbable.

The way TCHAE handles this very complex situation is very simple, if not simplistic – it is enough to spend one commander’s PIP:s (or more, if commander is beyond default command range) and the routed unit will always stop running. That’s it. If considered from my perspective, such handling of routs/rallies is highly unsatisfactory. The fact that under right circumstances, routed units don’t even have to “run”, but can be stopped in their tracks almost immediately after entering rout state, makes my concerns about the rout/rally rules of TCHAE even more serious. As for any effects of effective enemy fire on a routed unit, there simply are no rules that deal with such situations.

As I mentioned above, those “faults” gave a momentary pause to my until now unchecked enthusiasm regarding TCHAE. Does it mean that I will stop using the rules set? Absolutely not. Last Sunday’s game was in most respects a very pleasant experience. L’s deployment of his forces and his initial assault did remind me of descriptions from books about that conflict. In general terms I’m becoming more and more convinced that TCHAE is a sound rules set with great period feel and complexity suitable for our group. At the same time, I can't deny that the way TCHAE handles routs/rallies did receive substantial flak after the game and will require some serious tinkering to suit our taste.

Of course this is the opinion of just one wargamer, backed up to a degree by comments from a small group of wargamer friends. So please, feel free to agree or disagree. Also, I would greatly appreciate any help or comments in regard of rules questions in this post.

I guess that in the end, this far too long musing is yet another proof of the fact that it is impossible for a ruleset to suit all players and that we can't help ourselves to "improve" on even the best efforts of game designers. After all, what rules set survives its first contact with the players?

July 25, 2009

Review of "Heartland - the battles of Kentucky and the Tennessee" scenario book

Some time ago, Partizan Press released their ruleset for American Civil War, called “Guns at Gettysburg”. Shortly thereafter came the first scenario book for the system, called “Heartland – The Battles for Kentucky and Tennessee”. Since I am something of a compulsive collector in regard of scenario books, I couldn’t resist the temptation and ordered it almost immediately after it became available.

As it is implied by the title, focus of this book is put on the struggle for control of Kentucky and Tennessee during the early stages of the war. Engagements in the book take place between November 7th 1861 to October 8th. Each scenario consists of a short description of general situation before the battle, scenario objectives, detailed orders of battle on regimental level (including number of figures per regiment and classification of the leaders/units according to “Guns of Gettysburg”), a map and several paragraphs describing the events during the real battle and its aftermatch.

Following scenarios are included:

Belmont (7th November 1861) - small scenario with six infantry regiments and a single artillery battery on the Union side and ten infantry regiments and single battery on the Confederate side. Some fortifications are required for the terrain setup.

This one strikes me as perfect beginner scenario for two players that are just starting with the period or a ruleset. I plan to use it in my next game with ‘They Couldn’t Hit an Elephant’.

Logan’s Cross Roads (19th January 1862) – medium size scenario. Union side includes ten regiments of infantry and four small batteries. They are opposed by equal number of Confederate regiments and artillery, but the Rebels also have three small regiments of cavalry.

Breakout at Fort Donelson (15th February 1862)
- medium size scenario, where a green force of eight infantry regiments supported by three batteries tries to stop a frontal assault by twelve Confederate infantry regiments, supported by two batteries. To add to the misery of the Union side, Forrest is also present on the field with some cavalry.

This one looks to me like a foregone conclusion, but I’m the sucker for last stands and will be setting it up as soon as I make some field fortifications for the fort.

Assault on Fort Donelson (15th February 1862) – small, but interesting scenario where eight Union regiments supported by skirmishers and two batteries try to breach the fort. They are opposed by nine Confederate regiments and two batteries.

Interesting scenario, but one which will put some demands on my terrain supplies. Lot of field fortifications is needed to play this one.

Shiloh Church (6th April 1862) – large scenario, in which twelve Union regiments take the brunt of initial Confederate assault during first day of Shiloh. Confederates field whooping twenty infantry regiments and six batteries.

Fortunately the terrain isn’t very complicated. If you have enough miniatures, this one could be a great weekend game.

Hornet’s Nest (6th April 1862) – second scenario based on Shiloh and largest scenario in the book. Twelve Union regiments supported by three batteries stand up to twenty-one Confederate regiments supported by whooping ten batteries of artillery.

Richmond (30th August 1862) – medium sized scenario with eight infantry regiments, two batteries and two cavalry regiments on Union side and twelve Confederate infantry regiments, two batteries and two cavalry regiments.

This one seems really easy to set up for a quick afternoon game.

Munfordville (14th September 1862) – small scenario where three Union regiments aided by some skirmishers, token force of cavalry and a single battery try to hold strong fortified position. On the opposing side are six infantry regiments, two cavalry regiments and two batteries of artillery.

Another scenario requiring a lot of fortification terrain pieces, including a blockhouse.

Iuka (19th September 1862) – medium size scenario and first scenario in the book with characteristics of a meeting engagement. Union force consisting of thirteen infantry regiments, one cavalry regiment and two artillery batteries are on a collision course with Rebel force consisting of nine regiments and two batteries.

Hilly terrain and lots of woods should make this scenario very interesting and re-playable.

Battery Robinett (4th October 1862)
– medium size scenario dealing with one of main events during battle of Corinth. Union is on the defense here with eight infantry regiments supporting six entrenched batteries of artillery. Confederates field equal number of infantry regiments and are supported by two batteries.

Another scenario where one side is entrenched, making special demands on terrain setup.

Hatchie Bridge (5th October 1862) – a meeting engagement scenario dealing with the aftermath of the clash at Corinth. Ten Union infantry regiments, supported by a cavalry regiment and three batteries duke it out with six infantry regiments, some skirmishers, cavalry and six batteries on the rebel side.

Setup for this scenario is quite original and I think it may have a lot of replayability.

Peter’s Hill (8th October 1862) – a true meeting engagement, with both sides more or less blundering into each other in an attempt to occupy high ground position. Eight regiments, two cavalry regiments and three batteries are fielded by the Union. Confederates have seven infantry regiments, two cavalry regiments and two batteries at their disposal.

This scenario definitely caught my interest because of relatively uncomplicated terrain setup and variable entry times for most of the units. I think there is a lot of potential for total chaos in this one and that’s my favorite type of scenarios.

Chaplin’s Hill (8th October 1862) – here we have a straightforward ‘bash and mangle’ affair with twelve Union regiments and two artillery batteries confronting fifteen Rebel regiments and four artillery batteries.

In contrast to two previous scenarios, this is a classic set-piece assault on formed infantry line. However, terrain layout produces some interesting problems for both sides.

Invasion - a theoretical scenario with chess-like qualities. Both sides command equal forces of six infantry regiments, two cavalry regimens, and two batteries of artillery and have to achieve similar objectives. Terrain is a mirror image of itself along a diagonal line. This one seems to be a perfect choice for a tournament scenario, if such were ever played within ACW setting.

In addition to the scenarios, Partizan Press took the opportunity to include couple of pages of extra rules for ‘Guns of Gettysburg’. This fact alone should make this scenario book a must buy for players that use that ruleset. At the same time I must add that “Heartland” can be used without any problems with any regimental ACW ruleset, since figure ratios are provided in the book. Additionally, conversion table for Johnny Reb 2 should make it particularly easy to use “Heartland” for players that still play this classic ruleset.

What about scenarios then? I hope that my short synopsis gives a pretty clear view of the content – most scenarios have OOB’s hoovering around eight infantry units per side, which means that they are playable during an afternoon. Also, there is a lot of variety in the character of the scenarios and I do believe that everyone will be able to find at least a couple of scenarios that will catch their interest. At the same time I need to point out that five of the scenarios require fortifications of one sort or another, so you better have those walls and abatis pieces ready.

Two minor negative remarks: as far as I could see, there are no instruction in regard of the table size. While I assume that the scenarios are to be played on a 4’ by 3’ table, it would be nice if it was clearly stated somewhere in the text. Also, there are some typesetting errors in several of the OOB tables – misaligned rows that can cause a little consternation.

Regardless of that, I think that “Heartland” is an excellent scenario book and can recommend it to anyone interested in the period. Considering moderate size of most of the scenarios, I also think that it is a rather good starting point for people that are just beginning to assemble their ACW armies.
June 17, 2009

Other that that, Mr. M, how was the ruleset?

Following Sunday's event, it would perhaps be a good time to write couple of additional words about “They Couldn’t Hit an Elephant”. My first impressions were confirmed – it is very playable and relatively simple ruleset. Before our game, I’ve prepared a set of two Quick Reference Sheets and a page listing possible actions for each of the players. Quick walkthrough of basic principles took about half an hour. Then we started to play and after a couple of turns, things flowed rather smoothly.

Our game also confirmed the fact that as in any other ruleset from TFL, cards and luck can sometimes make or break you. The infamous sudden death card, called ‘Coffee’ in TCHAE, didn’t bother us so much for the simple reason that I’ve inserted two of those in the deck. However, cards limiting actions of generals of certain type (‘Cautious’ and ‘Political’) can, with a bit of bad luck, still ruin the day for individual players. In Sunday’s game, player handling the Union brigade in the middle that was completely neutralized by ‘Cautious’/’Political’ card being turned over and over again just before his turn. Word of advice – be very careful with use of a single general with this attribute in your OOB, unless you dislike the player that will assume this command.

As always, some mistakes were made. The most important one in our game was the fact that I’ve forgot about the rule prohibiting use of multiple pips for movement, once a unit reached certain distance from the enemy. This seemingly small mistake made it much easier for units to get into close combat. On the bright side, my mistake may not have been a bad thing, since gave us experience with the rules that handle melees. As it turns out, bayonet charges are very unpredictable in “TCHAE” and should not be attempted by those faint of heart. At the same time, certain critique can once again be raised against the layout of the ruleset. My mistake could have been easily avoided if the ruleset made clear connection between movement rates, infantry fire ranges and the above mentioned restriction.

So what did my friends think of “They Couldn’t Hit an Elephant”? It will come hardly as a surprise that P, who was forced to suffer wrath of Confederate artillery without being able to do much about it, wasn’t very happy about it. T’s opinion was a little more of a surprise – he found randomness of TCHAE somewhat annoying and missed the detail and period flavor of “Long Road North” (my previous choice of rules for this period). L-A, Ha.and He. were much more positive – they liked the confusion created by the card draw and appreciated uncomplicated game mechanics used in TCHAE.

In other words, THAE didn't receive standing ovations, but neither did I hear any petitions for ritual burning of the pages. Personally, I have to say that this ruleset grows on me. There is certain elegance in those hidden relations between different mechanics of the game, although I wish they were clearly stated in the text. Also, what I saw on the table reminded me in many respects of the accounts by Shelby and Sears - confusion, units that moved erratically, heroics of the officers that changed the tide of battle... So with some tweaking, THAE has the potential of being a lot of fun.

Terrain

Union blinds on the move

Closing with the enemy

On to the top

Meanwhile, on the other hill

June 01, 2009

They Couldn't Hit An Elephant - first impression

Three days weekend and quickly approaching date of introduction of the ruleset to my group gave me enough motivation for a quick test of “They Couldn’t Hit an Elephant”, Two Fat Lardies’ ruleset for American Civil War. Since my intention was to familiarize myself with the ruleset mechanics, I've decided to keep it simple, charge up a hill and see what happens.

For no particular reason I choose the Confederates to be on the defensive – two brigades, each consisting of four regiments and attached artillery battery were to receive an attack by three similar Union brigades. Terrain was created ad hoc from available terrain (made of GHQ TerrainMaker hexagonal tiles).

Thoughts after first reading
“They Couldn’t Hit an Elephant” is written in a style that is similar to that of other rulesets from Too Fat Lardies – clear and logical at first glance, but with some ambivalences and omissions that can confuse players rather quickly in their first games.

Like all TFL games, TCHAE is card-driven – basic cards activate either a brigade or division commander (depending on unit scale in the game). Upon activation, units that are part of leader’s command may move, fire, change formations or attempt to improve their current morale state. Amount of possible activities is limited by number of command pips, decided by a roll of an average dice.

Period flavor is defined by additional cards, which influence leaders of different character. For example a random cautious leader may be restricted to firing, but no movement, while inspirational leaders can get an opportunity to rapidly rally a unit or lead it into a sudden assault.

Last, but not least, there is the ‘Coffee’ card. When it is turned, it automatically triggers end of turn sequence of activities, after which the turn ends, deck is reshuffled and new turn begins. 'Coffee' card introduces fair amount of friction and uncertainty into the game, as players never know who will be able to act in current turn. It is also one of the usual TFL game mechanics that create most controversy among the players – it is either beloved or despised.

As is common for most rulesets, both units and commanders may be of varying quality and character. Unit morale state during the game is covered by four states – normal state allows the units to obey all orders, units that are ‘fightin’’ are locked in combat and won’t advance, while ‘defeated’ units are on the brink of breaking and will try to extract from combat. Finally, units that break, enter rout state and will run away until they find cover or are rallied.

Both ranged and close combat causes single figure casualties and may influence unit morale. Effectivness of firepower is low, most of the time there is either no effect or a single figure is lost by a regiment. Loss of two figures is a rare occasion.

All main game mechanics – movement, firing, close combat and command&control - are quite simple, but cover all the bases. At first glance I couldn't spot any bottlenecks in regard of game speed (very few dice modifiers) and there is just enough period flavor without the 'chrome' overloading the ruleset. So far so good… now on to my game.

Hold the high ground
In my imaginary engagement, Confederates were to stop Union troops from exiting along the roads that run to the edge of terrain behind the Confederate position. I didn’t give much thought to the most correct setup of the defensive position, my main goal was to create a situation where a clash between two forces would give me an idea about game mechanics. With this in mind I’ve placed Confederate forces in blocking positions near the roads. Initial rounds saw Union troops advancing under Blinds, one of typical TFL game mechanics, which allow both rapid movement and a degree of fog of war.

Confederate right flank...

...and the left

Union brigade on my left was quickly spotted by commander of the Confederate brigade on nearby high ground, forcing them to deploy while still in marching column. Confederate artillery opened fire on Union artillery battery while it was still limbered and drew first blood.

Union blinds enter the battlefield

Union brigade prematurely spotted

Union brigade on my right took its time and approached more cautiously, taking care of changing its Blind formation to ‘deployed’ before they were spotted by the Southerners. However, at the time they were spotted, woods on both sides of their advance route delayed their movement and made deployment of their artillery very difficult.

Last Union brigade swung through the open terrain in the middle and upon being spotted stacked its regiments in a single column. My intention was to throw those units against Confederate position on the hill and see what the result would be.

Overall situation in the middle of the game

Confederate view from the high ground

As the Union brigades moved into small arms range, both sides started to trade volleys and the ruleset started to show its strength. Units that suffer casualties need to take so called status check – first failure will cause the unit to assume ‘Fightin’’ status, which prohibits them from advancing any further. This very simple mechanics portray very well the character of ACW battles which often degenerated into two infantry lines pouring fire into each other until one side had enough. This is exactly what happened to the Confederate regiment in the woods on the right flank of Rebel line. Under pressure of a Union regiment and a battery of light artillery, they became first ‘Fightin’’ and then ‘Defeated’. Finally they were forced to move back into the woods.

The assault column in the middle came under intensive artillery fire from the hill in front of them. Advance of the regiment in front of the very Napoleonic formation stalled, as it became ‘Fightin’’. Second regiment bypassed them, as they recovered, but that was all their commander could do with his allotment of pips.

On Union right flank, things became very precarious for the blue-clad troopers. Difficult terrain hindered that brigade from deploying into effective formation. Furthermore, some rather silly decisions on the part of the player (yes, that would be me) caused one of the regiments to advance much too far without adequate support. The result was devastating – two Confederate regiments and an artillery battery opened fire and in a blink of the eye shattered their reckless opponent. The routed Union regiment…

Union right in peril

Dazed and confused
…at this point the ruleset stopped making any sense to me. You see, routed units perform mandatory flight movement as soon as the appropriate brigade card comes up. But for two rounds, the command card that would allow the broken regiment to run away didn’t come up. I refused to believe that this is how TCHAE was supposed to handle such situations, but the ruleset refused to give me an indication of how I was to proceed. Nevertheless, I came to the conclusion that I must have misunderstood some vital rule section. As it was 1.45AM, I've decided to call it a night, without achieving the goal of a close combat.

Afterthoughts
Even though this first test run was something of a failure, it confirmed my first impression of TCHAE as very quick ruleset with adequate feel of the period. After a couple of rounds I had pretty good understanding of the flow of the game, so the learning curve is low and even beginners should be able to grasp the basic concepts with relative ease.

At the same time, TCHAE also showed its weaknesses, which are quite typical for TFL rulesets. Some very fundamental concepts are either omitted or explained in convoluted manner that leaves them open for different interpretations. One of those omissions caused my confusion in test game above – as it turns out, status check for a unit that takes casualties is being done after ALL firing of ACTIVE enemy units is done. I on the other hand got the impression that status should be checked on every occasion a unit suffered casualties. My interpretation completely change the game - the unfortunate Union regiment that was shot to pieces made six test, but only two were required. Furthermore, some additional afterthought could have been given to placement of certain rules. For example, at the end of definition for 'Defeated' status there is a rather ingenious paragraph that effectively prohibits situation in which my Union regiment found itself in after being shattered. But as the situation was created as a result of firefight, I've primarily looked for the answers under sections dealing with combat and status checks.

Fortunately there is a very active Yahoo group that supports TFL games. After posting my questions there, I’ve had everything explained to me promptly and in very friendly manner. Next weekend I will run same scenario again and keep you updated about the outcome.