Continuing the attempt to bump up post count for 2018!
This time around, preview of terrain for quickly approaching Chaplin Hills game. Still, troops done, terrain done… and 36 hours before actual start of the game! Must be doing something right.
Continuing the attempt to bump up post count for 2018!
This time around, preview of terrain for quickly approaching Chaplin Hills game. Still, troops done, terrain done… and 36 hours before actual start of the game! Must be doing something right.
After spending last couple of days on preparation for next weekend’s game, I feel I deserve to bump up the post count with this “short and sweet” troop review.
On a slightly serious note though… I’ve been experimenting for a couple of years now with how to best identify individual untis on the battlefield. Another issue I’ve been playing around with is how much information to press into those identification markers. This is my conclusion so far:
Pictures below show “troop review” of forces that will participate in next week’s game. It will be yet another scenario from the book that keeps on giving – “Heartland” scenario booklet from Caliver Books.
Seems like every single post I make here starts with “It’s been a while since the last post…”, but this time around it’s really been a while since the last post! Funnily enough not because stuff isn’t moving forward on wargaming front, mind you! The fact is that April, which didn’t even earn a single post here, was quite busy and fruitfull, thank you very much. But “real life” made it impossible for me to make any pictures and let’s face it, what’s the point posting something without pictures, right?
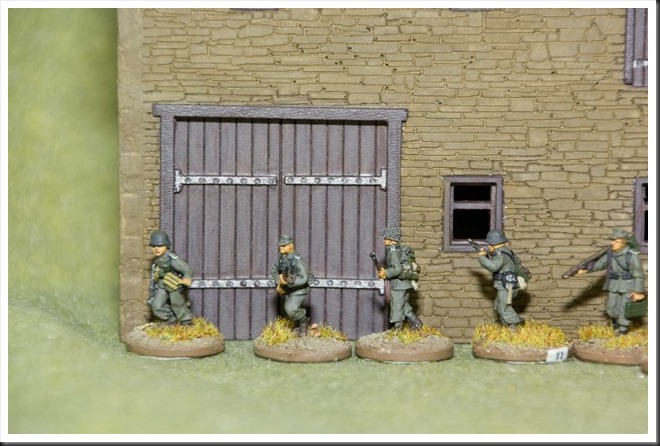
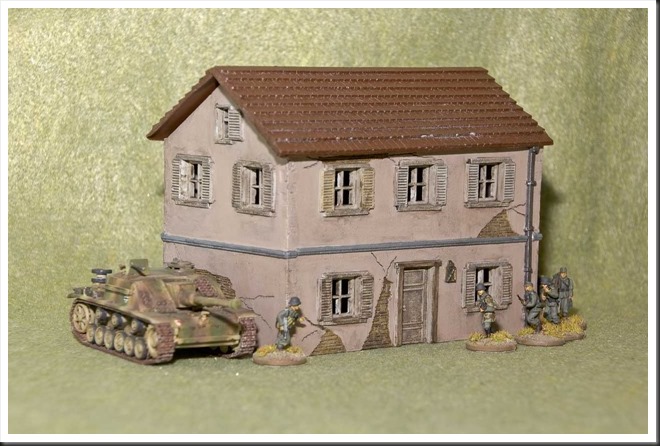
And so, here are finally some pictures, this time around from the finished Najewitz buildings that figured prominently and ‘in natura’ in my previous post. By now, they’re finished, painted and ready for featuring in those Chain of Command games I keep planning for.
Since those buildings are no longer available on the market, I will limit myself to saying that they’re very nice, but also very labour-intensive – couple of hours at the minimum needs to be spent on cleaning them up, glueing, sanding and filling. “Ready for deployment out of the box’ they’re not. But… once finished, they do look quite presentable and I look forward to putting them on the gaming table!
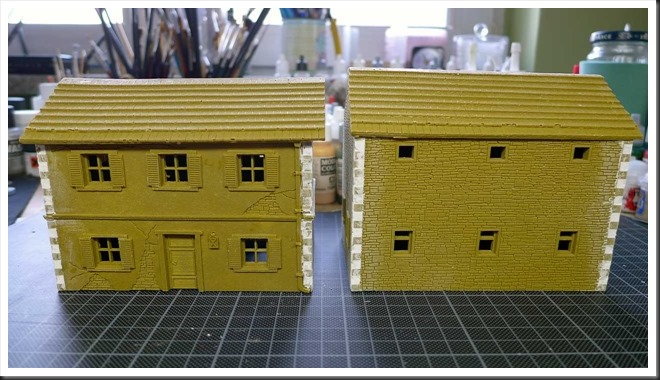
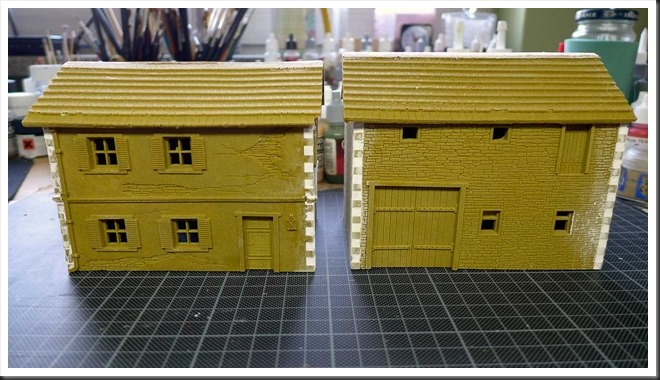
As for their preparation, they’re certainly a learning experience. I’ve cut some corners this time around and, after priming them in grey, I dealt with the interior quickly and efficiently with help of light cream paint in a spray can from Montana’s Gold product line. I’ve recently remembered about the existence of Montana and their spray cans and now I absolutely adore them. For those unfamiliar with the company, they produce spray cans for grafitti paintings. Wide range of colors, matte finish and very durable. Two coats were more than enough to paint the inside of my buildings. If you can find them, give them a try!
Exterior of the houses was painted with more traditional paints and techniques. Humbrol enamels were used on the stone barn. I tried to vary the shades of brown and do some wet-blending, but as usual I’ve chickened out in regard of palette and the end result is pretty uniform and boring. Oh well, maybe next time… The farm house was painted with… acrylic wall paint bought at local DIY shop. Perfect coverage and a whole lot cheaper than stuff from GW, Vallejo and such! I finished everything off with some Vallejo washes, just to dirt things up a bit.
Here are the promised pics, hope you’ll like them!
It’s middle of March, Saturday noon and outside it’s just friggin’ cold! Makes you wonder when this global warming thing arrives to Sweden! Oh well, this yet another cold snap gave me the opportunity to give some attention to another set of Najewitz 20mm buildings.
I’ve put together a the small farm building and stone barn couple of weeks ago. Now, I’ve spent almost three hours on making them presentable with help of “buckets” of filler and sanding sticks. I have to be honest, I am not a very happy bunny right now. Sure, they look quite spiffy, but the fit of individual components leaves a lot to wish for.
Anyway, here they are, ready for primer.
Some time at the end of last year I’ve grown seriously fed up with having to constantly deal with some sort of terrain projects. Trees, hedges, walls, houses – it felt like it was all that I was doing and I wanted to paint some minis again. What’s more, I also felt like painting something “different”… And I wanted to have a chance to play around with those new Scale 75 acrylics I’ve aquired at last year’s C4 exhibition.
And then I remembered… long, long time ago, I’ve bought a dozen or so miniatures from Hasslefree Miniatures. For those unfamiliar with the company, it’s a ‘one man band’ that produces some wonderful minis of wide variety. If there’s one thing they have in common, it’s not the theme, but rather the humor (often sarcastic) and wickedness of the sculpt. At least in my opinion, they are as much gaming miniatures as they are little works of art. Well worth checking out, if you’re unfamilar with the company!
Anyway… at the time I bought those minis, they were intended for a zombie project of some sort. And maybe, if I ever get there, they will be cracking some zombie sculls on the gaming table. But for now, I’m just painting them for fun. And here’s the first batch. Hope you like what you see!

Jess

Tony

Ashlee Campbell
Ray
I am slowly preparing for yet another ACW game based on scenario from Partizan Press’ “Heartland” scenario book and guess what… I need to do some more terrain. I really, really look forward to a game where all I need to do is put together stuff I have and play!
In this particular case, I was in need of seven rather small heights. This made me think – on those occasions I needed some hills, they were sizeable terrain features. Since they were so large, I also made them rather high… at least for 6mm battlefield. And sure those high hills look rather impressive on the “battlefield”, but they also cause some problems – their steep slopes always make my minis act as if they are out on a training session for sled tournament. Up I want them to go… and down they slide again.
So this time around I decided to do things a bit different and make a couple ‘very small’ hills with very gentle slopes. This poised slighly different demands on materials I could use – standard expanded polystyrene sheets wouldn’t work, because you can’t sand them. And my default cheapo choice for bases – 3mm board – would also be a bad choice, because it would not hold the ‘edge’ at the borders. So instead, I had to do it 'standard wargamer style’ – 3mm MDF for bases and extruded polysturene (aka blue or pink stuff) for the hills themselves.
Step 1- MDF bases were cut out of 3mm MDF sheet and beweled with a sharp Stanley knife (here in Sweden they’re called ‘mora kniv’). Keep the knife sharp, watch your fingers and always cut away from your body. Seriously, be very careful when beweling those sheets, you can loose half a finger in a blink of an eye if you’re not carefull.
Step 2 – glue sheet material to the bases and leave for some time under pressure. This time around didn’t use PVA glue, but builder’s mounting glue. Dries in an hour or two, doesn’t seem to warp and my hot wire-cutter didn’t have any problems slicing throuth it as I trimmed off the blue stuff.
Step 3 – after trimming off the polystyrene, it was time to sand. Another health warning here – put on a mask before you start with this step! MDF dust is definitely something you want to avoid breating in and I can’t imagine that ground down polystyrene will do your lungs any wonders!
This was actually the first time I’ve worked with MDF and extruded polystyrene and I have to grudgingly admit that I now understand why these materials are prefered choice for terrain making – you can really shape that stuff into exactly the shape you need. It doesn’t show on the picture above, but the angle on the bevel of the MDF bases are no more than 20 degrees and it will stay that way even if bumped into something. Untreated board sheets just crumble…
Step 4 – paint with brown of your choice. Here I cheated and painted with a mix of brown household acrylic paint, grit, sand and gipsum (something I saw on Youtube and wanted to try out).
Step 5 – flock, leave to dry and presto… gentle hills ready for the gaming table! The thing that worried me a bit was the slenderness of those hills – 3mm MDF and 5mm polystyrene doesn’t amount to much. But I must say that I like what I see. For 6mm games maybe less is more also in regard of elevations on the table!
Well, it would seem so, Saxons have finally figured out that carts and loot fit together as hand in a glove!
Seriously though… one of generic raid scenarios in ‘Dux Britaniarum’ requires three carts of some sort. With this in mind, I’ve had a quick look around for something suitable. Offering from 4Ground was very much to my liking – their cart is made from laser-cut MDF, thus cheap as dirt and shipping it over the pond wouldn’t cost me my shirt neither. Also, those guys at 4Ground seem to be clever chaps and realize that something must pull those carts around. And so, they are kind enough to offer suitable draft oxen minis, sold in pairs.
Don’t remember how long it took for the envelope (yes, envelope, apparently 4Ground took the page from IKEA’s operations manual), but it didn’t take many days before my carts arrived to me. Here’s what I’ve got, in three sets.
First a couple of words about oxen minis. They were all ‘business’, but required some serious cleaning up and putty to cover up some serious holes in the casts. Also, as can be seen in the pictures, heads are separate and the fit isn’t the best I’ve ever seen. Once the heads and bodies were glued together, it became apparent that something had to be done about the gaps around the neck. Lucklily that’s what green stuff is made for.
Carts, on the other hand, could be assembled without any problems. In fact, I glued them together while watching a movie and was done before it was finished. Really simple assembly was made even easier by a nice, easy to understand manual.
The paint job was also a pretty straightforward job. With carts, I started with couple of base coats of burnt umber. Then I proceeded with successively lighter coats of burnt umber and white. I finished with couple of black, brown and green washes.
With oxen, I first found couple of reference pictures of the real things – I was a bit surprised over variety of “cammos” that oxen come in. In the end, I went with dark brown/cream white “ambush scheme”. 
Anyway… I must say that I am quite happy with my first experience of laser-cut MDF and 4Ground. If you need a couple of carts to move your loot quicker around the table, I can recommend this stuff as affordable option.