October 29, 2017

Photography for wargamers – Part 1 - The rant and The Theory

Bet some of you are thinking “Photography for wargamers, eh? Quite pretentious of you, laddie,  considering the quality of some of the pictures on your blog! Also, hadn’t that done been before?!”.

Well, sure… but it hadn’t been done by me yet and considering how frequency of my wargaming activities have decreased to another low watermark, I do what I have to do to keep this blog alive. Smile

Seriously though… I’ve been toying with the idea of writing a couple of posts about this topic for quite a while. You see, wargaming is what actually got me into photography in the first place and the specific challenges of taking photos of wargames is what shaped my ‘development’ in photography department. Along the way, I’ve made (and keep making) a lot of mistakes, but I’ve also learned a couple of things while having a blast with cameras (most of the time). So, if I can help somebody to avoid some of the pitfalls I’ve encountered and maybe tell something informative about this particular aspect of our hobby, I’ll consider it effort well spent.

Before we continue, couple of usual disclaimers. First and foremost, I am not an expert of any kind, so keep that in mind. I may be mistaken in my definitions, terms or explanations. Second – once we get so far and if I at any time describe some technique – it may work for me, but doesn’t necessarily have to work for you. As always on this blog, YMMV principle is in effect!

Allright, let’s get on with it then. I will approach this subject from an absolute beginner’s perspective, so let’s start off with the basics of photography and digital cameras.

Basic principles

What a photo camera does is really pretty simple – it’s a dark box with a sensor of some kind that catches light and registers it on some type of medium. In old days, it was a film coated with light sensitive chemicals. These days, photography has become digital affair and the light is caught by a light sensitive sensor, transferred into zeros and ones and stored on a memory card.

From a photographer’s perspective, there are two factors that need to be controlled – how much light to allow into the camera and for how long to catch the light. Both these factors are controlled by something called the shutter. Shutter is the “gate”, located either in the camera itself or in the lens, that separates the outside world from the light-sensitive sensor. When you make a photo, this gate opens to a certain degree and for certain amount of time.

Lenses with different apetures

Aperture is the term used for the hole that appears when the shutter is opened. Aperture is the first of thee fundamental factors in digital photography. In the picture above you can see different apertures for a specific lens. The shutter opens in pre-defined incremental steps, called f-stops. The lower the number of the f-stop, the bigger the hole.

The aperture controls one thing – how much light is allowed into the camera to be registered by the sensor. In simplest possible terms, the bigger the hole, the more light is let in. This reduces the time needed for the sensor to register the image. But that’s just the part of the truth; size of aperture affects the image in other ways. We’ll get to it in a while.

Shutter speed is term used to describe the amount of time that the shutter is opened to allow the light into the camera. It’s the second of the factors that you need to decide upon whenever you take a picture. The longer the shutter is opened, the more time you allow for the sensor to register the light. The relation between aperture and shutter speed is simple – the smaller the opening, the more time your sensor will need to register adequate amount of light.

In picture above the f/1.8 opens the shutter wide open. This usually means that you can keep your shutter opened for very short while, usually a miniscule fraction of a second. On the other hand f/11 aperture barely opens the shutter. This makes it necessary to keep it opened for significantly longer time, sometimes several seconds.

ISO is the third and final factor that needs to be controled when taking pictures. Unlike aperture – the size of a hole in your camera – and shutter speed – the time the hole is opened – ISO is a bit more abstract in its nature. Basically, it’s the setting that controls the sensitivity of sensor in your camera to the light. ISO typically starts somewhere around 100 and goes up in predefined increments up to its maximum sensitivity setting. The higher the ISO setting, the more sensitive your camera sensor becomes.

Exposure Triangle

These three factors are directly related to each other. Together they form so called exposure triangle. Put these three together and here’s what you get:

  • Shutter speed – the shorter the shutter speed, the bigger aperture needs to be and/or the more sensitive your ISO settings needs to be. The longer your shutter speed is, the more you can reduce your aperture and reduce ISO sensitivity of your sensor.
  • Aperture – the wider aperture (smaller f-stop number), the shorter time is required for your shutter to be opened and/or your ISO sensitivity needs to be. Small aperture requires for your shutter to be opened for longer time  and/or  your ISO needs to be increased.
  • ISO setting – low ISO setting will increase the amount of time your shutter is opened and/or  for your aperture to be set to ‘bigger hole’.

Zero sum game

Pretty simple, eh? But what does it have to do with anything? Well, consider for a moment the most common problems with photos:

  1. They are either too dark or to bleak.
  2. Photos are blurry.
  3. Only part of the photo is in focus.
  4. There is a lot of strange inaccuracies, like small spots, all over the image.

Problem no. 1 is caused by either too little or too much light hitting your sensor.

Too much light will result an ‘overexposed’ image – the sensor will be overloaded with the light and register either too much light or, even worse, reach to its maximum sensitivity, resulting in homogenous blobs of color without any detail.

The opposite happens when too little light reaches the sensor. That’s caused by too short shutter speed, to small aperture (too high f-stop for selected shutter speed) or too low ISO sensitivity for selected shutter speed/aperture combination.

When a photo is ‘good’, the shutter speed is adjusted to right time for your ‘opened hole’ (aperture) and current setting for light sensitivity for the sensor in the camera.

Problem no. 2 is easier to explain – your shutter time is so long that your hand shakings or vibrations disturb the camera to such degree that its movement is registered in the image. Some folks have a so called ‘steady hand’, personally I seem to have a hand of an alcoholic in the middle of withdrawal. Any shutter speed above 1/250 of a second will result in blurry image if I hold the camera!

To counter this problem, increase the aperture (lower f-stop number) or increase ISO setting.

Problem no. 3 can be caused by your camera focusing on wrong spot. More probably though, your field of depth  is too short. What’s field of depth, you ask? Well, it’s the distance from your initial focus point that remains sharp and in focus. Consider your own eye. When you read, you see clearly the text you focus on and maybe a bit around it. Rest of the page is ‘out of focus’. Depth of field in a camera works the same way. And it’s controlled by your aperture – the bigger the hole (smaller f-stop number), the smaller amount of image will be in perfect focus!

I’ll be talking about field of depth a lot more later on, so ponder the consequences of this behavior for a second and let’s move on.

Finally, problem 4. Daddy of this one is your ISO setting. Basically, the more sensitive your sensor becomes (higher ISO setting) the crappier it becomes at understanding what colors look like.

Conclusion

If we put things together, here’s what you get. Perfect picture is correctly exposed, with sharp focus on stuff we want to take a photo of and with correct reproduction of colors. Easiest way to get a sharp photo is to keep shutter speed as low as possible. But that demands that aperture is wide open and that reduces the distance in which things are sharp and in focus. Quite often, the physical limitations of the camera lens itself can be the limiting factor – its shutter cannot be opened wide enough and we need to accept longer shutter speed than we’d wish for. Of course, we could increase the ISO sensitivity of the sensor. But that may make the photo grainy and (worst case scenario) covered with mis-colored dots.

OK, so let’s keep the ‘hole’ small. This will increase shutter speed, resulting in blury photos. Fine then, let’s push ISO to the maximum settings… oh damn, these mis-colored dots are there again!

So… you now think ‘Is he saying that there is no way to take a good picture?’. Well, kind of… actually, taking a good picture under good lighting conditions can be a no-brainer. But it’s when things aren’t working so great in the lighting department that it can be quite valuable to be able to figure out what causes the problem and maybe figure out a work-around.

But we get there in next installment of this series.

September 28, 2017

Timecast bridges–a Quick snapshot

I’ve finished bridges for Timecast’s river system and had a bit of fun with the camera.

Timecast_bridge002_1

Double-dipping in the hobby pool

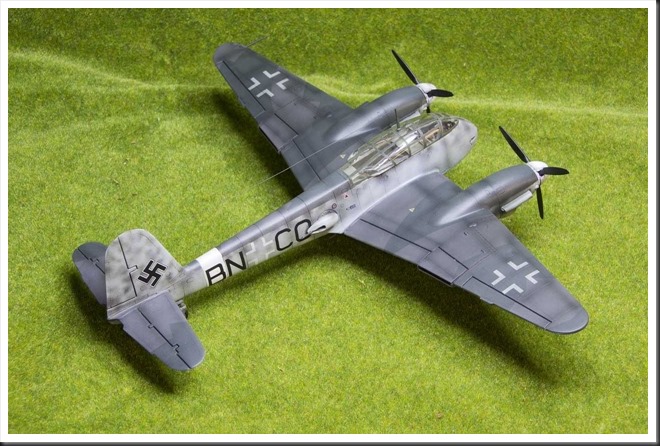
Another sidestep into my other hobby. This time it’s a Messerschmitt 210 from Italeri, 1/72 scale (as always). A problem-filled kit, with sligh, but annoying fitting problems which cost a bit additional construction time. Still, once I was finished with it, I was a bit surprised over how much I liked it. Mind you, the real thing apparently gave Göring an ulcer (which, when you think about it, should really count as a positive characteristic!), but it based on lines alone, it’s a really beautiful airplane!

Anyway, here’s a couple of pics of my take on this kit.

Italeri_Me210_001Italeri_Me210_003Italeri_Me210_005Italeri_Me210_009Italeri_Me210_011Italeri_Me210_013Italeri_Me210_014

September 21, 2017

1/72 Normandy buildings from Najewitz Modelbau

Well… this post was supposed to be a short and sweet introduction to buildings from Najewitz Modelbau, but I’m afraid I will kick it of with a rant. Over last couple of years, I’ve bought a grand total of five sets from these guys and was extremly pleased with the stuff I’ve received. Beautiful buildnings, minimal assembly, prompt delivery times. Of course when the packages from them arrived, I admired my new ‘precious’ and then placed them in my ‘stash’. Today however, I’ve came to realization that if my Chain of Command project is to ever lift of ground, I would have to force myself and actually put couple of these buildings together. With a sigh (another terrain project!), I dug up the boxes from Najewitz and picked one of the house at random to work with.

After I have washed the components and took the snapshots, I wanted to take a quick look at Najewitz’s site to check what they called this particular item. Well, the site is still there… but all the stuff they sold is gone. From what I can understand, the firm has switched focus and is now selling files with design plans for 3D printouts of buildings. I won’t lie, I am quite annoyed by this move. I get it that a company is free to do as it pleases when it comes to its activities. But at the same time, making lateral move like this, without much of a warning, is leaving me at least in a bit of a lurch.

On with the ‘first look’ at one of Najewitz 20mm Normandy buildings then, although I’m not sure there is much point in it anymore since it and all of its brethren seems to be no longer available on the market. Anyway… the building I will be working with is actually a set of two buildings – a café and a small garage. They’re made of plastic. The walls are about 5mm thick, while the roof sheets are bit thinner, maybe 3mm. There is minimal flash in some of the windows, but otherwise the casts are very crisp.

Construction should be simple – one just has to put the ‘teeths’ together and ensure that the angle between the walls is 90 degrees. The fit of components is pretty good, but I suspect some filler will be needed to hide the ‘tooth’ outlines at the corners. Roofs may be a bit more tricky and will probably need some sort of reinforcement, as I intend to make them removable.

Najewitz_003Najewitz_005

September 06, 2017

Review of Peter Cozzens’ ‘The Darkest Days of War- The Battles of Iuka & Corinth’

Darkest Days of WarWhat do you say about a book that you find pretty much perfect? This seems to be dilemma I am finding myself in right now, as I try to formulate some sort of coherent opinion about Peter Cozzens’ ‘The Darkest Days of the War’. The only thing that keeps popping up in my head is simply ‘This bloody thing is perfect!’.

Of course I realize that this is not a very helpful review and if I’d be hard-pressed to be more precise about the reason why this book made such an impression on me, I’d say ‘balance’. The author strikes absolutely perfect balance between overall picture and detail, between dry facts and personal experience, between commander’s perspective and the horror of combat experienced by individual soldier standing in the line of battle. Military history buffs interested in American Civil War are blessed by the fact that there is a multitude of historians that are also very talented writers, but Peter Cozzens is exceptional all in his own right.

There may be another reason why I cannot help but regard this book as absolutely superb. Just as most historical wargamers, I read a lot of military history literature. Most of the time I regard books in this genre simply as source of information and a learning tool. Very seldom do they manage to touch me on personal level. On this occasion however… there is something in the writing style of Cozzens that on several occasions filled me with immense sense of sorrow and sadness for the men who had to live through the horror of the events author describes. Military history writers often try to present the ‘human aspect’ of armed conflict, but in my case at least it is very seldom that their efforts manage to provoke a reaction. This book is for some unexplainable reason different and it definitely managed to leave a lasting emotional imprint on me.

What about the wargamer’s perspective then? Well, here I can be a bit more precise in my opinion and say… what a shocker… that it’s pretty much perfect and not for one, but for two specific reasons. First of all, the book deals with Iuka and Corinth battles of 1862, which also happen to be the subjects of many scenarios in Caliver Books’ ‘Heartland’ scenario books I’ve used for my games over last couple of years. ‘The Darkest Days of the War’ puts at least two of the scenarios I’ve played into historical content in best imaginable way! Furthermore, this book is a scenario trove all in its own right due to the fact that all three of the main engagements of the campaign are described in exceptional detail. Unit deployment is described all the way down to regimental (and sometimes skirmish screen) level, while the maps could be fetched from a wargaming magazine. The only thing missing is detailed information about manpower of individual regiments, although it can often be extrapolated from the narrative. Last but not least, the Iuka/Corinth campaign as a whole strikes me as extraordinarily suitable for a campaign game and this book provides all the necessary information and data needed for such exercise.

Overall, I wholeheartedly recommend this book to anyone interested in topic of American Civil War and doubly so to historical wargamers invested in this conflict.

August 19, 2017

Timecast latex rubber rivers

Since this article is a ‘pure’ review of a commercial product, let’s start with the mandatory declaration of independence – I am in no way associated nor sponsored by Timecast Models. Thus, this review is an expression of my personal opinion as private consumer and wargamer.

Allright, with these rather official preliminaries completed, let’s get on with it.

Couple of years ago I’ve decided to ‘migrate’ my terrain from GHQ-s styrofoam hexagons to ‘conventional’ DIY terrain boards. Major reason for this move was my wish to simplify the setup and keep as much of it (hills, woods, rivers, ditches, hedhes and so on) as removable, flexible stand-alone pieces.

At the same time, Timecast Models released their roads and rivers system, made out of silicone rubber. That in itself wasn’t anything spectacular, many companies make similar terrain pieces. But two things caught my attention in regard of this particular product range. First, Timecast Models made rivers came in four different widths that could be connected together with dedicated ‘connector’ bits into integrated waterway system. Second, Timecast complemented their product with variety of resin bridges and fords. In other words, their product line struck me immediately as a complete and expandable solution for waterways. And that, ladies and gents, isn’t something one can often say when it comes to wargaming terrain.

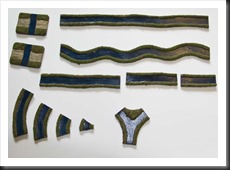
My first (and so far only) order included enough straight and meandering river sections of smallest width to provide continous river of about 2 meters. I’ve also ordered all available sets of fords, connecting bits and river bends. Samples of what came in the box are shown below.

Timecast_Small_Rivers_009Timecast_Small_Rivers_004

As can be seen in the pictures, the rivers and fords are made of brown, flexible rubber-like material. You can easily cut and trim individual pieces with a pair of scissors.

Before painting and flocking, I washed the whole lot in lukewarm water with some dishwasher detergent. Every bit was gently scrubbed with a toothbrush, rinsed in cold water and left to dry. It was probably a bit of an overkill, but better be overly cautious than running into problems later on with some chemical residues left-over from mouldning process messing with the paint.

On with the painting then… I kept things extremly simple here and started with painting the riverbanks with dark-brown acrylic wall paint from Flügger. Water surface was painted with dark-blue acrylic artist’s paint from Amsterdam. I know, I know, not very realistic, but I like my rivers and ponds blue. Next, I tried to add some shine to the water surface with help of blank acrylic varnish, but I can’t say this step had a lot of effect. Finally, I’ve stuck some flock on top of river banks with thinned PVA glue. And that was that.

Timecast_Small_Rivers_011Timecast_Small_Rivers_012Timecast_Small_Rivers_013

Couple of comments about painting process. First and foremost – the paint seems to stick to the rubber material used for these terrain pieces… and stays there! This is more than I can say about my silicon roads from Total Battle Miniatures. Yes, you can peel it of if you scratch it forcefully with fingernail or something sharp, but the paint doesn’t peel of on its own if you bend the ‘bands’. That’s a good thing. Second, the flock I’ve glued on with the PVA will probably rub off with time. But that’s no biggie, I’ll just reflock if I feel it’s necessary. Finally, I feel it’s a good ocassion to repeat the advice I keep hammering on this blog – if you value your money, do not use modelling paints for your terrain pieces. Vallejo, Army Painter, Games Workshop, it doesn’t matter which brand you use, their pricing is insane and wasting their product on terrain pieces will cost you a pretty penny. For large terrain pieces, use artist’s paints that come in huge tubes, or better yet, take a trip to your DIY market and find their paint section. They usually sell half litre sample jars that will last you forever, for price of two GW paint pots and carry color ranges that will make all modelling paint ‘systems’ look puny.

Oh yes, one last thing. I’ve included couple of resin bridges that were suitable for those rivers. I still haven’t painted them, but I think it’s only fair to included couple of snapshots of how they fit together with the rest of  the ‘system’.

Timecast_Small_Rivers_015Timecast_Small_Rivers_017Timecast_Small_Rivers_018

Overall, my initial impression of Timecast’s river system is very positive. They’re made of what seems to be durable, flexible material. Acrylic paint and varnish sticks well on them and they look the part once painted. Addition of dedicated bridges and possibility to integrate different river widths into single ‘system’ is in my opinion a stroke of genius and was the factor that convinced me to go with this product. So, for the moment at least, I can’t but enthusiastically recommend it to anyone in need of simple but effective representation of rivers on wargaming table.

August 01, 2017

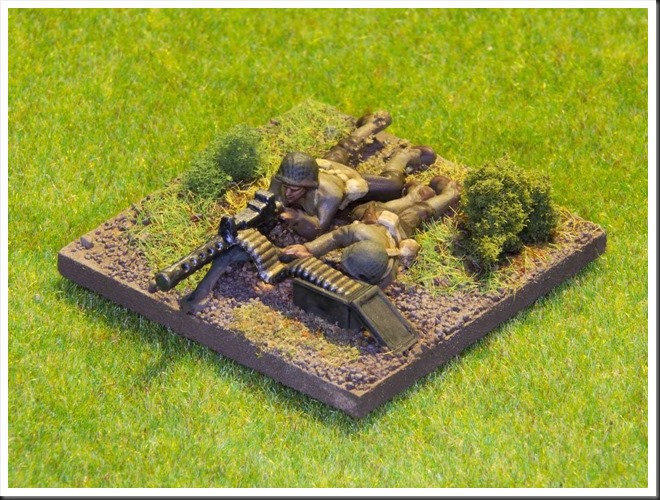
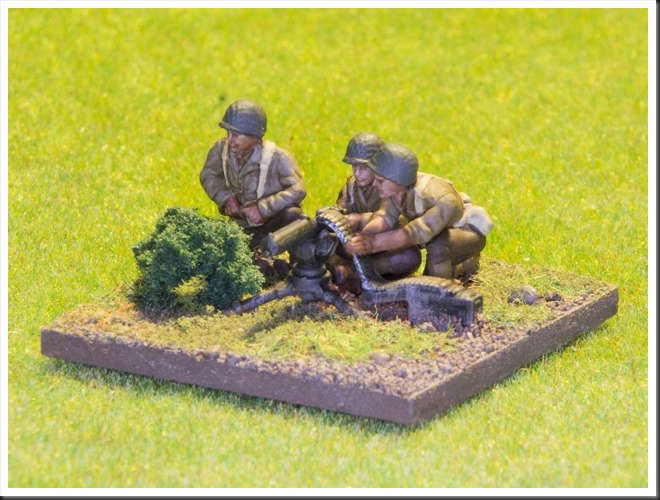
1/72 US Heavy Weapons set from Plastic Soldier Company– painted

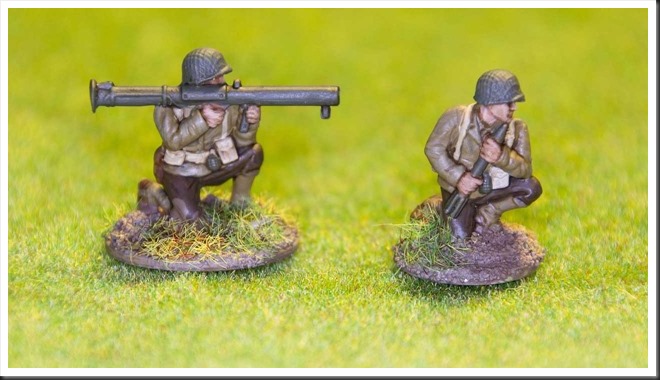
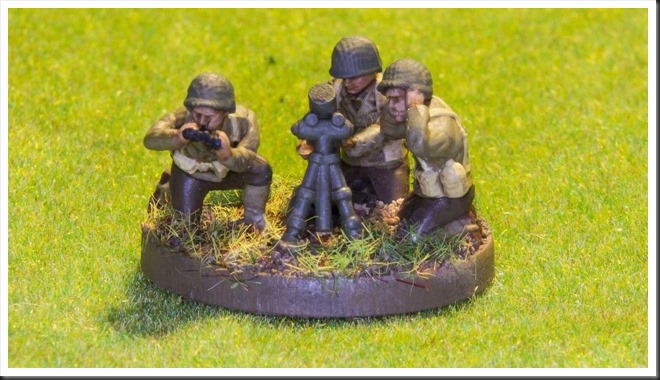
Took me just two months, but they’re now done. Final impression after putting some paints on them? Neeeaaah… my initial impression hadn’t changed that much – they are cheap and they are adequately detailed for a wargaming table. It should be enough and yet, somehow, it isn’t.

Oh well! Judge for yourself, what do you think?

PSC_Painted_US_Heavy_Infantry_001PSC_Painted_US_Heavy_Infantry_003PSC_Painted_US_Heavy_Infantry_005PSC_Painted_US_Heavy_Infantry_006PSC_Painted_US_Heavy_Infantry_007PSC_Painted_US_Heavy_Infantry_008PSC_Painted_US_Heavy_Infantry_009PSC_Painted_US_Heavy_Infantry_010_1