Showing posts with label Too Fat Lardies. Show all posts

April 21, 2019

Having another go at Chain of Command

Intro
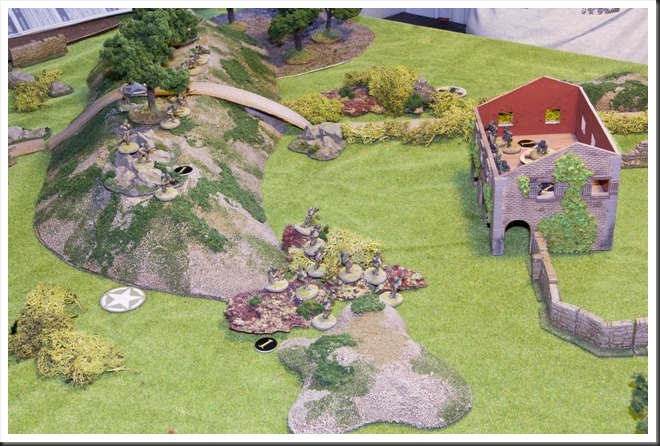
After almost a year of unvoluntary hiatus, I’m quite happy to post a game report – this time around L. and I managed to find some time and play some Chain of Command. By now, this ruleset has been reviewed, analyzed and quite justifiably been discussed a lot on the net. I will therefore limit myself to saying that Chain of Command is a WWII skirmish ruleset with small teams and sections as tactical elements. If you want more information about this rulset, all you need to do is make a Google search.

The game L. and I run yesterday was based on first generic scenario in the ruleset, called Patrol – two platoons bump into each other and mayhem ensues.

The game


The game started with me trying to get into the house complex to the left. All I managed to get in was a BAR team, which managed to get a drop on one German squad, but failed to inflict any damage. In firefight that followed, my team was wiped out to the last man. Their sacrifice paid however unexpected divident, as L. decided to send the squad that killed my BAR team on a long walk around the houses in an attempt to flank me. As things turned out, he never got the chance to spend resources on that march and the entire squad remained out of position for rest of the game.


‘Main event’ took place in the center of the board. L. was favoured by the powers that be on that particular day and managed to retain initiative on three different ocassions early in the game. This allowed him to push his two remaining sqads across the road and pin one of my rifle sections on the height to the left. He had an MG42 in perfect position and their fire slowly picked off my guys, one or two at a time.

In broken terrain section there was another stalemate – one squad on each side took potshots at each other without much effect. Somewhere in the middle of the game, I tired of it and closed the distance with one of my rifle sections. It was a close run thing and both sides suffered heavy casualties, but the assault failed.


In sheer desperation, I threw in my last squad from a jump-off point at the edge of the table. They were far away from the ‘action’, but in CoC, rifles have unlimited range so the distance didn’t really matter. I pushed them forward slow and steady while keeping a constant barrage of small arms fire – in the end, I had a bit of luck and managed to inflict serious casualties on opposing Germans.


L. retaliated by assaulting my isolated and seriously depleted section on the height in the center of the board. Close combat that ensued was surprisingly bloody, but decisive – once the dust settled, the high ground was in German hands.

At this time, with both sides seriously weakened, the game was in the balance. But we were at it for over four hours and were quite satisfied with what we achieved so far. Therefore, by mutual agreement we decided to call it a day.

Musings after the battle
The ‘special thing’ with Chain of Command is that the game starts at the moment of first contact. The action is therefore fast, furious and most importantly, pretty much immediate. This seems to be a litte of mixed blessing, because just as in our first game (run almost a year ago) our positions became locked pretty much instantly. As a result, the entire affair became rather static dice-trow festival, with both sides hoping to roll high for ‘shock’ (morale hits) and ‘kills’. In yesterday’s game, L. picked off my lads in rapid succession, but failed to give me any ‘shock’ points. I, on the other hand, seemed to have my weapons filled with blanks, but dished out serious amount of ‘shock’ points, forcing L. to pick them off and thus being unable to act more decisively with his leaders (despite three ocassions where he retained initiative and had two consecutive rounds at his disposal). The stalemate was finally broken by my third squad, which finally managed to kill three Germans and for all practical purposes broke L.’s right flank.

This rather static nature of the game (for second time in a row) is a bit troublesome, but perhaps not surprising. After all, both sides are of equal strength (a platoon each, with some minor support elements). Also, I read some comments on the net that this particular scenario tends to develop into a static firefight, while the other five scenarios included in the ruleset are of more fluid nature. Let’s hope that’s the case!

Until next time and let’s also hope that it will be sooner than in ten months time!

May 21, 2017

First impressions of “Chain of Command”

For the wargamers who just arrived from outer space, let’s start with a short introduction to “Chain of Command”. It’s one of the “newest” rulesets from Too Fat Lardies and it’s a WWII skirmish ruleset. One miniature represents one man and one vehicle or artillery piece model represents a corresponding single real world piece of equipment. The ruleset focuses on combat between forces of platoon size with some reinforcements. While it allows the player to directly control every individual figure, the basic manouver and fire units are squads of 8-12 men. Those can be further split into (usually) two teams, which is how most units of that size operated in real life. Specialized weapon teams, such as bazooka or medium machine gun teams provide additional firepower. Command and control is performed by ‘leaders’ of two types; junior leaders usually lead individual squads and weapon teams, while senior leaders provide control at platoon comman level, allowing coordination between individual sub-units of the platoon. Ruleset caters for support units in all forms and shapes – tanks, mortars, artillery (both on the table as well as off-board), engineers, etc are all handled. D6 dice is used throughout the ruleset.

“Chain of Command” has been around for a while now (about three or four years, I believe) and many reviews have allready been written about it, both in printed publications and online. So I will not try to reinvent the wheel by writing yet another lengthy review that will hardly add anything new to what’s already been said and written. If you’re interested in a detailed analysis, I recommend for you to listen to episode 106 of Meeples&Miniatures podcast or read an excellent review posted on Anatoli’s Game Room blog. Both of them provide a very good overview of this ruleset.

So what’s the point of this post of mine then? Well, I hope to provide a ‘rookie’ gamer’s initial impression based on two games I’ve run yesterday. In the first one I acted as Game Master, in the other one (enriched by my impressions of the first game) I took over one of the gaming seats.

The setup

Since it would be a first experience of the ruleset for all involved sides, I’ve picked up the most basic generic scenario that is included in the ruleset – an encounter between two patrols in no-man’s land. In this setup, the players start by establishing their initial zones of control with help of simple meta-game. Basically a bunch of markers are moved over the board until they come into 12’’ of one of enemy marker. Once this is done, players select their jump-off points in territory they control – computer game players can think of those as spawning points. These define where individual squads, teams and leaders can be deployed on the table.

To further simplify the task of ‘first game’, I decided to play on smaller area than recommended 6x4’ table. The game would be played on my kitchen table, which is only 5x3’. The terrain setup was my own creation – i basically threw whatever terrain I had available on the table with hope that this random arrangement would provide for a good game.

Finally, I decided to limit order of battle to a single basic platoon and no support units. So both sides (German and American) had their three squads consisting of an LMG team and rifle team to play with. Each of the squads was led by a junior leader. Furthermore, Americans had at their disposal two platoon leaders and a bazooka team, while Germans had a single platoon leader and a panzerschreck team.

CoC_First_Game_003

Game one

In our first game the Americans, played by T., managed to gain control both of the hill and the house in the initial phase. This gave him a huge advantage from the start and set the tone for the game. He deployed one squad in the house and the other two along the ridge of the hill. L. responded by deploying one of his squads in the hedges by the crossroad and the other one in the woods by the ‘northern’ foot of the hill (by the chairs in the picture above Smile). The MG team of that squad gained a foothold on the hill, deploying in the rock outcrops in its northern end. And that was it… both sides started to hammer each other, with Germans clearly getting the worst of it. After a fire-fight lasting over several phases, L. suffered eight casualties to two of T, the  machine gun teams of both of his deployed teams were wiped out and the remainder of the squad in the hedges by the road was pinned by T.s fire from the house. To put it plainly, he was screwed and he knew it. Thus, we ended that game.

CoC_First_Game_007

Game two

T. left our company by that time and L. and I gave it another go. Wiser by the experience, L. managed to claim the posession of the house in the initial phase of the game, while I grabbed the hill and the high ground to the south of it.

L. then proceeded by deploying a squad on second floor of the house and another by the wall outside the walled house court. I responded by establishing the line of fire along the ridge with one squad, deploying the second in the rough ground at the southern foot of the hill. I deployed my third squad behind the hill, out of sight. My plan was to move it around the hill and hit the house from the north. Once again, L. never bothered to deploy his third squad, probably waiting with it until he found out my intentions for the squad behind the hill.

CoC_First_Game_009

In some respects our game developed in similar manner to the previous. L. blasted at my guys in the rough ground, while I tried to hit him hard with fire from the hill. The pressure mounted on units on both sides, but yet again an impass seemed to occur almost instantly. After a couple of phases I grew tired of this static character of the game and decided to take a risk. I ordered the squad on the hill to fire suppressive fire at the Germans in the house – this is a temporary state where the incoming fire won’t cause any damage, but automatically reduces fire effectivness of any enemy units that are in the sector where suppressive fire is ‘applied’. This was a preparation step for my next action, which was a mad dash across open field toward the house by the rifle team of the squad in the rough ground.

CoC_First_Game_008

As Germans hunkered down under suppressive fire, the advancement was completed without any casualties. L. reacted by dropping a couple of grenades on my guys who were now huddling directly below, hiding behind the arcade walls of the house. My luck held and noone was hurt by the explosions. Naturally, as soon as I had the opportunity, I pushed on into the house. A vicious close combat for control of the house now took place… with disastrous consequences for the my side. Once the dust settled, six out of my soldiers were dead, with the sole unhurt man trying to patch up his wounded leader. Normally, such outcome would rout the survivors, but considering the enclosed surroundings we agreed that my survivors were now POW;s.

L.s triumph came however at a cost of three casualties and a wounded squad leader. Another round of whittling fire from the hill completed the grim job, breaking the German squad and forcing them to flee the house.

At this time we were at it for five hours and were more than satisified with the entertainment of the day. Thus, the second game also ended inconclusively.

Musings after the battle

After a single evening, it is far too early to say anything definite about this ruleset. But there is a couple of things I can say with conviction even after this brief exposure.

  • First and foremost, I am not at all surprised that so many people have been raving about ‘Chain of Command’ over last couple of years. It is a cracking ruleset and I will definitely invest much more time and effort into it.
  • In one rather important respect, ‘Chain of Command’ seems to be a very different beast when compared with other similar rulesets (‘Arc of Fire’ and ‘Bolt Action’ comes to mind). Let me explain.

    Over the years, I have learned to identify (and also exhibited myself) in gamers a phenomenon that I believe can be called ‘a stress cone’ – once a player sets his mind on a ‘target’, be it an enemy unit or a specific location, its destruction must be accomplished. And as the game progresses, this target increasingly becomes the sole focus of gamer’s attention. When this happens, a certain blindness to alternative solutions seems to occur. Flanking manouvers, an often valid option of breaking of contact and re-deployment or employment of less obvious assets is no longer considered – the initial goal must be accomplished. What’s even more important, it must be accomplished by direct assault and destruction by fire or close combat. To an unengaged observer, such behavior may seem odd, sometimes even bisarre. But if you think about it, we all occasionally exhibit it and many of us much more often than not!

    So what does this have to do with ‘Chain of Command’? Well, in most wargame ruleset, the initial phase of the game consists of manouvering the units into contact with the enemy. As this takes time, it also allows players to logially consider their options. Once the units come into contact and ‘combat’ starts to happen, player’s attention shifts to the actual action. He may then enter further and further into this ‘stress cone’ I’ve mentioned above. What seems to be special about ‘Chain of command’ is the fact that with this ruleset, the opposing units can be deployed pretty much on top of each other directly at the start of the game. And indeed, this is exactly what the designer of the ruleset states – a game of ‘Chain of command’ starts with opponents already in contact with each other! In other words, players are placed immediately at the small end of the ‘stress cone’ with consequence of ‘shootout’ games being a very tangible possibility if one is not careful and remains cool-headed. But if a player manages to keep his cool and remembers the simple fact that you don’t have to shoot at an enemy as soon as he’s visible, this ruleset has a possibility to provide a damn realistic experience of low level combat in WWII setting.

Allright, enough of ‘deep thoughts’ for this time around. Let me round this post up with repeating the sentiment that ‘Chain of Command’ seems to be an excellent ruleset. If you haven’t yet, you should definitely give it a shot (pun intended). Smile

September 10, 2016

Here we go again

Last Sunday H. decided to grace me with a visit. Naturally he insisted on dragging his unrully Saxons along with him. My Britons filed a strongly worded complaint to these plans and another clash in our semi-dormant Dux Britanniarum-campaign became unevitable.

Yeah, its’ been a while since I’ve hosted a proper game!

We’re still dipping our toes in the pool when it comes to Dux Britanniarum and trying out different scenarios that are included. In our previous games the games focused on some sort of loot – either plunder of a village or getting away with stuff already grabbed before the encounter in the game. This time around we choose a scenario that is a bit different from the rest of the lot included in the rulebook – a Briton patrol consisting of two warrior groups and an officer are returning from an uneventful stroll around the countryside. The rest of the Briton army is camped around the watchtower at the other end of the table, which also doubles as the ‘panic room’ for the patrol. Saxons have apparently gotten hold of playbook of South-American drug cartels (or would it be the other way around?) and figured out that snaching a noble could render neat little profit without having to deal with angry peasants and sniveling kids.

With a lot of random setup elements in the initial deployment as well as a terrain deployment controlled by players intending to block movement paths or trying to ensure escape routes, there seems to be a lot of replayability in this one.

Initial deployment

The terrain placement would obviously play a significant role in this scenario and it took us a while before we were done with all the sneaky shuffling around of bogs, rough patches, woods and hills. We agreed that all terrain features with the exception of stand alone trees, were medium difficulty terrain. The steep hill-side was impassable.

Next, I placed my units on the table. My forlorn patrol was allowed to move a bit towards safety of the building that proxied for the watch tower (future terrain project?), while the rest of my troops was deployed around it. Saxons had to roll for their entry edge, as well as how many units would enter on first round. H. promptly rolled a six, which meant that all his scoundrels would pour onto the table without any delay.

DuxGame4_001

DuxGame4_002

DuxGame4_003

The game

Plans, plans, plans… Well, the obvious part of my game plan was to make the patrol move as quickly as possible and hope H. wouldn’t catch them. What to do with the troops around my base was a bit more of a challenge, mostly created by myself. In deployment phase I was a bit flippant and spread individual groups around the deployment area – you know, ‘we are resting and doing nothing’-thing. Once the game started, I  realized however a bit too late that this dispersion gave H. an unintended advantage. It would now take time for me to gather everyone together and time was something I didn’t have in this game. By that time it was too late for regrets and I had to adapt to the situation I’ve decided to send my elites and archers under command of Noble on a dash toward the patrol as some sort of quick reaction force. In the meantime I would use my Lord to herd together my levies and when ready, try to get behind the Saxons, wherever they may be at that time.

H. must have read my mind and split his force in three groups – his two groups of hearthguard and two warrior groups set were arranged in separate formations and set of in a run toward their intended prey. Remaining warrior group, its numbers increased to eight warriors after his previous successful raid, accompanied by his archers turned toward my base in a clear attempt to secure the flank of main force.

DuxGame4_004

After a couple of rounds the character of the game started to take shape. Personally I suffered from a brain-freeze and threw my patrol into rough terrain in front of them, not only unnecessarily slowing them down, but also giving the a couple of Shock points. Really dumb move – I should have either rushed to the right of these boulders or rushed to the top of the hill, gaining superior defensive position. My choice now guaranteed that H. would catch my patrol detachment in the open. This meant forming a shieldwall and waiting for the onslaught of a shedload of now clearly visible horde of screaming Saxons, quickly closing the distance.

At the other end, my peasant levies tried their best to gather together, failing miserably, with one group being too fast for their own good and the rest dragging their feet. The ‘fast’ group ended up dangerously close to H.’s ‘security force’, which pounced on them without delay. Three peasants promptly went down in the violent melee that followed… but to everyone’s surprise, two Saxons also met their end in this initial clash! Unexpected casualties seemed to have taken a bit the fight out of the remaining Saxons, who probably expected some easy killing but met their match.

DuxGame4_005

This initial contact also put some ideas into my head – my rescue force was now about same distance from the position of my now stationary patrol as it was from H’s flank group. Due to its separatin, it presented a juicy target – with my peasants in front and comanipulares jumping them from the rear, they’d surely be dead meat! Said and done, I diverted my rescue force from the initial destination. The plan was now to wipe out these separated Saxons first and proceed with rescuing the ambushed patrol if there was still time for that. And if I didn’t make it in time? Well, eye for an eye, mate!

My decision shaped the game into its final form, consisting of two separate actions. The encounter between H.’s flank party and my comanipulares asssisted by a levies shieldwall was a one-sided affair. The outcome was assisted by H.’s consistently bad luck with dice rolls in this fight. His warriors took their time dying, but die they did, one or two at a time! The few survivors finally had enough and broke down, trying to make it to the edge of the board. In this they failed and were unceremonously dispatched by their pursuers. The noble leading this unlucky group managed to dodge all the blows (and there were many!) to the very end and was finally allowed to flee as last man standing. For me, the cost was one slain comanipulares – all things considered, a decent payoff.

DuxGame4_007

The main event was however the last stand of my warriors. And indeed, it was a last stand worth of songs praising this group of stalward heroes! SmileOver five rounds they stood their ground, not budging an inch, slugging it out with the best H. could throw at them. Over the course of this fight there were very few casualties, with just one man going down on each side, and my noble, leading by example, suffering a honorable wound. In the end, the fight was decided by the Shock mechanism, which dictates that each two points of Shock take away one attack dice for the inflicted group of figures. As the fight progressed, my shieldwall formation absorbed all but one kill result H’s hearthguard managed to score, but my Shock points increased steadily. When H’s warrior formation, which lagged behind, finally slammed into the side of my shieldwall, the jigg was up due to a scenario special rule, which said that if Saxons had three times attack dice my force could muster, my lads would give up. And that’s precisely what finally happened – abandonded, obviously in despair and completely exhausted, my warriors realized that further resistance was futile and laid down their arms. But they never broke!

DuxGame4_008

With the entire patrol in the bag, H. declared that he would be quiting the field. This he was allowed to do without any challenge on my part – the distance to the edge was too short and even if I managed to get to his main force before it left the table, it would be in disorganized manner. I would be asking for further losses, so it was better to bite the bullet and wait for the inevitable ransom demand.

Post-battle

In Dux Britanniarum, each scenario is set in a simple campaign setting. Once a game is finished players compare their results – were scenario conditions fulfilled, how many loses were suffered by each side, were any Nobles wounded or killed and so on… This comparison decides who won the game and how much of a success it really was. In this case, the destruction of H.’s warriors on the flank minimized the level of his victory to a rather phyrric victory. But a victory it was nonetheless and now he has enough money to advance career of his warlord to the next step in the overall campaign.

Musings after the battle

Well… there were moments in this game where I feared it would turn out into a frustrating, one-sided affair leaving bad aftertaste in loser’s mouth. But in the end it turned out to be a true nail-biter that could literally turn either way due to a single dice roll! Also, the rules are rock-solid in every respect, with combat mechanism actually surprising me with its, in my opinion at least, quite ‘realistic’ outcome in both main fights of this game. The post-game phase is also a bit of a blast with its capability to reduce a seemingly very sucessful encounter into a sour grape.

Two events that took place during the game require a further analysis. The first took place in final phase of the massacre of H.’s flanking force. The ruleset says that Nobles don’t suffer hits in normal way, instead a simple check is made whenever a group to which the Noble is attached suffers casualties. If a roll on a D6 is equal or less than the number of kills suffered by that group in a fight, the Noble takes that hit instead. In our game, H.’s Noble managed to avoid damage throughout the game and in the end only he and one last warrior was still standing. Three kill hits were dealt against them in combat round that followed. Common sense says that both men were hacked to pieces. But if rules are applied in ‘rules lawyer’ manner (which we chose to do), all these hits would be absorbed by the ‘last’ warrior and a check with a D6 would follow, with a result of ‘1’ resulting in a wound to the Noble. Our check left H.’s Noble unscathed and a lucky card draw allowed him to escape the field. I’m not entire sure how I feel about that outcome, as I would have loved to finish the man! Smile

DuxGame4_009

The other curiosity occured due to scenario conditions. As already mentioned, the ‘main event’ ended with my Noble and eleven of my warriors being taken prisoner. This event posed a question that is unaswered by the ruleset – how were these prisoners to be regarded in terms of loses in post-battle phase? The question is not trivial – a loss of eleven men could be a very significant factor when deciding level of victory, which in turn can have impact on development of the campaign. The noble will probably be ransomed, but would the British lord care about paying for captured warriors? Maybe, but would the Saxon chieftain want to release them? They would probably be worth more on slave market somewhere in Europe. In the end we decided that everyone in captured party had to be considered as a loss. It would however be nice to hear opinions of other players about this situation.

DuxGame4_010

All the ambiguities nonewithstanding, the fact remains – Dux Britanniarum gave us another excellent game and that’s the important thing. Also, with H. having successfully amassed wealth necessary to proceed in the social meta-game, we will now be able to expand number of troops in our games.

May 14, 2016

Iuka Redux

As promised, here’s the AAR of the second take of Iuka scenario, this time with IABSM turn sequence and a bunch of other rules applied correctly. For the background information about the scenario and home rules in play I refer to the first report, since I haven’t changed anything in that department. It is however worth repeating that I planned for the game to run for fifteen rounds, with random extension of of between one and six rounds just to keep everyone on their toes.

This time around it would be a one on one affair, with L. yet again taking the role of Confederate commander, while yours truly would take over the Union troops. Poor bastards…

The plans

It became obvious rather quickly that L. intention was repeat his shock and awe aproach and run over the Union troops to his front with a bold frontal charge with one of his brigades, while the other one kept my flanking force at bay.

I must admit that I did spend a bit of thought on my initial deployment in the time that passed since the first game. I finally came to the conclusion that the original plan of HĂĄ. was a pretty good one considering the initial deployment of troops and restrictions on movement imposed by terrain. I did however decide to make one major change – the first brigade of my ‘front’ force would take position at the edge of the woods at the left edge of the road. The second brigade would however not march up the road, but move quickly over the open field on my right flank, then turn left, traverse the woods and smash into the flank of Rebel forces which I suspected would attempt to repeat the events of previous game. The flanking column on the far side would at the same time try to push as hard as they could manage against L.’s blocking force.

The game

Right, let’s move over to the pictures.
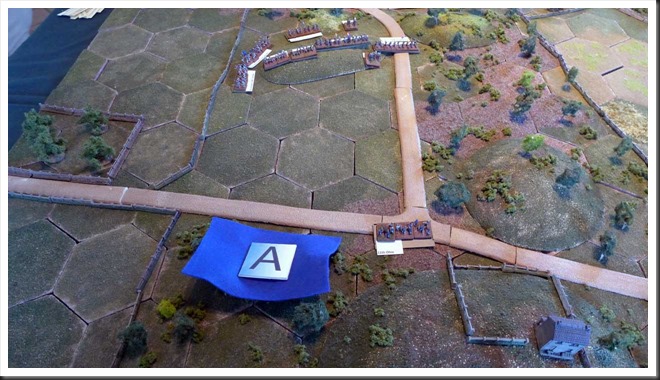
P1020825We start the game somewhere around turn six or seven. L.’s first brigade has been spotted while still deploying for their intended frontal charge. My own troops are by now safely tucked away in the woods. The attached medium artillery battery is deployed from its blind at the road fork, since its unable to enter difficult terrain As it turned out, this prompt deployment played siginficant role in the events that followed, since this battery took rather severe toll on two of the Confederate regiments in its front and delayed their advance for a crucial round or two.


P1020833Couple of rounds later… With L’s assault on its way, I took the opportunity and unmasked my first brigade. Its position on the edge of the woods and supports to the rear would give them a bit of a bonus if Rebels managed to get that far. The effect of the fire of my artillery is already visible, with Confederate left flank starting to drag a bit. Also, it seemed like a good idea to move my skirmishers into a position that would enfilade approaching rebels.

The arrow illustrates my ‘cunning plan’ and the path I intended for my second brigade in its approach toward the enemy.


P1020837A bit more complete picture of the situation somewhere in the middle of the engagement. As can be seen, the situation on the flank is quite similar to that which developed in the first game, with both sides having difficulty deploying troops effectively. The major difference was that use of blinds in this game allowed me to freely deploy the artillery attached to that column where I needed it the most, in this case on the road. Once deployed, it started blasting away at the rebels in front of it, with considerable effect I may add. It actually managed pushing L’s blocking force back a bit all on its own.
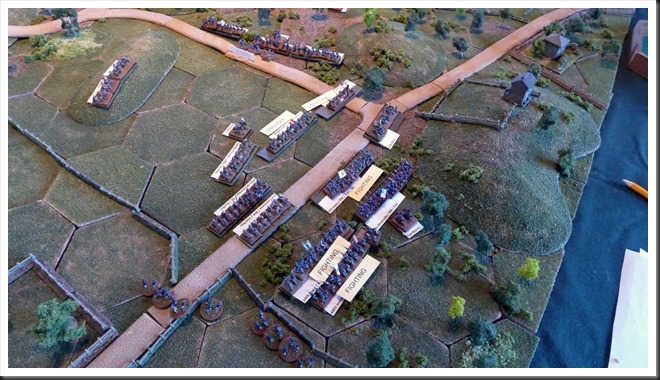
 

P1020842There was however never any doubt that the main engagement would once again take place at the crossroads which were the target of Confederate charge. Despite suffering serious casualties on their way in, once in contact, the rebels had no problems mauling the green Union regiments trying to oppose them. Initial contact was made on my left flank, due to my artillery battery making the rebels to pay dearly for every step they took and temporarily halting their advance. However, where the contact was made, the rebels threw the Union regiment that took brunt of the charge back into the woods, pulling their supports in second line with them.

On the positive note my second brigade has now reached jumpoff position for its own assault. Also, the fire of my skirmishers on extreme left flank of my defensive line was surprisingly effective.

P1020843Whatever optimism I was able to muster from the butcher’s bill payed by the rebels during their advance was sapped away over next couple of turns. L’s seemingly unstoppable grey steamroller smashed into my line across the entire front, with disastrous consequences. My entire brigade was prompty routed, while the artillery battery which punished Confederates so severly was overrun and captured. It seemed like a repeat of L.’s charge in the first game. And indeed it was – once routed, my broken brigade got an unexplainable break and a chance to recover due to lucky unit activation sequence. This was helped by a quirk in TCHAE rules set, which I believe we run into for the very first time - routing troops move fifty percent quicker than troops which are in order. This allowed for my broken brigade to get away from their tormentors for a little while. Next a lucky/unlucky draw of activation chips allowed me to recover most of the regiments (one regiment and crews of the overrun battery run off the table edge and, I presume, of the face of the earth as is custom in tabletop wargames! Smile).

Also, the casualties that L. suffered in his brave, but perhaps a bit reckless advance did start to have tangible consequences -his best regiment having suffered more than 50 percent casualties became permanently defeated, while another was just two casualties from reaching same state. In plain language, two out of L.’s regiments had quite enough excitment for the day.
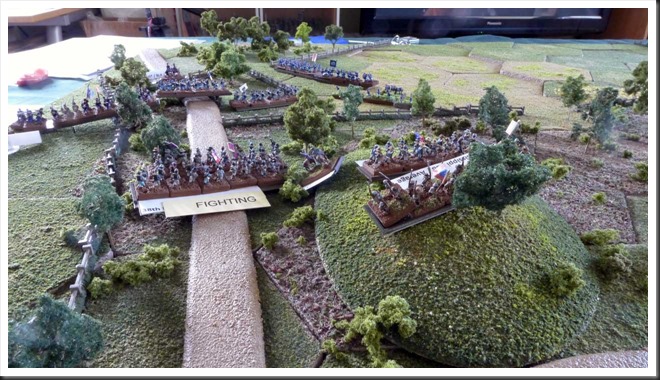
 

P1020850Meanwhile, on the other side of the battlefield, things took remarkably similar shape as in the first game. The activiation chips for forces involved here were few and far between, making any decisive action impossible.

By now we have reached round fourteen out of ‘regular’ fifteen and L. decided to call it a day. Somewhat exhausted after over four hours of gaming time, I readily agreed.

P1020853I was however a bit curious about how things would turn out if we continued and decided to play the game to its conclusion on my own. It took me a week to find the time and energy, but today I finally run the last couple of rounds.

The situation at the time L. and I decided to call it a day was rather peculiar. Union brigade on the receiving end of L.’s bold but costly charge was decidedly shaken, but still useable. At the same time my second brigade was finally in the position for its own assault into the rear of L.’s decidedly bloodied assault force. Aware of that fact, he switched the orders of his second brigade, calling upon it for support. Also, his artillery was in perfect position to blast into the backs of my ‘rescue force’ as soon as it came out into open. So the situation on the battlefield looked like a blue-grey-blue-grey-blue sandwich, with each layer posed to attack somebody.

Before taking on the role of CinC for both sides, I decided that Confederate artillery on the high ground could not be ignored by Union side. I therefore split my second brigade into two parts – two regiments were to advance against Rebels to the left, while the remaining regiment and skirmishers would engage the artillery batteries to the right.

The first two rounds (final one of ‘ordinary time’ and first bonus turn) went pretty well for boys in blue. Rebel guns weren’t silenced, but I did manage to mask them and cause some casualties among the crews. Also, my ‘assault force’ of two regiments seemed to gain upper hand against the single Rebel regiment that opposed them. Then second bonus round started and ended abruptly with first activation chip drawn being a ‘Coffee break’. This was followed by a roll of six on a check for next bonus round, bringing a rather anticlimactic finalĂ© to this game.

Musings after the battle 
Right… let’s start with a quick explanation regarding the reason for me and L. wanting to replay this scenario. As already stated, first time around I bungled several crucial sections of the ruleset, such as sequence of play and what ‘mandatory’ effects close combat had on participants. I also managed to ‘forget’ the fact that units can move multiple times under certain circumstances and refrained from using the ‘blinds’, which theoretically at least allowed for more rapid movement. L. and I suspected that if the ruleset was applied correctly and with the blinds in play, we’d be able to move more often, providing a more rapid game.

It is safe to say that our expectations were not met – the contact between L.’s first brigade and HĂĄ.’s defening troops in first game took place in round eleven, in our game in round ten. The action on the flank was as inconclusive as in the first attempt. My flanking force arrived to its jump-off position about the same time as it arrived to HĂĄ.’s rescue in previous game. In other words, correct use of movement rules and taking advantage of supposed advantages of ‘blinds’ had no effect in this particular game. On the other hand, applying correct turn sequence certainly did make some of the rules more logical, but without influencing the ‘feel’ or course of the game in any significant manner. L.’s assault was in most respects a repetition of what happened in our first game, main difference being that he took much more severe casualties while charging my line. This was due to my deployment of troops, not because of the ‘corrections’ to the rules we used this time around.

The ironic thing is that paying careful attention to the rules in TCHAE led me to a couple of new insights about this ruleset and none of them is very positive. The ‘blinds’ mechanism, while providing intended fog of war, is also in my opinion something of a can of worms as soon as partial deployment of units is attempted. It is also the only the ruleset I know of where line of sight rules are not clearly defined. This omission forces players to make their own judgement calls when trying to comply with restrictions applied to multiple unit moves in same round. Also, both L. and I were a bit dumbfounded by realization that movement rates between line and column formations (for units deployed on the table) are exactly the same. I’m sure that the rules designer has good reasons for this decision, but the explanation for this rather odd choice would be welcomed.

I’ll be frank and admit that all the ambivalencies and question marks that pop up every time I play a TCHAE game are starting to bother me more and more. At the same time it is without a question a tabletop games ruleset I am most familiar with and therefore most comfortable with. The dilema I find myself with is  therefore somewhat peculiar – do I stick with TCHAE despite all of its annoyances or do I, for lack of better word, dump it and start hunting for a replacement ruleset?

Now, where did I stash that copy of ‘Guns at Gettysburg’…

December 30, 2015

Charlie Don’t Surf Auto-Generated Scenario

Yesterday, H. dropped by and that gave me opportunity to have another go at ‘Charlie Don’t Surf’. This time around I’ve decided to give scenario generator a limited try, so a couple of words about how it works is probably suitable. In CDS, each side is provided with a selection of four different types of generic scenarios. When scenario generator is used in full, players are supposed to roll for the scenario type first, next for variables in scenario type assigned for their side and finally for the forces that will participate in the game (usually a company with some support). I’ve decided to simplify things a bit and, lazy as I am, I’ve reused the OOB-s from the previous game. Next I’ve assigned a ‘Sweep’ scenario for U.S. side and ‘Evade’ for VC.

Scenario

‘Sweep’ scenario type requires for the Allied side to make… well… a sweep, from point A to point B. While doing that, the troops are assigned up to three objectives. In this case, U.S. side had a search of the village as its primary goal, recon of the heights as secondary and interogation of locals as triary.

In ‘Evasion’ scenario, Viet Cong had to get out of Dodge. An exit edge is randomly decided before start of the game and the troops were then placed on the opposite side. The main goal is to get out with as many troops as possible. Picture below shows the scenario overview before start of the game.

CDS_20151229_002

Random card draw assigned VC side to yours truely. H. was kind enough to take upon himself the task of U.S. commander.

My plan was rather simple. Since I had a bunch of local guys under my command, I didn’t want any extended shootous with the enemy. Thanks to the same fact (control of local force units), I also had a whole bunch of dummy blinds at my disposal. They would come in handy as a massive decoy on one flank, while I sneaked of the board on the other.

H. decided to take care of buisness as quickly as possible and selected the edge closest to the village as his entry point. Two platoons immediately headed of toward the village, obviously with the goal of ransacking the huts and intimidating the villagers into giving up any info on Charlie they may have. One of the hills would be the initial destination of the remaining platoon and MG platoon.

The game

Why abandon the winning concept? Let’s have a look at the pictures?

CDS_20151229_008

First phase of the game was a true sleeping pill. H. moved over open terrain and rapidly occupied the village and high ground on the opposite side of the road. I on the other hand had a much worse time getting my troops going. Not only did I manage to roll an amazing amount of ones and twos, but the jungle terrain sapped about half of whatever movement allotment I managed to scrap together.

A somewhat bizzare situation occured during that phase of the game. Since none of my units/blinds could spot H.s blinds and they in turn had no targets to shoot at, H. could not deploy his troops. On the fly, we decided that his blind in the village could search two hootches per round, while the officer was allowed to interrogate one villager per round withouth having to deploy. My slow approach gave H. plenty of time to find the two rice stores hidden in the huts, thereby achieving his main objective. The force sent up the hill climbed it, found nothing and decided to take a rest.

CDS_20151229_017

When my dummy blinds finally reached the position occupied by H., another odd situation occured. H. was apparently unwilling to abandon the high ground, while I wasn’t very interested in pushing on and disclosing my bluff. And so, for most of the game, we just sat there, starring at… nothing. In the end, H. broke the impass by pushing his dummy blind into my ‘troop concentration’, revealing a lot of empty space.

CDS_20151229_012

On the other side, things finally heated up as my least letargic platoon scrambled up the high ground. U.S. platoon in the village was still in the hoots, but the one supporting it was in the rice paddies, giving me a perfect opportunity to blast them. One of the americans fell, critically wounded, the rest took cover wherever they could. However, a medevac helicopter arrived swiftly, fetching the wounded soldier to field hospital (no, no helicopters are painted yet, thus improvised marker).

CDS_20151229_021

A nasty little firefight followed. I brought up my second platoon to the edge of the jungle, hoping on suppressing yanks in the village with their firepower. At the same time I intended on leap-frogging the platoon on the hill toward my exit edge. Ideally, my heavy weapons elements (recoiless gun and an MG) would be able to reach the low hill facing the flank of the village and keep the yanks pinned, allowing the rest to exit.

Plans are one thing, reality (or dice) allow for something very different. Fire from my platoon in the jungle was completely innefectual, while the heavy weapons group continued to take its sweet time getting into position. This forced the platoon on the hill into an exchange of fire with H.s units around the village. My fire had some effect – one american soldier fell dead, while yet another was critically wounded. Another medivac was called and responded as quickly as its predecessor. The rest of americans blasted into the jungle line, killing one of my soldiers and severly surpressing one of my squads.

CDS_20151229_019

H.’s MG platoon on the far hill also opened up, taking my rear platoon under fire. This caused me some concern. MG-s are effective at much longer range than normal infantry small arms, so the two ‘Pigs’ on that hill reached comfortably edge of the jungle on the opposite side of the road. Given time they would hurt me. It was time to get back into the jungle, after all my goal was to get out, not to engage the enemy.

It was at that time that H. announced that he would now be pulling back from the village area. After all, his primary action was accomplished and his casualties were a bit alarming. Also, by now we’ve been at it for four hours and were a bit tired. And so, we called it quits. Picture below shows an overview of the situation at the end of the game, as seen from the hill occupied by the Americans.

CDS_20151229_024

Musings after the battle

Yesterday’s game was one of those slightly odd occasions where the scenario ‘starved’ the enthusiasm out of the players by couple of mistakes in its design. To begin with, my movement into contact took far too long. As it turns out, this was mainly caused by me forgetting the fact that units on blinds can ignore first –1 in movement penalties in difficult terrain – a valuable lesson for the future. This –1 may not sound as much, but it is applied on every dice, meaning a reduction of movement by 4’’ per turn if a blind uses all its dice for that purpose.

Another thing that I think would make improve this setup immensly would be by moving the village into the center of the table. This would force U.S. side into more agressive movement, speeding up moment of contact. Funnily enough, a very similar scenario can be found in the Too Fat Lardies scenario book for ‘Charlie Don’t Surf’ – there, the village is placed smack in the middle of the table. I think I now know why that is. Smile

And what about ‘Charlie Don’t Surf’ itself? Well, I still haven’t used rules for artillery, helicopters, air support and a whole bunch of other stuff, but in general terms it is what it is – ‘I Ain’t Been Shot, Mum’ with Vietnam flavour. If you like IABSM, you’ll like CDS. With two ‘Tea Break’ cards, chaos of the card driven game engine is managable and I really do like the fact that Big Men have action points that can be used to activate either platoons or squads.

However, the Blinds mechanism in ‘out of the box’ format still seems to suffer from same issue that I’ve first observed in ‘They Couldn’t Hit an Elephant’. If deployment of troops is restricted to the two situations specified in the rules, which is either when unit wishes to fire or is spotted by enemy, then situations such as this which occured at the start of our game are bound to happen! Naturally, most of them can be resolved by application of common sense and couple of ad hoc rules. At the same time, when they occur, they will at the very least put extra strain on game master or players. Furthermore, as we all know, supply of common sense can sometimes run out in heat of battle. Smile Therefore I think that in the future games I will re-instate the rule I’ve already used in TCHAE games and allow players to voluntarily deploy their own troops from blinds at the end of each turn.

September 06, 2015

First taste of Charlie Don’t Surf

And so, more than two years after I decided to dive into this project, the day finally arrived – yesterday, I’ve run my first game with ‘Charlie Don’t Surf’, Too Fat Lardies’ company level ruleset for Vietnam war. T. took charge of Americans, L. run the local VC forces, while yours truly took upon the ungrateful role of game-master.

While ‘Charlie Don’t Surf’ has a full-fledged scenario generator, I’ve decided to keep things to bare minimum for this first try and put together a simple scenario without any bells and whistles – a reduced strength U.S. company with 3 x platoons with two squads each and a weapon platoon of two M60’s was to perform a search of a village suspected to contain a VC store. Local VC company of two platoons (3 squads each), an MG and a recoilless rifle stood for the opposition.

The game

Once again, I’ll rely on the pictures for the ‘meat’ in the AAR, with supplementary text providing the details. Quick comment about the pictures; for this first game I wanted as little distractions as possible, so I didn’t take any pictures while it played out. Instead, the pictures were ‘arranged’ today, while my memory of the game was still fresh. Mistakes were however committed, the most serious one consisting of me forgetting to deploy MG bases that were attached to two of U.S. squads, thereby augmenting their firepower. Furthermore, I didn’t bother with placing the ‘shock’, ‘pin’ or ‘suppression’ markers that were present during the game.

CDS_Test_Game1_02

The picture above shows the terrain where the engagement took place. Once again, with goal of keeping things as simple as possible, the jungle was designated as ‘light terrain’. Clumps of vegetation are also ‘light terrain’ although they do block LOS. Elephant grass is designated in CDS as ‘light terrain’, but I’ve read multiple personal memoirs of how exhausting it was to get through them, so until further notice I’ll regard it as ‘hard terrain’.  Rice paddies, hills and houses are self-explanatory.

The game started with L. deploying his forces. 1:st platoon and recoilless rifle took up position in the woods and on the height above the village. 2:nd platoon was deployed in the woods on the other side of the road, while the machine gun was placed on the height nearby, guarding the flank (I guess).

In CDS, units of platoon size initially have to be placed under so called ‘blinds’, effectively disguising the type and strength of the units. Furthermore, each terrain feature can act as a ‘blind’, thereby making units placed in such manner totally hidden – so in our game, initially there was no indication of 1st platoon and recoilless rifle at the beginning of our game.

Additionally, each side has the right to deploy a number of dummy blinds. Number of such dummies varies depending on ‘fraction’, with local VC being the extreme case. They’re authorised to deploy one dummy blind for each real unit in their OOB. Transparent red rectangles indicate where L deployed his dummies (although I do believe there weren’t as many as in the picture! :-).

Finally, L. marked a grand total of five tunnel entries on the board, or rather on a snapshot of the board I took before the game and printed out for this very purpose; isn’t modern technology grand?!! Four of those secret entries were in the area where his 1st platoon was hidden. One entry was placed just beside the lone house near the road.

With L. ready to receive his ‘guests’, we were ready to start! Events of initial four or five rounds are shown in the picture – T. entered the board from the right, with two platoons above the road and one below. T. had to spend some time on spotting and removing of fake blinds L. placed in path of his advance. This was done without problems, but T. had to disclose content of his own blinds while doing it – false blinds can spot as well as real ones!

CDS_Test_Game1_05

Meanwhile, the local villagers minded their own business, doing their best to ignore American patrol.

CDS_Test_Game1_12

Contact! In fifth round, L. took advantage of the fact that T.’s 1:st platoon came into close range of his own 1:st platoon hidden in the woods at the end of the turn. This gave him the right to open fire and he blasted forward squad of T’s exposed platoon with massed fire from two squads that were in range. This could have had fatal consequences, but luckily for T., L.’s ‘famous’ bad luck with dices restricted the casualties to one KIA and some ‘shock’ points.

CDS_Test_Game1_13

T.’s luck held in round that followed, with his 1:st platoon being activated before its assailants. His return fire managed to cause several ‘shock’ points on one of VC squads, but no casualties. Next, he called on 2:nd platoon for support – the rushed at top speed into the woods, their goal clearly being the flank of VC position.

L. had opportunity to continue the engagement, but decided that discretion was the better part of the valour. When his platoon was activated later in same turn, he broke contact and directed his troops to the tunnel entrance conveniently placed behind his position. In subsequent round T. managed to drop one of the retreating opponents , but that was all he managed to achieve before the VC platoon disappeared from sight.

CDS_Test_Game1_15

With VC vanishing into thin air, T.’s 1:st platoon headed for the edge of village. As soon as one of the squads got inside the hutch, L.’s recoilless rifle pumped couple of 57mm shells into it. Yet again, the results of the fire were limited to couple of points of ‘shock’, although one of the civilians taking cover inside the hutch was instantly killed.

T:s response was rapid and similar to that of the reaction to the initial VC attack – concentrated fire from two squads suppressed the gun’s crew and caused two casualties. Next, 2:nd platoon came into firing position, opened up and killed two more crew members. With single VC soldier remaining standing, we removed the gun from the play, even though there are rules in CDS for handling such situations with a bit more detail.

This ended the game in this sector, even though T. took advantage of the lull in combat and tested the rules for interrogation of civilians. The peasant in question was however, as the ruleset expressed it, ‘not interested in conversation’. :-D

CDS_Test_Game1_17

Meanwhile on the other side of the road, T.:s 3rd platoon advanced slowly forward against one of L.’s dummy blinds after another, until they unwittingly got in range of L.’s hidden machine gun. It opened up on one of the squads and managed to kill one American soldier before extremly effective return fire from his comrades almost instantly eliminated machine gun’s crew to the last man.

With 1:st VC platoon skulking in the tunnels and 2:nd never being able to get into position, we decided that it was quite enough excitement for this time and called it a night.

Musings after the battle

What did the ‘combatants’ think of this first experience with ‘Charlie Don’t Surf’? Well… T. has never been a big fan of rulesets from Too Fat Lardies and ‘I Ain’t Been Shot Yet, Mom’ in particular has become something of his pet peeve during the years when we used it for our WWII games. So, considering the fact that CDS is a derivative of IABSM, it’s hardly surprising that his impression of the ruleset was lukewarm. As far as I understood it, his initial opinion could be summarised with single word –overcomplicated.

L.’s initial impression, while restrained due to the basic character of the scenario, was definitely more positive.

As for me, the goal of this game was for me quite simple and clear – I wanted to get familiar the core rules for command and control of troops, basic infantry combat mechanics, and if we managed it, get a taste of some of the rules specifically designed to handle peculiarities of Vietnam conflict. I feel that this little scenario gave me what I was looking for, but at the same time it hadn’t provided me with enough ‘data’ to form a definite opinion about the ruleset. Of course it won’t stop me from writing another, more detailed post about my initial thoughts of ‘Charlie Don’t Surf’ in next couple of days, so stay tuned! :-)

May 24, 2015

Refighting assault on Battery Robinett

Time for another after action report for an ACW game we played earlier today. I’m still stuck on Caliver Books’ “Heartland” scenario booklet and now it’s time for Corinth. “Battery Robinett” depicts the Confederate assault on battery Robinett, so called after its commander Leutenant Henry Robinett and which was one of key Union positions in this battle.

For this game, we used yet again ‘They Couldn’t Hit an Elephant’ with the modifications I described in my AAR for ‘Shiloh’s Church’ scenario – card deck is replaced with chips drawn from a bag, number of chips is equal for both sides regardless of number of units on each side, with dummies making up the balance for the side with fewer number of chips in the bag. All chips are present in the bag from the start of the game, even before the tactical deployment to offset any mathematical advantages gained by unequal deployment of units/blinds on the table.

For those interested about the ruleset, I’ve reviewed and analysed it in my previous posts. There, you’ll also find descriptions of my modifications and reasoning behind them.

The scenario

As already mentioned, “Battery Robinett” is an attempt to depict one of key actions in battle of Corinth. The scenario itself is a surprisingly small affair – eight Confederate regiments with some artillery need to carry an extremely well-fortified Union position manned by a brigade consisting of five green Union regiments, a bunch of artillery batteries, two of which are heavy 20-pounder Parrots. Two small unattached Union regiments, short on ammunition, are also present on the battlefield, but they hardly played any role in our game. Union commander may get an additional large regiment in reinforcements during course of the game.

The game

I’m rather liking the picture-heavy format I used in AAR for the Shiloh game, so why not use it also on this occasion?

BatteryRobinett700The game starts with Confederate brigades formed in a wood facing federal field works, preparing for the assault. L. took command of Rebel right wing, while T. took control over the brigade to the left. Yours truly is peaking over the parapet of Union breastworks, feeling the tension in the air… The rebs are coming!

The picture shows the left and central section of Union line. Breastworks are stretching across the line, manned by the five regiments under command of certain Colonel Fuller. The ‘battery Robinett’ is the gun in the middle. Two lines of abatis cover the field works. Since there are no rules for abatis in TCHAE, I applied my own – either move to the breasworks and spend entire movement allotment to cross in ordered formation or spend half a move on breaching it and become ‘Disordered’.

BatteryRobinett701Nothing to do with the game, just T. making his own field adjustments for gaming purposes. Ler

BatteryRobinett702Confederate dispositions were uncovered instantly once the rebel regiments step out into open field, revealing their concentration of force on the centre of Union position.

BatteryRobinett703“In my campaigning I had never seen anything so hard to stand as that slow, steady tramp. Not a sound was heard but they looked as if they intended to walk over us.” – Captain O. Jackson 63rd Ohio Infantry .

L. chose a tight formation two regiments wide, his Napoleonic inclinations clearly showing. T. choose to throw one of his regiments into a skirmish line, with the remainder advancing in single line close behind.

BatteryRobinett704Not much of a prelude in this engagement. Confederates took some casualties while closing on Federal entrenchments, but close quarter combat was the name of today’s game. First to reach Union positions were the front regiments of L.s brigade. One of them broke under small arms fire as soon as it crossed the abatis, while another thrown back after savage point blank fight. That gave L. a pause. But by then T.s Texans reached the section of the Union line without the additional protection of abatis…

BatteryRobinett705…and it was all over but the crying. Both 63rd Ohio and 11th Missouri, manning the breastworks to the right of the road ignominiously run away before the Confederate charge. Even though I managed to stop their rout shortly after, their initial collapse turned them into a useless mob, just waiting to continue their flight. Even 27th Ohio, which I moved over from the left to the right just in time to plug the hole made by the fleeing regiments wasn’t of much use…

BatteryRobinett706…as L. figured out that a commander in chief shouldn’t have any problems giving move order to all of his brigades with single order if they were close enough… which in this case they were! And so, a general onrush of rebels smashed into the blue-clad regiments. T.’s Texans brushed away the already shaken 63rd Ohio and 11th Missouri and then charged 27th Ohio and an artillery battery, which now was all that stood in their way. Neither of Union units took much convincing before joining their already routing comrades in the rush to the rear.

To the right of unstoppable Texans, L.s brigade reached the breastworks yet again, slamming into and routing another Union regiment. Once the turn was done, the crew of guns of Battery Robinett and a regiment immediately to its left was all that was left of Union line.

BatteryRobinett709And so, it was done and the day belonged to the Rebels. T. and L. were courteous enough not to glee too much before heading for home, leaving me to clean up the mess while wondering what went wrong.

Usual musings after the battle

OK, so first a couple of words about the game in general. By now I’m quite familiar with TCHAE and it’s paying its dividends – today’s game flowed smoothly and we were done in under three hours. Questions still arose now and then, but with a bit of common sense, they could be resolved without too much pain or searches in the rules.

As for the outcome of the game… well, by now it is very clear that with TCHAE, raw troops don’t stand much chance in close combat against a side of significantly better quality. This is the explanation for the sudden collapse of my right flank; my regiments were raw and assaulted by veterans with ‘aggressive’ attribute, which is pretty much the best you can have in this system if you’re charging into a defensive position. I may very well have ‘overcooked’ T.s brigade while adjusting the scenario to TCHAE, but with only three troop quality levels and four attributes to play with, it is almost impossible to model subtle qualities of individual regiments.

Still, even with ‘aggressive’ veterans, things can go sideways also against raw troops, as L.s almost stalled assault clearly showed. TCHAE gives enough playroom for ‘fortunes of war’ that on a different day even T’s seemingly irresistible charge could have been thrown in disarray with a bit of luck.

It is also worth observing that the Union reinforcements in form of one large regiment never showed up – I may have been too restrictive with the conditions of its appearance and it could have played important role in stemming the confederate advance.

Historically, the Confederate troops were nowhere close to being as successful as T. and L. were. J.C. Moore’s brigade (L’s command) was apparently formed in assault columns, an unusual formation in Civil War; THAE doesn’t even provide rules for assault columns! Perhaps their unusual tight formation was the reason for them suffering terrible losses before being repulsed, their commander being one of those killed in action. Phifer’s brigade was also shot to pieces, with Texan regiments so effective and horrible in our game being especially severely mauled. However, the Arkansas regiment of that brigade did manage to punch straight through Union line, only to be ambushed in Corinth itself by 5th Minnesota regiment, which also happens to be the reinforcement that failed to materialize in this scenario. So, maybe the outcome of our game isn’t as far from historical result as one would think! Ler

Confederate dead in front of Fort Robinette, CorinthPicture of real Battery Robinette after the assault depicted in this scenario.

Finally, couple more words about TCHAE itself. If I am to be perfectly honest, after all those years and several games with it under my belt, I am for variety or reasons still of split mind about it. And that’s why I have now decided to run this very scenario with two other ACW rulesets I own at this moment – ‘Black Powder’ and ‘Guns at Gettysburg’. AAR’s and comparisons will of course show up here in due course.