Showing posts with label product review. Show all posts

May 10, 2018

Najewitz Little Farmhouse and barn–ready for action

Seems like every single post I make here starts with “It’s been a while since the last post…”, but this time around it’s really been a while since the last post! Funnily enough not because stuff isn’t moving forward on wargaming front, mind you! The fact is that April, which didn’t even earn a single post here, was quite busy and fruitfull, thank you very much. But “real life” made it impossible for me to make any pictures and let’s face it, what’s the point posting something without pictures, right?

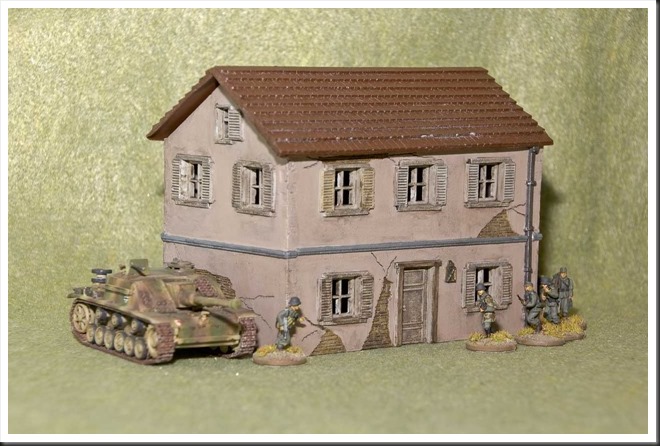
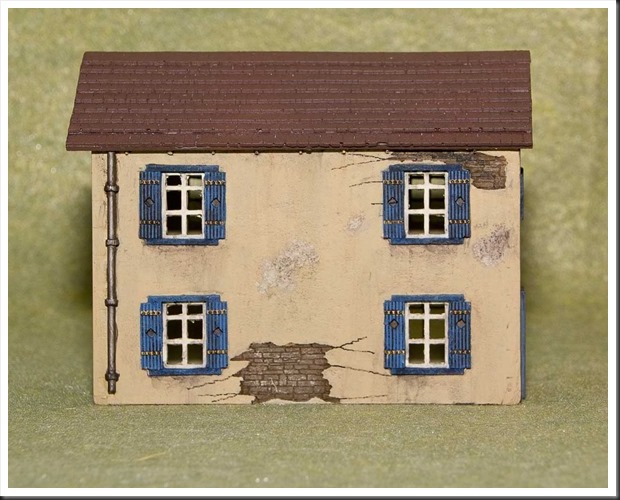
And so, here are finally some pictures, this time around from the finished Najewitz buildings that figured prominently and ‘in natura’ in my previous post. By now, they’re finished, painted and ready for featuring in those Chain of Command games I keep planning for.

Since those buildings are no longer available on the market, I will limit myself to saying that they’re very nice, but also very labour-intensive – couple of hours at the minimum needs to be spent on cleaning them up, glueing, sanding and filling. “Ready for deployment out of the box’ they’re not. But… once finished, they do look quite presentable and I look forward to putting them on the gaming table!

As for their preparation, they’re certainly a learning experience. I’ve cut some corners this time around and, after priming them in grey, I dealt with the interior quickly and efficiently with help of light cream paint in a spray can from Montana’s Gold product line. I’ve recently remembered about the existence of Montana and their spray cans and now I absolutely adore them. For those unfamiliar with the company, they produce spray cans for grafitti paintings. Wide range of colors, matte finish and very durable. Two coats were more than enough to paint the inside of my buildings. If you can find them, give them a try!

Exterior of the houses was painted with more traditional paints and techniques. Humbrol enamels were used on the stone barn. I tried to vary the shades of brown and do some wet-blending, but as usual I’ve chickened out in regard of palette and the end result is pretty uniform and boring. Oh well, maybe next time… The farm house was painted with… acrylic wall paint bought at local DIY shop. Perfect coverage and a whole lot cheaper than stuff from GW, Vallejo and such! I finished everything off with some Vallejo washes, just to dirt things up a bit.

Here are the promised pics, hope you’ll like them!

2018_Blog_0592018_Blog_0602018_Blog_0612018_Blog_0622018_Blog_0632018_Blog_065

December 23, 2017

Najewitz French Café and garage

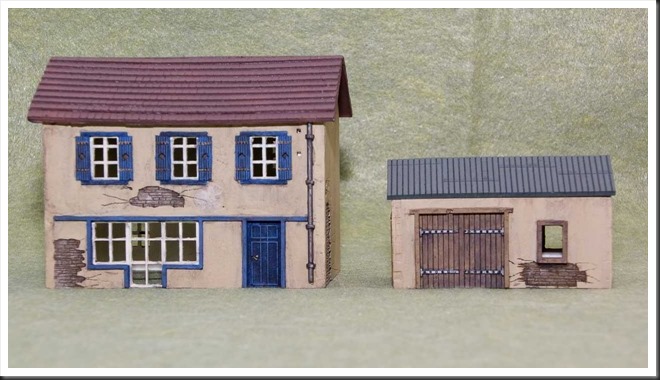
Couple of posts back I’ve posted a short note about starting work on a couple of 1/72 buildings from Najewitz. Well, they’ve been done for quite some time by now, I just haven’t had time to take the snapshots. And here they are!

My verdict about the kits? Construction was pretty straightforward, although I didn’t manage to get the walls to fit with each other 100 percent. In fact, the ‘hacksaw’ joints were quite prominent and even with generous dose of filler I didn’t manage to get perfect result. I have however to clarify that the issue could have been self-inflicted. Initially I tried to glue the parts together with plastic glue and was a bit surprised when it had no effect whatsoever. In slight panic mode, I switched over to super-glue and that worked much better, but I rushed the job and wasn’t very careful with ensuring 90 percent angles between individual walls.

Most problematic part turned out to be the roofs, or more precisely, getting the right angle there. I completely botched the job with garage roof and as a result there is a significant gap in the “joint” between the roof and the building.

Painting consisted of couple of steps. After a base coat of black from a spray can (big mistake, which I will not make again), I painted both buildings with actual acrylic wall paint. Let me tell you, those sample cans from DIY shops are worth their weight in gold, when compared with Vallejo or GW paints! Smile Details like doors and window frames were painted with craft acrylics. Roof of the café building was airbrushed with Tamiya brown paint, while that of garage was painted with some off-green Vallejo paint. Not much consistency with techniques here…

As first step in weathering process, I gave both buildings a generous wash of Vallejo’s dark brown wash. Next, I used enamel washes to do some dirt and rain water streaks. Drain pipes were darkened with a couple of layers of different dark brown and grey washes.

The big although perhaps irrelevant question (after all, Najewitz isn’t selling these kits anymore) – are they any good and are they worth the cost? As for “any good”, you may judge for yourself, but personally I’d say ‘heck, yeah!’. They’re perfect for any WWII scenario in France or neighbourhood! In regard of value for money; here I must say that it kind of depends. You get two nice, but relatively simple kits for 25 Euro. With a bit of effort and investment of 6-8 hours I could probably crank out something similar on my own and here’s the big question – is the price worth a working day? To be honest, I don’t know.

Anyway, here are the pictures, hope you enjoy them.

Najewitz_Cafe_And_Garage_Done_003Najewitz_Cafe_And_Garage_Done_012Najewitz_Cafe_And_Garage_Done_013Najewitz_Cafe_And_Garage_Done_014Najewitz_Cafe_And_Garage_Done_015Najewitz_Cafe_And_Garage_Done_018Najewitz_Cafe_And_Garage_Done_024

September 28, 2017

Timecast bridges–a Quick snapshot

I’ve finished bridges for Timecast’s river system and had a bit of fun with the camera.

Timecast_bridge002_1

August 19, 2017

Timecast latex rubber rivers

Since this article is a ‘pure’ review of a commercial product, let’s start with the mandatory declaration of independence – I am in no way associated nor sponsored by Timecast Models. Thus, this review is an expression of my personal opinion as private consumer and wargamer.

Allright, with these rather official preliminaries completed, let’s get on with it.

Couple of years ago I’ve decided to ‘migrate’ my terrain from GHQ-s styrofoam hexagons to ‘conventional’ DIY terrain boards. Major reason for this move was my wish to simplify the setup and keep as much of it (hills, woods, rivers, ditches, hedhes and so on) as removable, flexible stand-alone pieces.

At the same time, Timecast Models released their roads and rivers system, made out of silicone rubber. That in itself wasn’t anything spectacular, many companies make similar terrain pieces. But two things caught my attention in regard of this particular product range. First, Timecast Models made rivers came in four different widths that could be connected together with dedicated ‘connector’ bits into integrated waterway system. Second, Timecast complemented their product with variety of resin bridges and fords. In other words, their product line struck me immediately as a complete and expandable solution for waterways. And that, ladies and gents, isn’t something one can often say when it comes to wargaming terrain.

My first (and so far only) order included enough straight and meandering river sections of smallest width to provide continous river of about 2 meters. I’ve also ordered all available sets of fords, connecting bits and river bends. Samples of what came in the box are shown below.

Timecast_Small_Rivers_009Timecast_Small_Rivers_004

As can be seen in the pictures, the rivers and fords are made of brown, flexible rubber-like material. You can easily cut and trim individual pieces with a pair of scissors.

Before painting and flocking, I washed the whole lot in lukewarm water with some dishwasher detergent. Every bit was gently scrubbed with a toothbrush, rinsed in cold water and left to dry. It was probably a bit of an overkill, but better be overly cautious than running into problems later on with some chemical residues left-over from mouldning process messing with the paint.

On with the painting then… I kept things extremly simple here and started with painting the riverbanks with dark-brown acrylic wall paint from Flügger. Water surface was painted with dark-blue acrylic artist’s paint from Amsterdam. I know, I know, not very realistic, but I like my rivers and ponds blue. Next, I tried to add some shine to the water surface with help of blank acrylic varnish, but I can’t say this step had a lot of effect. Finally, I’ve stuck some flock on top of river banks with thinned PVA glue. And that was that.

Timecast_Small_Rivers_011Timecast_Small_Rivers_012Timecast_Small_Rivers_013

Couple of comments about painting process. First and foremost – the paint seems to stick to the rubber material used for these terrain pieces… and stays there! This is more than I can say about my silicon roads from Total Battle Miniatures. Yes, you can peel it of if you scratch it forcefully with fingernail or something sharp, but the paint doesn’t peel of on its own if you bend the ‘bands’. That’s a good thing. Second, the flock I’ve glued on with the PVA will probably rub off with time. But that’s no biggie, I’ll just reflock if I feel it’s necessary. Finally, I feel it’s a good ocassion to repeat the advice I keep hammering on this blog – if you value your money, do not use modelling paints for your terrain pieces. Vallejo, Army Painter, Games Workshop, it doesn’t matter which brand you use, their pricing is insane and wasting their product on terrain pieces will cost you a pretty penny. For large terrain pieces, use artist’s paints that come in huge tubes, or better yet, take a trip to your DIY market and find their paint section. They usually sell half litre sample jars that will last you forever, for price of two GW paint pots and carry color ranges that will make all modelling paint ‘systems’ look puny.

Oh yes, one last thing. I’ve included couple of resin bridges that were suitable for those rivers. I still haven’t painted them, but I think it’s only fair to included couple of snapshots of how they fit together with the rest of  the ‘system’.

Timecast_Small_Rivers_015Timecast_Small_Rivers_017Timecast_Small_Rivers_018

Overall, my initial impression of Timecast’s river system is very positive. They’re made of what seems to be durable, flexible material. Acrylic paint and varnish sticks well on them and they look the part once painted. Addition of dedicated bridges and possibility to integrate different river widths into single ‘system’ is in my opinion a stroke of genius and was the factor that convinced me to go with this product. So, for the moment at least, I can’t but enthusiastically recommend it to anyone in need of simple but effective representation of rivers on wargaming table.

August 01, 2017

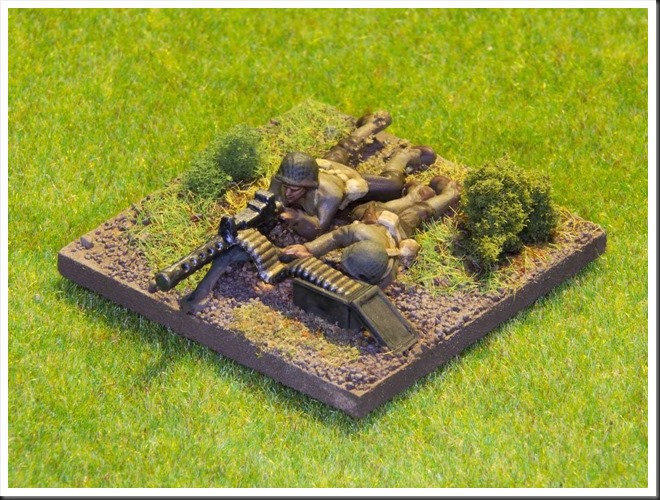
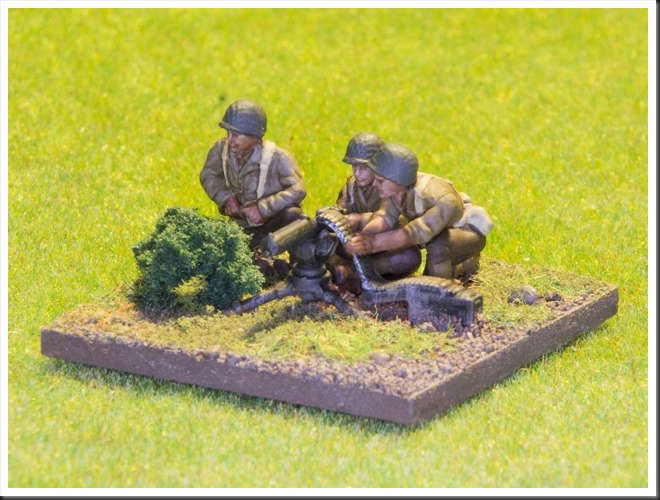
1/72 US Heavy Weapons set from Plastic Soldier Company– painted

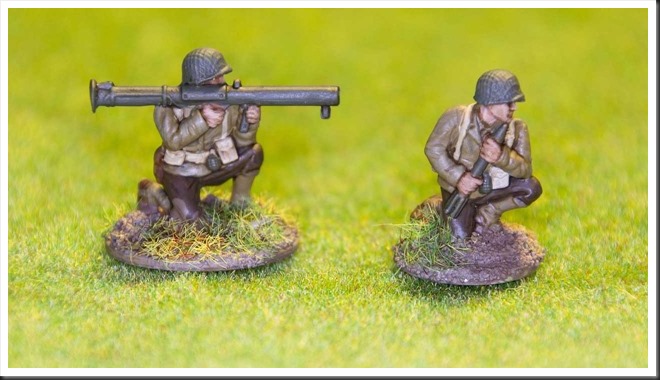
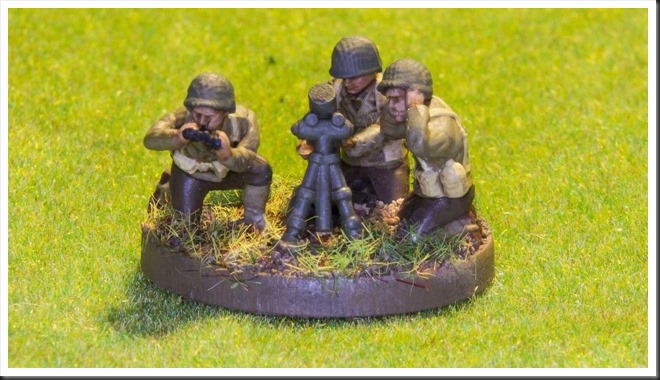
Took me just two months, but they’re now done. Final impression after putting some paints on them? Neeeaaah… my initial impression hadn’t changed that much – they are cheap and they are adequately detailed for a wargaming table. It should be enough and yet, somehow, it isn’t.

Oh well! Judge for yourself, what do you think?

PSC_Painted_US_Heavy_Infantry_001PSC_Painted_US_Heavy_Infantry_003PSC_Painted_US_Heavy_Infantry_005PSC_Painted_US_Heavy_Infantry_006PSC_Painted_US_Heavy_Infantry_007PSC_Painted_US_Heavy_Infantry_008PSC_Painted_US_Heavy_Infantry_009PSC_Painted_US_Heavy_Infantry_010_1

May 31, 2017

Quick look at 1/72 US Heavy Weapons set from Plastic Soldier Company

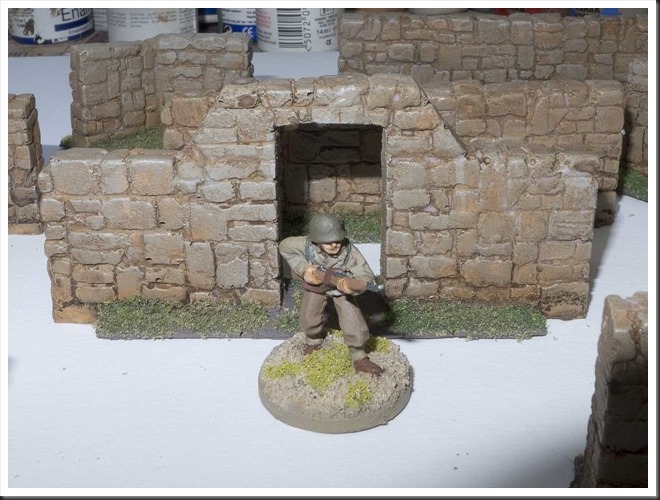
There is this old wargaming saying that claims that there is no better motivation for painting more minis than actually playing games. There may be something to this, because after recent test run of Chain of Command which disclosed how limited my collection of minis really was, I decided to do something about it.

And so, after yet another archeological excavation in my basement, I found what I was looking for – 1/72 sets of German and US infantry from Plastic Soldier Company. For those unfamiliar with this company, it’s been around for a better part of a decade by now. Their goal is simple – to provide affordable hard plastic figures and vehicle models in 15, 20 and (I believe) 28mm scale, mostly for WWII.

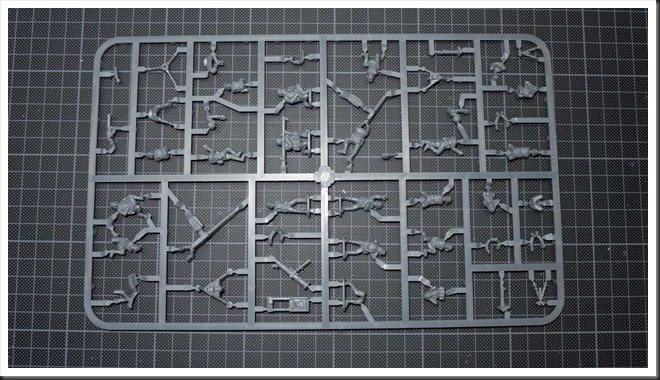
First off, as I am in urgent need of getting some .30 cal Brownings on the table, I decided to get cracking with the US Heavy Weapons set. Just to clarify yet again, I use 20mm or 1/72minis, so review is of the box in that scale. The box contains three identical sprues. Each sprue has following contents:

  • 19 miniatures, all of which are sculpted as crew personel for weapons listed below.
  • M1917 water-cooled MMG on a tripode, crew in sitting stance
  • M1919 aircooled MMG on a tripode, crew lying down
  • M2 HMG (aka 50cal or ‘Big Deuce’) on a tripode, crew in sitting stance
  • 60mm mortar
  • 81mm mortar
  • 4.2’’ chemical mortar
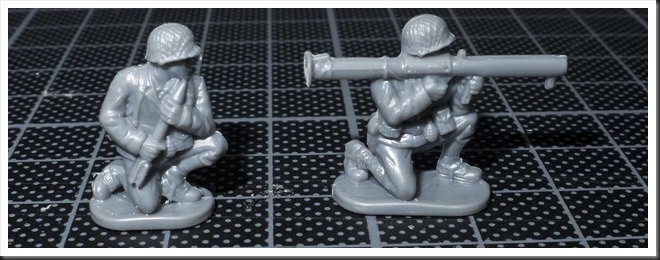
  • Bazooka

As I hope can be seen in picture of the sprue, some cleanup, assembly and gluing, both of weapons and figures, is required. For gluing I recommend the glues intended for plastic model kits, such as Revell’s Contacta glue or Tamiya’s Extra Fluid Cement. Superglue will also work, but personally I prefer the kind of glue that melts and fuses plastic together.
PSC_US_Heavy_Weapons_002

The assembly of minis isn’t complicated, but it does takes a bit of time – this single sprue required about two hours of my time. If you don’t bother with scraping and filing away all tiny mould lines (which are not much of a problem, really), you could probably cut away an hour or so from preparation time.

It has to be said that these little suckers weren’t the easiest ‘build’ I’ve ever worked with. The parts are a tad fiddly and I managed to snap off one leg of the .50 cal tripod, but that’s not really much of an issue. What gave me most problems were the minis with arms separate from the torso – .50 cal gunner, M1917 gunner and the guys with binoculars. The .50 cal gunner is especially tricky, as his arms are fused to the machine gun. If you don’t attach these arms ‘just so’, the entire gun ends up floating in the air. In the end, I had to use some filler for the joints between the arms and torso on a couple of figures and I’m still not 100 percent happy with the result.

Perhaps I make it all sound too dramatic – the minis go together pretty well and I’m sure that with a bit of practice things will move along for you without any hickups. And once you’re done with a sprue, here’s what you get…

The good

PSC_US_Heavy_Weapons_015

PSC_US_Heavy_Weapons_016

PSC_US_Heavy_Weapons_011

The bazooka team and both medium machine guns are pretty nifty figures. The .30 cal is slightly overdimensioned and bazooka’s details aren’t 100 percent historically accurate, but I don’t think anyone but a true button-counter will have any problems with deploying those minis on the table.

The bad
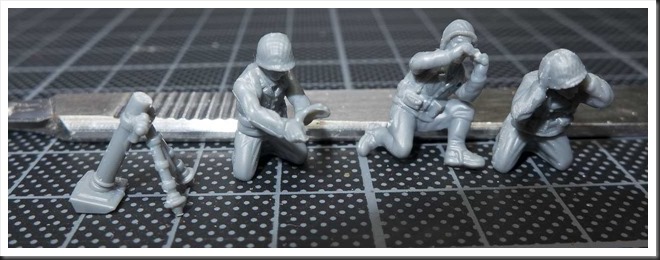
PSC_US_Heavy_Weapons_006

PSC_US_Heavy_Weapons_013

PSC_US_Heavy_Weapons_014

With this group, I unfortunately have some issues. Let’s start with the ‘elephant in the room’, and I do mean it quite literally. Seriously, who the heck sculpted this M2? While it is instantly recognizable as what it’s supposed to be representing, it is simply huge. Its length is 3,2 cm, i.e. about 230cm in 1:1 scale. The real thing is about 165cm long. So the overdimensioning in this case is very hard to ignore.

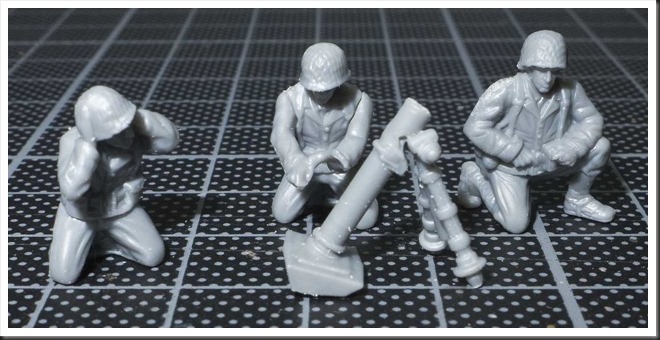
Next the 60mm and 81mm mortars. Both are sensible additions to this set, but… once again, the 60mm tube is grossly oversized, so much so that at one meter’s distance it is really quite hard to distinguish it from its bigger brethren. The real M2 60mm mortar was a tiny thing (relatively speaking), with a barrel just a bit over 72cm long. M1 81mm mortar’s tube was 119cm long. Sadly, this difference in size and heft of the two mortar types is unfortunately hard to observe in this set.

The questionable

PSC_US_Heavy_Weapons_003

Finally, we arrive to my ‘huh’ moment. Opinions may of course differ, but to me the addition of this heavy piece of equipment in a 1/72 scale set is a bit of a mystery. 20mm minis are most often used in skirmish games. On the other hand, 4.2 inch mortars were deployed as battalion level assets and had minimum range of over 500 meters – not likely the equipment you’d encouncer at the edge of front line. Addition of some troops with sachel charges, bangalore tubes or flamethrowes would in my opinion be much more useful. But here it is, in three ‘copies’.

Luckily, the minis that follow with it are generic sculpts and will certainly come in handy as artillery crews for all kinds of equipment.

Conclusion

In the somewhat underrated WWII movie ‘The Monuments Men’, there is this scene where Matt Damon steps on a German anti-personel mine. He hears the click and freezes. Then Clooney comes along and wonders what happen. Damon tells him and Clooney asks ‘Why did you do something like that?’. Personally, after putting together these figures, my reaction is a bit like that of George Clooney in that movie. The guys running Plastic Soldier Company know their stuff and they certainly know what a whiney bunch we wargamers can be. So why would they decide to give us an .50 Browning looking like a bolt gun from Space Marines set and a 60mm mortar on steroids? Honestly, I don’t know. Maybe it’s something about the design process (I think PCS designs in CAD and then scales minis accordingly), maybe it was a concious decision to make the pieces less prone to breakage. I can only speculate, but regardless… overall, I can’t help but think that this set is a bit of a missed opportunity.

Having said that, I must allow my sensible side to have it’s say – despite my criticism, I claim that this box it is most definitely a good purchase. The crew minis look good and you get 47 figures for peanuts when compared with prices of metal figures. And if you’re after a cheap, quick way to flesh out out your U.S. infantry force, I doubt that you’ll find better ‘value for money’ option that this set. I won’t lie to you, in due time I will maybe be replacing these 60mm mortars and .50 cal HMG’s with figures from AB Miniatures (with gritted teeth over their abhorent prices, I may add), but for now I will happily be fielding these minis in my Chain of Command games.

May 26, 2017

When Wargamer’s Magpie Syndrome pays off

Let’s face it, we all suffer from it to some degree – new period catches our interest, a new range of minis is released, a book or a movie gives us ideas for a cool scenario or campaign. When this happens, small parcels start being delivered by postal service to our doors. I’m sure that vast majority of wargamers is far more disciplined than I am and manages to put contents of those parcels onto wargaming table within a couple of weeks… In my case though, these newly acquired ‘treasures’ are as often as not inspected, admired, put in some box and then doomed to linger, half-forgotten, in my basement storage room. Sometimes for years, sometimes for decades.

Every once in a while though, a small miracle happens and my interest in the period or theme awakens again. As for example, with the WWII skirmish due to ‘Chain of Command’ ruleset. As I started to seriously consider putting together last week’s test scenario, I realized that I really didn’t have much terrain suitable for such game. And then I remembered… sometime in late ninties I’ve bought a shedload of bits and pieces from Gamecraft Miniatures. It took some effort, but after a small archeological excavation I’ve managed to dig up a bag of resin walls and stones. I am pretty sure that a dozen or so resin buildings are hiding somewhere, so the search is not yet complete!

Anyway… getting these walls and stone formations ready for a game seemed like a plausible goal over a period of two weeks I had for preparation of the game. In ‘raw’ form, the terrain pieces are made of off-white resin. So the first step was to wash them in luke-warm water with some detergent. An old-fashioned toothbrush is quite useful for this task.

Gamecraft_Miniatures_Bits_n_Pieces_005

Gamecraft_Miniatures_Bits_n_Pieces_009

While the resin lumps were put aside to dry, I started to wonder how to approach this particular painting job. Normally, I start with a coat of Vallejo (or these days Plasticoat) grey primer and then get to work with acrylics. But in this case we’re were talking about stone. In nature, both stone walls and outcrops have a lot of subtle tonal variation, but in a limited color range. Browns or greys shift in saturation due to varied exposure to elements – to get a realistic effect, I would have to do a lot of blending and washes. And I have to admit, after all these years blending with acrylics is still a challenge for me. And so, I arrived to a somewhat surprising decision – this time around I would go ‘old school’ and dust off my old Humbrol enamel pots!

Gamecraft_Miniatures_Bits_n_Pieces_014

Enamels may be an unfamiliar medium for ‘younger’ wargamers, but they were pretty much all we had before acrylic ‘revolution’ of early ninties. They are not water-solvable and need either white spirits or terpentine to thin (and wash the brushes). They stink (especially some of the older Humbrols can make your nose hair curl in panic as soon as the lid is off) and they take forever to dry. So when acrylics arrived on the scene, enamels didn’t stand a chance. But… this last drawback – long drying time (and I speak about several hours) is under certain circumstances a blessing in disguise. It allows for blending and lifting off techniques (that’s what I call painting and then ‘taking off’ paint from painted surface) that one only can dream of with acrylics.

I started the painting process with an uniform coat of Humbrol 98 for the stone formations and Humbrol 118 for the stone walls. Once this was done, I let the pieces dry over night.

For stone formations I next proceeded with building up several thin layers of 72 and 187 mixed in different ratios. Darker shades were applied all over the stones. I did however try to let the dark base color to get through here and there. That’s where ability to pick off the paint with the brush was very useful. As I successively lightened my mix, I blended it with underlying layers in the areas that would be exposed to sunlight and elements. For final highlights I added some light grey Humbrol 64. Addition of light neutral grey desaturated the mix. It was added to the sharp edges and surfaces that were visibly raised. Normally this step would be done with drybrushing technique. However, since enamels don’t dry in a blink of an eye, I had plenty of time to do proper blending.

I did however switch over to drybrushing once I started working on the walls. Blending of individual stones would simply take too much time. So a heavy drybrush of Humbrol 26 was applied to the raised stone areas with a flat brush, followed by lighter passes of Humbrol 187 and 72 in irregular patterns.

Next, I returned back to the stone formations. I dilutted heavily the dark brown Humbrol 98 with white spirits and used it as a wash, applying it to lower parts and around crevices of stone formation. Once done, I left everything to dry over night.

Last painting step consisted of a wash with Vallejo’s acrylic washes, which I applied on the walls in an attempt to bring out the detail of the walls. I mixed together Black and Oily Earth and applied it all over the walls. Not entirely happy with how this step turned out, but it did add a bit of variation in color tonality.

Once everything was dry, I flocked the terrain bits with turf and foam clumps from Noch/Woodland Scenics.

Overall, I am not entirely happy with how the walls turned out – the reddish tone of Humbrol 118 that I used as base color looks a bit unnatural to me. But from a couple of meters away the walls look perfectly serviceable. On the other hand I am totally delighted over the visual effect of stone formations. The stones have subtle but clearly visible shifts in color, which is exactly what I was after and the dark brown wash that was added in spur of the moment did a lot for creation of ‘natural’ look.

It was a very happy return to an old medium of enamels, which I’ve neglected almost completely over last two decades. For the future, I will have to remember about their special characteristics and positive properties.

Gamecraft_Miniatures_Bits_n_Pieces_018

Gamecraft_Miniatures_Bits_n_Pieces_022

Gamecraft_Miniatures_Bits_n_Pieces_023

Gamecraft_Miniatures_Bits_n_Pieces_026

Gamecraft_Miniatures_Bits_n_Pieces_027

Gamecraft_Miniatures_Bits_n_Pieces_034

Gamecraft_Miniatures_Bits_n_Pieces_037

February 02, 2017

Serious reinforcments for the Austrians

Work on miniatures for Teugen-Hausen scenario continues. New addition to Austro-Hungarian force consists of two 3-pounder batteries – perhaps not overwhealming firepower, but better than nothing.

To be completely truthful, these are 4-pounders standing in for 3-pounders, which are missing in Adler’s range, but at 6mm who’s gonna notice. And while we’re in the ‘honest mode’, these guns are intended for the Grenzer force present at the field, but once again, Adler has no Grenzer artillerymen, so regular artillerymen in caskets it became instead. Sometimes one has to compromize.

In any case, here they are and if I may say so myself, they look properly ‘artilleristic’ to me. Next, a shedload of Austro-Hungarian infantrymen, as I need another five battalions of those guys to meet the ‘specification’ of OOB. Better make sure I have good supply of white paint!

20170202_072430_7_bestshot20170202_072514_3_bestshot20170202_072705_3_bestshot