Showing posts with label vehicles. Show all posts

December 18, 2016

FIrst Huey–the story continues

Spent two more hours on Huey ‘pilot project’ and the results are not too shabby. Not too shabby at all! The construction itself is pretty straightforward, although the fit of individual comopnents is ‘basic’ to say the least.

Also, as I suspected, the construction of rotor sub-assembly contained a hidden trap for the unweary. Rotor blades are installed on the shaft one at the time, with the lower one being mounted through a small square-shaped frame. Well. if one is not careful. the actual removal if this component can potentially weaken the plastic square to a point where it snaps off, either during removal process or at later time. As every plastic model kit modeller will tell you, when components are cut out of their sprue, there is a tension, which often can snap ‘the weakest link’. Whic, in this case, are the sides of little frame supposed to be used when mounting the blade in place. In my case, the frame held during removal process, but snapped as soon as I touched it later on. Once again, Tamiya’s Extra Thin Cement came to the rescue and salvaged a potentially critical situation.

The rest of construction process is quite uneventful. I am still not conviced that a mixed medium (pewter, plastics and resin) approach had to be used here, but once the kit is put together, certainly it certainly looks the part!

Huey_363Huey_365

December 17, 2016

Paint it black

Blaim it in on TV show ‘Tour of duty’ - whenever I see a Huey, I hear ‘Paint it black’.

Anyway, this post isn’t about flashbacks from my teens, but a flashback from about six or seven years ago, when Battlefront decided for some unexplainable reason to transplant their ‘Flames of War’ ruleset into Vietnam conflict. I guess things didn’t work out too well with that idea, but since Battlefront never does anything half-hearted, we’ve got a shedload of minis out of that misadventure… Perhaps the most valuable addition, if one’s to draw the conclusions of the fact how hard they’re to find these days, are helicopters that are symptomatic with Vietnam conflict – Bell UH-1 Iroquois, better known as ‘Huey’.

Since I’ve started to think about getting into Vietnam conflict, I’ve managed to acquire couple of those models. But, as so often, once acquired, they landed in a box and have been resting there ever since. That is until today, when I’ve dug them out of the stash and cracked open one of the boxes.

FoW_Huey

What I found in it was a bit of a surprise – a strange mix of resin, metal and plastic components which took aback even a moderately experienced model builder like myself. Body of the helicopter consists of three resin components, which aren’t exactly best moulds I’ve seen. They do seem however to fit together resonably well. Main rotor assembly seems fiddly and metal parts are covered in flash. I do however like the fact that both the rotor and the stand are attached to the fuselage with rare earth magnets, making them removable for storage and transport purposes. Somebody at Battlefront did use their nuggets!

So… initial impression is overall cautiously positive – with a little TLC, this could turn out to be a pretty decent ‘Huey’. Will report again, once I get started with the construction.

November 04, 2015

C4 Open 2015–Part II

Second and last part of pictures from this year’s C4 Open exhibition. Hope you like them.


July 18, 2015

Sidetracked

So if you take a look loong way back into time machine of this blog, you will discover that once upon a time one of my ambitions was to put together a small set of minis and terrain for World War II skirmishes in Normandy. That particular project had some success, I have two complete platoons of Yanks and Germans, as well as some terrain. If I recall correctly, I’ve had two or three games with T. (Arc of Fire), before the project died away. Cause of death – extensive requirements for hedgerows! As said before, I’m not that much into terrain making.

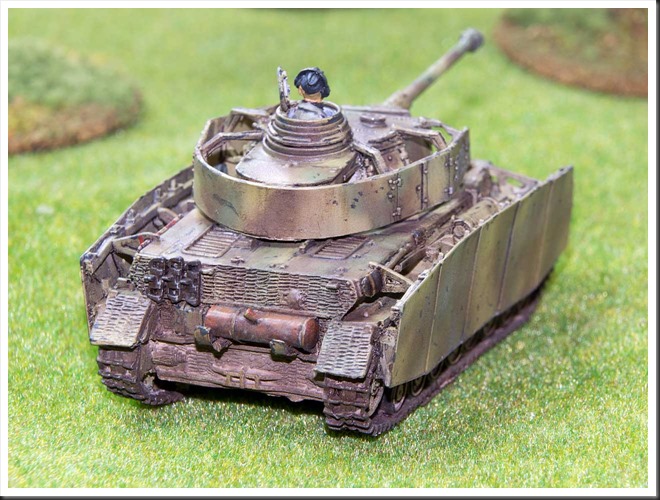
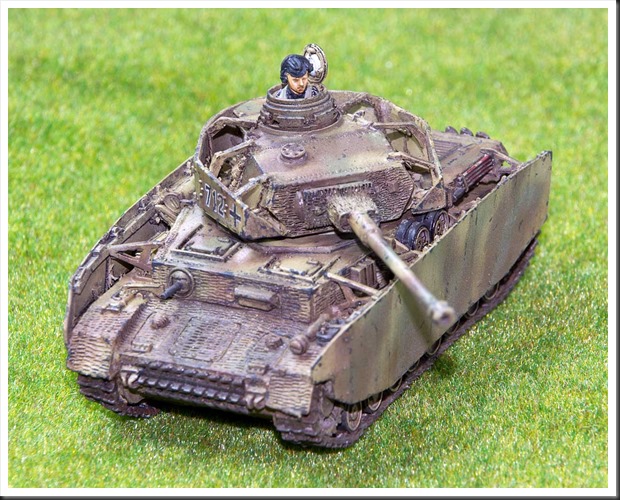
Anyway… with vacation period upon us and me being rather ‘sick and tired’ of anything Vietnam-related, I needed a quick side-project. So when I literally stumbled upon a resin PzIVH from Milicast that I bought many moons ago for above-mentioned skirmishes in Normandy, I thought ‘what the heck, let’s get this one done’.

Now, working with 1/76 resin kits isn’t exactly the same thing as their ‘little brethren’ from Flames of War or Forged in Battle. In case of Milicast kits, we’re talking about proper ‘models’, with detailed mouldning and small, fiddly resin parts that need to be cut out of their mould blocks and cleaned up. It maybe sounds more complicated than it really is, especially with Milicast’s Battle Range, which I think is simplified for wargamers, but there is some additional clean-up work involved with those kits. In case of this particular PzIV, the casting was mostly very clean. The exception was a nasty, solid blob of resin lodged between turret and one of front edges of turret shürtzen. Finally, after drilling a bunch of small holes and cutting and chipping away at it, I managed to get most of it out, but it was a real PITA.

Small resin parts can be either cut away with scalpel (gently) or sawed out with specialized tiny razor saws mounted on scalpel handles. Yes, it is additional hassle, but it’s worth the effort. The kit looks, at least in my opinion, really great with all its small details. Perhaps a bit softer that its plastic cousins, but on the other hand those shürtzen mounts won’t snap in two if you breath at them a little harder. Also, Milicast’s product range is simply bewildering, by far exceeding whatever is out there in plastics!

Paint job is in this case pretty straight forward ‘German’ routine. First, wash the kit in warm soapy water – this is really necessary with resin kits where rests of mould release materials are always present and can make painter’s life a real hassle. Next, I used Vallejo grey primer as initial coat. Funny thing about resin and primers – this is the only one that seems to stick to resin, at least for me. Generic primers for plastics and primers just seem to pool together on resin when I use them.

Next, default German ‘war paint’ was applied. Orche from Tamiya, followed by German Olive Green from LifeColor and German Cammo Brown from Vallejo Model Color. All applied with an airbrush, I’m afraid – I’m sure there are ways to paint mottle cammo with brushes, but if you have an airbrush handy, why complicate life?

Once the paint job was sealed with acrylic varnish, weathering process commenced, starting with an overall application of dark brown wash from MiG. Next, I ‘chipped’ the kit with Vallejo Panzer Grey and applied streaks with different products from Ammo. Finally, some pigments were added, before sealing everything with another coat of varnish. This of course resulted in pigments being virtually wiped out, but what can you do?

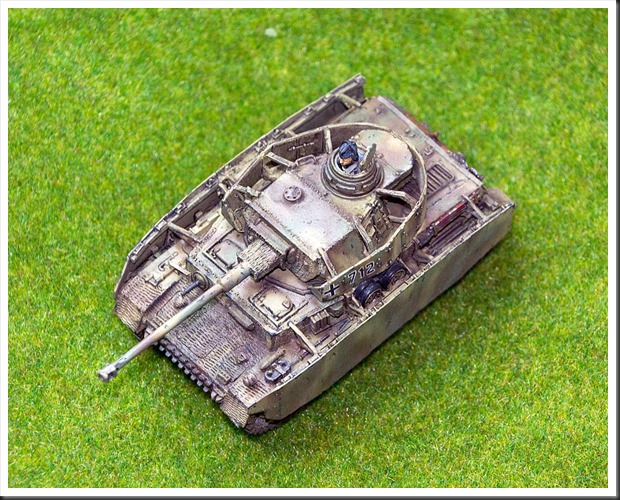
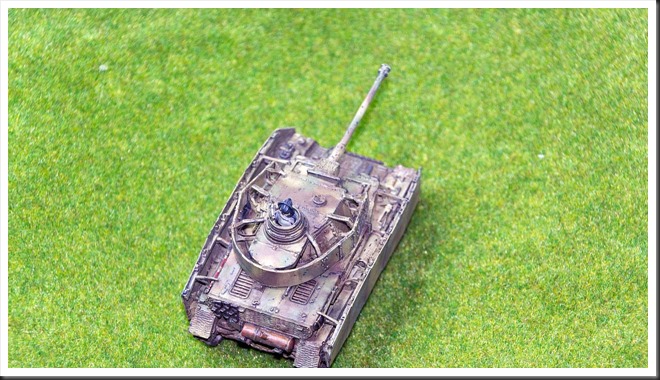
Here’s the final product, in my opinion as good, if not better as anything that Warlord puts out for their 28mm range and for a fraction of the price.

Milicast_PzIVG_01Milicast_PzIVG_02Milicast_PzIVG_03Milicast_PzIVG_04Milicast_PzIVG_05Milicast_PzIVG_06Milicast_PzIVG_07Milicast_PzIVG_08

December 13, 2014

And yet another distraction

Oh, while I’m already here, I may just as well admit that some time during November was committed to another distraction in 1/72 scale – a late StuG III from Revell. This one was literally made in spare time between jungle plates and work with the huts. One of these days it will hopefully make an appearance in a Bolt Action game, once I get that project of the ground.

 Stug3G40-276Stug3G40-278Stug3G40-279Stug3G40-280Stug3G40-281Stug3G40-277