As promised, here’s the AAR of the second take of Iuka scenario, this time with IABSM turn sequence and a bunch of other rules applied correctly. For the background information about the scenario and home rules in play I refer to the first report, since I haven’t changed anything in that department. It is however worth repeating that I planned for the game to run for fifteen rounds, with random extension of of between one and six rounds just to keep everyone on their toes.
This time around it would be a one on one affair, with L. yet again taking the role of Confederate commander, while yours truly would take over the Union troops. Poor bastards…
The plans
It became obvious rather quickly that L. intention was repeat his shock and awe aproach and run over the Union troops to his front with a bold frontal charge with one of his brigades, while the other one kept my flanking force at bay.
I must admit that I did spend a bit of thought on my initial deployment in the time that passed since the first game. I finally came to the conclusion that the original plan of Hå. was a pretty good one considering the initial deployment of troops and restrictions on movement imposed by terrain. I did however decide to make one major change – the first brigade of my ‘front’ force would take position at the edge of the woods at the left edge of the road. The second brigade would however not march up the road, but move quickly over the open field on my right flank, then turn left, traverse the woods and smash into the flank of Rebel forces which I suspected would attempt to repeat the events of previous game. The flanking column on the far side would at the same time try to push as hard as they could manage against L.’s blocking force.
The game
Right, let’s move over to the pictures.


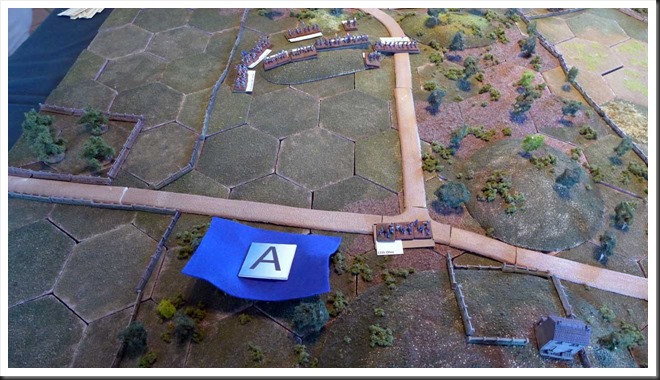
The arrow illustrates my ‘cunning plan’ and the path I intended for my second brigade in its approach toward the enemy.


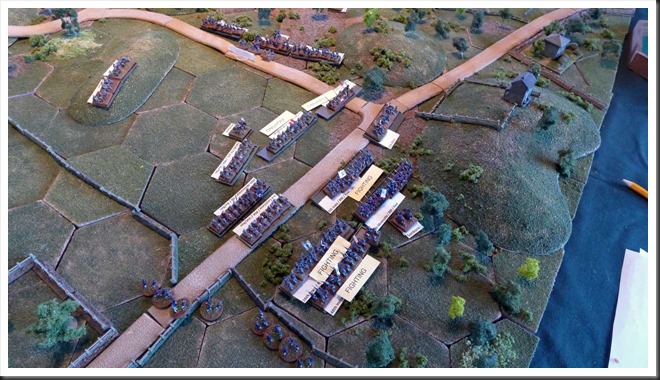
On the positive note my second brigade has now reached jumpoff position for its own assault. Also, the fire of my skirmishers on extreme left flank of my defensive line was surprisingly effective.

).
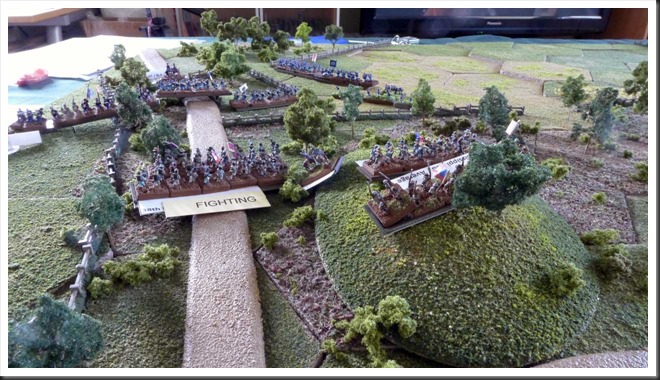
Also, the casualties that L. suffered in his brave, but perhaps a bit reckless advance did start to have tangible consequences -his best regiment having suffered more than 50 percent casualties became permanently defeated, while another was just two casualties from reaching same state. In plain language, two out of L.’s regiments had quite enough excitment for the day.

By now we have reached round fourteen out of ‘regular’ fifteen and L. decided to call it a day. Somewhat exhausted after over four hours of gaming time, I readily agreed.

The situation at the time L. and I decided to call it a day was rather peculiar. Union brigade on the receiving end of L.’s bold but costly charge was decidedly shaken, but still useable. At the same time my second brigade was finally in the position for its own assault into the rear of L.’s decidedly bloodied assault force. Aware of that fact, he switched the orders of his second brigade, calling upon it for support. Also, his artillery was in perfect position to blast into the backs of my ‘rescue force’ as soon as it came out into open. So the situation on the battlefield looked like a blue-grey-blue-grey-blue sandwich, with each layer posed to attack somebody.
Before taking on the role of CinC for both sides, I decided that Confederate artillery on the high ground could not be ignored by Union side. I therefore split my second brigade into two parts – two regiments were to advance against Rebels to the left, while the remaining regiment and skirmishers would engage the artillery batteries to the right.
The first two rounds (final one of ‘ordinary time’ and first bonus turn) went pretty well for boys in blue. Rebel guns weren’t silenced, but I did manage to mask them and cause some casualties among the crews. Also, my ‘assault force’ of two regiments seemed to gain upper hand against the single Rebel regiment that opposed them. Then second bonus round started and ended abruptly with first activation chip drawn being a ‘Coffee break’. This was followed by a roll of six on a check for next bonus round, bringing a rather anticlimactic finalé to this game.
Musings after the battle
Right… let’s start with a quick explanation regarding the reason for me and L. wanting to replay this scenario. As already stated, first time around I bungled several crucial sections of the ruleset, such as sequence of play and what ‘mandatory’ effects close combat had on participants. I also managed to ‘forget’ the fact that units can move multiple times under certain circumstances and refrained from using the ‘blinds’, which theoretically at least allowed for more rapid movement. L. and I suspected that if the ruleset was applied correctly and with the blinds in play, we’d be able to move more often, providing a more rapid game.
It is safe to say that our expectations were not met – the contact between L.’s first brigade and Hå.’s defening troops in first game took place in round eleven, in our game in round ten. The action on the flank was as inconclusive as in the first attempt. My flanking force arrived to its jump-off position about the same time as it arrived to Hå.’s rescue in previous game. In other words, correct use of movement rules and taking advantage of supposed advantages of ‘blinds’ had no effect in this particular game. On the other hand, applying correct turn sequence certainly did make some of the rules more logical, but without influencing the ‘feel’ or course of the game in any significant manner. L.’s assault was in most respects a repetition of what happened in our first game, main difference being that he took much more severe casualties while charging my line. This was due to my deployment of troops, not because of the ‘corrections’ to the rules we used this time around.
The ironic thing is that paying careful attention to the rules in TCHAE led me to a couple of new insights about this ruleset and none of them is very positive. The ‘blinds’ mechanism, while providing intended fog of war, is also in my opinion something of a can of worms as soon as partial deployment of units is attempted. It is also the only the ruleset I know of where line of sight rules are not clearly defined. This omission forces players to make their own judgement calls when trying to comply with restrictions applied to multiple unit moves in same round. Also, both L. and I were a bit dumbfounded by realization that movement rates between line and column formations (for units deployed on the table) are exactly the same. I’m sure that the rules designer has good reasons for this decision, but the explanation for this rather odd choice would be welcomed.
I’ll be frank and admit that all the ambivalencies and question marks that pop up every time I play a TCHAE game are starting to bother me more and more. At the same time it is without a question a tabletop games ruleset I am most familiar with and therefore most comfortable with. The dilema I find myself with is therefore somewhat peculiar – do I stick with TCHAE despite all of its annoyances or do I, for lack of better word, dump it and start hunting for a replacement ruleset?
Now, where did I stash that copy of ‘Guns at Gettysburg’…
No comments:
Post a Comment