May 09, 2010

MOST DANGEROUS ENEMY BY STEPHEN BUNGAY

Most Dangerous Enemy Battle of Britain is probably the most covered topic in military aviation literature and there must be literally hundreds of titles covering the topic in English language alone. Throughout the years I have managed to read quite a few of them and I can say that 'The Most Dangerous Enemy' is without a doubt the best of them. First of all, author manages to stay focused and balanced both in his narrative and analysis of events. Both antagonists get same amount of coverage, while critique and prize are dealt out where appropriate, regardless of the side. Furthermore, the book is perfectly balanced in another respect - personal experiences, technological aspects of the conflict and overview of large scale events are dealt with in separate chapters with focus on single well-defined topic. It may sound strange based solely on my description, but this writing technique seems perfectly suited for coverage of Battle of Britain. It allows the reader to keep solid track of the events as they unfolded, understand the high level decisions and at the same time never lets him forget the personal costs and sacrifices required by both sides.

For those that are familiar with this clash between Luftwaffe and RAF some seventy years ago, I'd recommend this book for a different reason - conclusions of Stephen Bungay regarding the Battle, its outcome and consequences may be controversial and challenge traditional opinions, but I dare to say that they deserve some afterthought.
If there is any criticism that this book deserves then it's the fact that, if one is to draw conclusions from the references, the author relied predominantly on English sources. Also, I found it a bit annoying that Stephen Bungay seems to have problems with deciding in how to present foreign pilots in RAF service and their role in the Battle of Britain.

From wargamer's perspective this book is to be considered mainly as a great historical background source for those of us who enjoy aerial wargames. 'The Most Dangerous Enemy' does not contain much information for creation for new scenarios, it is however excellent source for understanding of proper tactics and why they were employed. It is also worth reading for the reason that I suspect I hardly have to point out - learning about real events that our games are based on is after all, or at least should be, part of this hobby.

April 22, 2010

Duel of the Eagles

For next installment of our Battle of Britain-saga we selected scenario with very suitable title 'Duel of Eagles'. It was our first pure fighter game, which was a nice change of pace from previous games, where bombers were the primary targets.

The setup

Historical encounter depicted by 'Duel of Eagles' was between elements of Jagtgeschwader 26 and Squadron No.76. Pilots of both formations were very experienced and both were led by an ace - Adolf Galland and "Sailor" Malan. To reflect this fact, both sides in our game had an Ace pilot and a bunch of Veteran pilots each. R.A.F was represented by three sections of Spitfires, while Germans had four sections of Me109:s. Entry point and initial altitude of each section was determined randomly, although random Scenario Special Rule roll allowed the German side to enter one section of Messerschmitts at highest altitude at the beginning of round 2.

Random setups have sometimes tendency to put a certain spin on a game and this was one of those occassions. Malan's section entered the table at very low altitude and it was obvious that his formation would not have much influence on the initial phase of the game. Galland's rote and second Spitfire section entered the table on the opposite sides of the table, at high altitude, but equally out of position. Third section of Spitfires was however definitely in trouble - two sections of 109:s were in their immediate vicinity. Furthermore, unbeknownst to the player controlling British fighters, last section of Messerschmitts would show up on their tails at the beginning of second round.

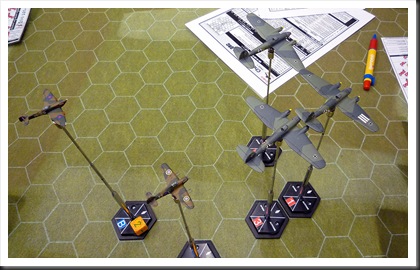
A001 Separated Spitfire section at the start of the game

The game

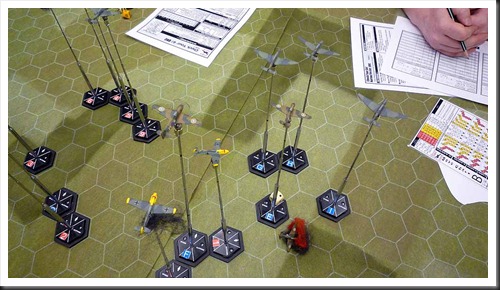
It could be said that this game had two very distinct phases. First half was spent on maneuvers where every one of us was trying to select their targets and gain an advantageous position. On one side of the table focus lay on Malan's Spitfire section that started at very low altitude. This formation was a very obvious target for Galland's Messersmitts, which started to the right of Spitfires - both sections tuned into each other, Spitfires climbing, 109:s diving. Both sides opened fire simultaneously, missed and then they were past each other. While Malan's planes continued on same course, still climbing, Galland's rote met the other section of Spitfires that started on same side of the table. This time the Brits were the lucky ones - Galland's wingman was hit and damaged and both Messerschmitts were suddenly fighting for survival.

The picture was very different on the other side of the table. Single section of Spitfires, with enemy fighters both in front and behind them, had no choice but to run toward the middle of the table. Initially the only good news for those British planes was the fact that one of German flights was below them and had to climb before it posed a real threat, while the remaining 109:s didn't really have a good shooting resolution and choose not to open fire.

B002 Between the rock and the hard place

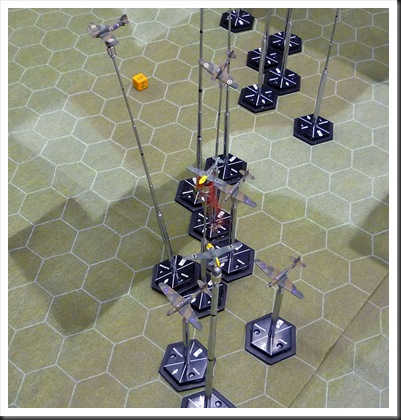
In other words, the game was at first separated in two separate chains of events. Then all airplanes found themselves in the middle of the table and at roughly same altitude. As it turns out, it was a recepy for total chaos - six Spitfires and eight Me109:s were basically on top of each other, every pilot having at least one target in its sights at any given time. For the first time we experienced a true dogfight.

C003
Gathering in the middle

Considering the amount of fire, surprisingly few hits were scored. First victim of the day was one of green Spitfires that turned the wrong way (incorrect plot) and found two Messerschmitts in its path. Short burst of cannon shells demolished the unfortunate Spitifre and it spun down to the ground. Another Spitfire was shot down shortly afterward by a random snapshot from a German fighter. The Brits returned the compliment and hit one of 109:s, setting its engine on fire.

D004 Two vs. one

E005 Engine on fire and long way away from France

With two British fighters shot down, the Germans seemed to gain the upper hand. At this moment, Malan's flight finally found its way to the fight, with immediate and telling effect. A deflection shot from British ace found its target, putting the Messerschmitt into a spin from which it never recovered. Third Spitfire became victim of German fighters at the same time, but two of German fighters also run out of ammunition. Those events changed the picture dramatically - German planes found themselves outnumbered and in a disadvantageous position. Prefering prudence before glorious death for the Fatherland, all German pilots put the superiour diving speed of their planes to use and managed to exit the table without any additional loses.

F006 Time to head for home

Final score of the game - three Spitfires and one Messerschmitt shot down, two Messerschmitts damaged. Another German victory, but this one with much narrower margin than in previous games.

Musings after the game

This game made two things rather apparent. First, a game without bombers is a very different experience - there are no obvious targets and players can take their time, searching advantage of position or simply waiting for a mistake from the opponent. Second, a melee like the one that developed in this game is a very unhealthy proposition for everyone involved. Firing arcs are very generous in CY6 (and we are playing with the optional, narrow arc), so most of the time it is almost impossible to avoid potshots.

From practical point of view, I have to say that it wasn't the most enjoyable CY6 game I had opportunity to play. Chaos that developed made it rather hard to keep track of who was supposed to move when. Additionally, if one is to draw any conclusions from this game, dogfights tend to concentrate all the planes in a very narrow area. This fact creates some purely physical problems, as you can fit only so many bases in a single hex.

At the same time I have to say that 'Duel of Eagles' has a lot of replayability and does seem to be an excellent pick up scenario for multiple players. In our game we had three players on British side and four on the German. Two of them were complete beginners, but managed to be 'self-going' within a couple of rounds.

April 09, 2010

Black day for R.A.F.

One week after the slaughter of German bombers on a forlorn night mission, it was time for us to run ‘Dogfight Over Convoy BOSOM’. This scenario is the first in the Battle of Britain scenario book that actually takes place during that battle. Scenario in question depicts one of many raids aimed at the Channel convoys in the initial phase of the campaign. Although the targets of those attacks were obviously British ships, the real goal of Luftwaffe was to lure slender R.A.F. forces into a battle of attrition.

Initial setup

At first sight, ‘Dogfight Over Convoy BOSOM’ does look like another milk run for the British. Not only do they have superior fighter force, they are also allowed to setup very close to their primary targets, a group of nine Ju-87:s, more famous as Stukas. German side has one rote each of Me-109:s and Me-110:s, although it has to be said that German fighters are severely hamstrung by rather restricting setup rules.

The game

With setup rules allowing the British airplanes to start basically on top of the Stukas, this scenario can be characterized as “short and sweet”… which it was, although not in a way that one would expect.

A001 British fighters bounce the Stukas

British fighters (one vic of Spitfires and Hurricanes) approached the bombers out of the sun, ten o’clock high relative to the German formation. With German escorts far behind the bombers (a calculated risk on the part of the Germans), Brits had opportunity for one freebie pass on the bombers before they had to tangle with the escorts. This was a temptation that guys on the British side couldn’t resist - Spitfires went after the group closer to the British entry point, while Hurricanes selected to make a head on pass against the remaining Stukas a bit further back. The reward for the trouble was surprisingly slim – one Junkers received a solid hit to the engine, while another started to burn after a lucky hit from a .303 bullet.

B002 Hurricanes trying to get behind the bombers

Seeing the Brits splitting up forces, German fighters did the same – Me-109:s side slipped to the right to meet the Hurricanes, Me-110:s dove toward the Spitfires, two of which surprisingly choose to disregard the escorts and turned behind the Stukas. Remaining Spitfire left the formation in an attempt to try his luck with 109:s and was immediately shot down in what can only be described as a nonchalant manner by a single burst from German rote leader’s cannons.

C003 Doomed Spitfire

This unexpected kill was the start of a nightmare for the British side. Leader of Spitfire formation was the next one to pay the ultimate price – after his engine was damaged by accurate fire from Stuka rear-gunners, he was unable to do anything against Zerstörers at his six o’clock.

Last survivor of the Spitfire formation tried to get away, but was unable to shake off the Me-110:s. 20 mm cannon shells found their target in next round and last Spitfire immediately went down in flames.

Demise of the Hurricane formation was equally rapid, but far more memorable. After a completely unsuccessful head-on pass, British fighters choose to repeat the mistake of their comrades flying the Spitfires – they turned to the left with the intention of gaining tail position on the Stukas. The fact that two Me-109:s were rapidly closing on them apparently didn’t bother them… however, the fact that the formation leader managed to turn so tightly that he managed to collide not with one, but two Ju-87:s struck everybody with complete amazement. Miraculously, the first Stuka suffered only scratches on its paint, while the Hurricane suffered minor damage. British pilot wasn’t as lucky in his second ramming attack – his plane blew up. It has however to be noted that his perseverance paid off and he managed to bring his victim down with him.

E005 Amazing performance of the evening

Remaining Hurricanes were bounced by Messerschmitt immediately afterward. Position advantage of German fighters made the dogfight a foregone conclusion and both British fighters were shot down after a short dogfight. One of Me-109:s was damaged in the process, but that was a small price to pay for the complete triumph of Luftwaffe in this fight.

D004 Hurricanes bounced by Messerschmitts

Musings after the battle

The entire game took less time than it took me to write this post – it was all over after only two hours, or six game rounds. This however is unimportant. It is however worth noticing that “Check Your Six” once again proved to be an excellent game ruleset and you will suffer if you ignore Boelke’s Dicta. In this game, both British players choose to ignore the threat of German fighters at their back and suffered the consequences.

Meanwhile in the other room…

F006G007

March 22, 2010

Disaster in the dark

Two weeks ago it was time for another ‘Check Your Six’ scenario from ‘Over The Channel’ scenario book. This time it the turn came to ‘Into the darkness’. Name of the scenario refers to the fact that it is a little different from the rest, as it tries to represent the challenge of night bombing raids in those early years of the war.

Setup

To simulate the difference in night and day missions, a couple of special rules are implemented in this scenario. Visibility is very limited, while German bombers are allowed to fly individually. Additionally any airplane that is can be shot at, needs to perform a check for illumination – if it makes it, it is invisible for the rest of the turn.

The game

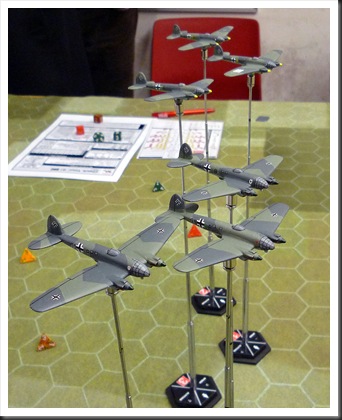
Goals of this scenario are very simple for both sides. The objective of six Heinkels was simple – try to stay alive while traversing the board. For three sections of British assailants – one section each of Spitfires, Hurricanes and Blenheims – the task was to find the bombers and bring down as many as possible. Their task was made difficult not only by very limited visibility conditions and special rules, but also by random entry points in regard of both location and altitude.

As things turned out, start of the game ment some good news and some bad news for the German players. Blenheims came in low and out of position – this was very fortunate for the opposition, since those obsolete light bombers hastily converted into night fighters are real hogs in regard of speed and climb rate. But any optimism on the German side was quickly dispersed by the fact that both Hurricanes and Spitfires entered the table with height advantage and behind the Heinkels. We didn’t know it by then, but this simple fact more or less decided the outcome of game.

P1000495A
Blenheims making a debut in this game

The game itself was straight forward and the events need only few sentences to be described. William and I were in control of the bombers and we decided upon different strategies. My previous experience told me that defensive armament of German bombers can be very effective made me decide to keep my planes in formation. William went for speed and additional maneuverability of bombers flying individually. One of us made the right call, the other was disastrously wrong and payed the price.

P1000501B
The hunted…

I have to add though that I don't think any decisions would change the course of the game – both Hurricanes and Spitfires took full advantage of altitude and speed and came into range within a couple of rounds. Since my three Heinkels were from British point of view was flying slightly behind William’s bombers, they were the natural first target and they took the brunt of British onslaught. As soon as the fighters reached optimal firing position, it was all over but the crying for my doomed Heinkels. A single burst of .303 machine guns was all it took to bring down first victim; other two put up a better fight, but nevertheless went down after being repeatedly by British fighters.

P1000506C
…and the hunters

Distraction of three juicy targets or ‘the heroic sacrifice’, as I prefer to call my dismal performance in this game, did have one positive side-effect – it bought William enough time to dive, dive, dive and put some distance between majority of British fighters and his Heinkels.

P1000510D
Heinkels making it to the other edge of the table

Nevertheless, one Spitfire and one Hurricane did manage to score some hits into his bombers, with limited success of knocking out both dorsal gun positions on one of the bombers (two lucky hits, both resulting in same effect). This didn’t stop William from exiting the game area with three more or less intact Heinkels.

March 13, 2010

Over Albert Canal once again – this time bigger and improved

Year of 2009 seems to be starting for me under the sign of reruns. First a double take on Belmont and last week I had opportunity to yet again play the Albert Canal scenario with Check Your Six ruleset.

Same Game, Different Approach
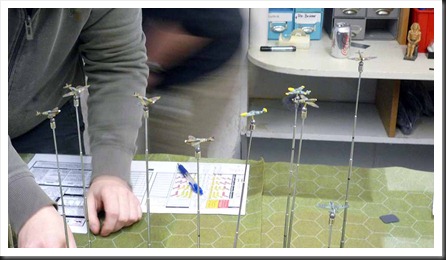
A little background info about the second bombing run on the Albert Canal bridge. Great rulesets attract the attention of many wargamers and Check Your Six is no different – William from Dansk Figurspilsforening in Copenhagen became as delighted in CY6 as I did and decided to run the Battle of Britain campaign for the club. But while our objective was the same, our approaches could not be more different. In simple terms, I choose the ‘cheap and simple’ approach – 1/600 airplanes, simple stands, as small gaming area as possible. William went ‘full monty’ – 1/300 airplanes of best possible quality, telescopic stands with custom magnetic mounts, historically correct decals… Quick comparison of the pictures from our games will show the difference in visual impact.

1A
William’s Messerschmitts 109:s…

2B

…Battles…

3C

…and Hurricanes

Once again, over the bridge
On to the game… In some respects, the scenario played out in surprisingly similar manner as my first attempt. Three rotas of Me109 were spread out all over the edge opposite to entry point of the British, but having the altitude advantage, quickly closed the gap. First blood was drawn by the German veteran pilot, who despite having to take a difficult deflection shot, managed to down one of Hurricane formation leaders with a single burst from his 20mm cannons. This caused some consternation on British side. Loss of one of their valuable Skilled fighter pilots this early in the game would have been bad enough. However, this sudden victory allowed victorious German and his wingman to fly over British bombers and then sweep behind the completely defenseless rear formation of Fairey Battles. The best comparison for what followed would be ‘fox in a hen house’. Two of the Battles went down in quick succession, while the remaining survivor was forced to turn home, trailing thick plume of smoke. The fact that wingmen of the downed Hurricane caught up with the Germans and managed to damage airplane of the wingman was small consolation for the British.

4D

No bombers for me this time around.

Meanwhile, a vicious dogfight developed in area around the remaining Battles. One pair of Me109 dove onto the bombers with the intention of obliterating them in a single head on pass. This maneuver was matched by the three Spitfires, shooting wildly in an attempt to discourage the Germans. This tactic was successful – no hits were scored by the Germans, but one of Messerschmitts suffered airframe damage.

5E

Dogfight around the front formation of Battles

Remaining German formation initially stayed out of the fight, maintaining the height advantage until the last moment. Just as the foremost Battle was about to reach the bridge, leader of German formation performed a very deep Split-S, placing himself in perfect position behind the bomber. Cannon shells ripped the Battle apart just seconds before it could drop its bomb. (Yes, it was one of my planes – and since it’s my blogg, I can brag all I want here :-)

6F

Panoramic view of the action

This violent maneuver had however some unfortunate consequences – in a desperate attempt to follow his leader, wingman of victorious German pilot managed by accident to place himself in front of two Spitfires (same guys that already scored hits on one of Me109:s in the other formation). .303 bullets found their target and yet another German Messerschmitt suffered serious damage.

Next couple of rounds put a smile on the faces of British players – all German fighters were by now out of position and unable to do anything to stop last two surviving Battles from flying over the bridge and putting one of the bombs squarely into the target. One of them was hit immediately afterward by a stray bullet from German fighter and started to burn, but the fire quickly subdued (I must say that I love the shooting mechanics of CY6) and both Battles were able to turn, heading for home.

Final episode of our game occurred when one of the Hurricanes tried to pursue my damaged wingman – undeniably reckless decision, as it made it possible for three German fighters to get on its tail. Brave but foolish British pilot became an easy pray for the Veteran Messerschmitt pilot and my rote leader

7G

Surviving Battles heading for home

The game ended on that somber note. British side suffered horrible losses – three bombers and two fighters were downed, while two more Battles were badly shot up. Germans didn’t come out unscathed out of the contest with three of the Me109:s suffering serious damage. Nevertheless, thanks to a single well-aimed bomb, it was yet again a close British victory with final the final score being 22 to 20.

February 28, 2010

Battle of Belmont – take two

Last Sunday I had an opportunity to run Belmont again. I made small adjustments to the terrain - addition of one more row of hexagons in front of Confederate camp was the most significant – but otherwise it was exactly the same setup as in previous game.

IMG_0083-1
Terrain setup for second attempt at Belmont

More significant changes were made to OOB:s – I decided to drop rating of all units one step, which meant that almost all regiments became Raw. This is the lowest quality class in TCHAE and as it turned out, this change had significant impact on the game.

Since the first game showed clearly that the Union side had a very tough objective in this scenario, I asked L. to make a repeat appearance as general Grant. Confederate army was this time run by H. and P. taking one brigade each. H. also assumed the role of confederate CinC, general Pillow.

Different players – different battle

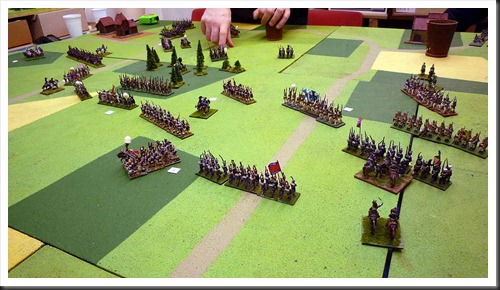
Second run of Belmont scenario was quite different from the game between me and L. Initial dispositions of Confederate forces were however rather similar to mine. The only difference of importance was the fact that H. decided to place his larger brigade in the field in front of the camp and retaining P.’s smaller brigade in the camp. It did however signal to L. that this time around the Rebels would probably be more agressive in their defence.

IMG_0085-1
Union brigades deploy for assault

L. remembered the difficulties he run into in his first attempt at Belmont and decided to concentrate his scant forces before assaulting the rebel line confronting him in the field. I have to say that his attack definitely had a proper ACW feel to it. He put two regiments in front, two regiments as supports, allowed time for short artillery shelling that disrupted one of raw Confederate regiments and then smashed his infantry into Confederate position in the field. Southerners did their best to stop that advance and did cause some casualties on the Union regiments, as they closed the distance. In the end however, the forward momentum of both Union brigades was unstoppable. In a matter of two turns, Confederates lost their artillery battery (more on that later), while all of their infantry was routed and running toward their fortified camp.

IMG_0091-1
Crisis in Confederate line

Then something strange happened – despite the complete chaos in the rebel ranks, a single round was all it took for their officers to stop the seemingly unstoppable rout. Somewhat unfortunate draw of cards (if seen from Union perspective) and a very opportune arrival of additional Rebel regiment helped to stabilize the situation even more. Regardless of the intervention of 'Lady Luck', all of us were very surprised by TCHAE allowing such easy recovery from a situation that seemed irrecoverable just two turns before.

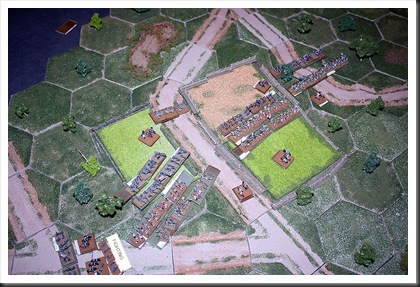
By that time our game was nearing its end and it was quite evident that despite L.’s initial success, he would not be able to break the Confederate lines before the appearance of the rest of their reinforcements. H., emboldened by that knowledge and the fact that P.’s brigade finally came up to protect his right flank, decided to make the final effort before we called it a day. He threw his recovered regiments into an all or nothing assault against battered Union regiments, with mixed results. His raw units in the center failed miserably to make an impression on L.’s single regiment of better quality and routed once more. Assault on left flank fared much better and managed to push the blue line back in disarray.
IMG_0095-1
Final clash of the day

IMG_0096-1
End of the game from another perspective…
Just because I like that picture. :-)

All of us knew however that this last action of the day was unnecessary and should be considered more as a rules test than part of the game. The game was decided when initial Confederate rout was stopped on a dime – an event that for a moment made me doubt if I wanted to continue to use TCHAE as the ACW rules set for our group.

Musings after the game – improved and this time far to long

Until our last game, I was rather enthusiastic about TCHAE. Now however, I do feel that TCHAE does deserve some serious criticism.

Remember that Confederate battery that was lost in the initial contact with Grant’s force? What happened there was that the rebel battery was in front, while supporting infantry regiments were behind it. In game terms, the battery took the full brunt of Union assault. Despite my best efforts, we couldn’t find any rules that clearly covered a situation where artillery received infantry charge all on its own. In the end, after looong deliberations, we managed to interpret relevant rules and came to the decision that the battery was overrun and its supports had to retire. However, if I am to be perfectly honest, it was more common sense than the rules that guided us to this conclusion. Later, I posted a query about this issue on TFL Yahoo Group, which usually is great at clearing up this sort of questions. This time around, my question seemed to leave most members stumped. From that fact alone, I draw the conclusion that the part of TCHAE that deals with assaults could use some editing and additional explanations.

My main criticism is however reserved for the way in which TCHAE handles routs and rallies. Sunday’s game was the first time we had the opportunity to “study” TCHAE’s interpretation of this significant part of the game and unfortunately we weren’t very satisfied with what we saw.

Now, let me be perfectly clear here – I am fully aware that opinions of this sort are highly subjective and will differ widely from player to player. For that reason, let me explain how I understand the concept of rout: it is a state where majority or all soldiers of a unit no longer have the will to fight and are mainly concerned with their personal safety. Unit cohesion is dissolved and authority of the officers is reduced or maybe even disappears completely. In simple terms, units in rout run for their lives.

In game mechanics terms, it translates in my opinion into two things – any contact between routed unit and organized enemy reinforces the rout and will in the end lead to complete dissolution of the unit. Furthermore, a rally of a unit in rout state should always be unsure and under some circumstances even improbable.

The way TCHAE handles this very complex situation is very simple, if not simplistic – it is enough to spend one commander’s PIP:s (or more, if commander is beyond default command range) and the routed unit will always stop running. That’s it. If considered from my perspective, such handling of routs/rallies is highly unsatisfactory. The fact that under right circumstances, routed units don’t even have to “run”, but can be stopped in their tracks almost immediately after entering rout state, makes my concerns about the rout/rally rules of TCHAE even more serious. As for any effects of effective enemy fire on a routed unit, there simply are no rules that deal with such situations.

As I mentioned above, those “faults” gave a momentary pause to my until now unchecked enthusiasm regarding TCHAE. Does it mean that I will stop using the rules set? Absolutely not. Last Sunday’s game was in most respects a very pleasant experience. L’s deployment of his forces and his initial assault did remind me of descriptions from books about that conflict. In general terms I’m becoming more and more convinced that TCHAE is a sound rules set with great period feel and complexity suitable for our group. At the same time, I can't deny that the way TCHAE handles routs/rallies did receive substantial flak after the game and will require some serious tinkering to suit our taste.

Of course this is the opinion of just one wargamer, backed up to a degree by comments from a small group of wargamer friends. So please, feel free to agree or disagree. Also, I would greatly appreciate any help or comments in regard of rules questions in this post.

I guess that in the end, this far too long musing is yet another proof of the fact that it is impossible for a ruleset to suit all players and that we can't help ourselves to "improve" on even the best efforts of game designers. After all, what rules set survives its first contact with the players?

February 12, 2010

2009 Podcast roundup

Let me start by saying that I am huge fan of podcasts. After 'discovering' them a couple of years ago while searching for new ways to fill my four hours of daily commuting to and from work, I quickly realised that there is a multitude of people who on regular basis produce very high quality productions about almost every possible topic that is of interest to me, including history and gaming.

Meeples and Incoming

Now, please notice that I write 'history and gaming' and not 'historical wargaming'. That's because to my best knowledge, in year 2009 there were really only two podcasts about tabletop wargaming that achieved my rather high demands on quality of content and production, regular release schedule and high focus on historical wargaming. 'Meeples&Miniatures' is one of those podcasts - long-lived production of Neil Shuck that deals with all possible aspects of gaming, but largely dedicated specifically to historical wargaming.  In my opinion, if you have time to listen only to a single podcast dedicated to this hobby, then 'Meeples&Miniatures' should be your choice.

'Incoming' is the other podcast focused specifically on wargaming. It is yet another production of Neil Shuck, but with completely different concept than ‘Meeples&Miniatures’. The idea of 'Incoming' is simply brilliant - a short video presentation of all miniatures that were released during a week. Short, sweet and to the point. ‘Incoming’ became quickly one of the podcasts that I eagerly await every week. Or I should say 'two' podcasts, since Mr. Shuck now makes two versions of 'Incoming' - one for historical miniatures and one for fantasy/sci-fi.

Gaming section

Unfortunately, Neil Shuck’s productions are the start and the end of my wargaming podcast shortlist for 2009. The rest of the podcasts that in my opinion are relevant to the hobby and which I follow are distinctly split into either gaming or history categories.

‘The Dice Tower’ is my prime choice for news and reviews about all things called board games. Tabletop gaming and historical wargames are hardly ever touched by the host of this excellent show, but hey… if you’re a gamer, then you’ll play anything at least once.

‘The 2 Half-Squads’ is a recent find of mine and definitely an acquired taste – after all, for most people a podcast exclusive focus on good, old Advanced Squad Leader may sound like a strange idea of entertainment. But love it or hate it, ASL is still the ultimate squad level board game and hosts of this podcast sure know a lot about it and like to talk about it. Not that it’s a bad thing, if you’re into this game, they go through a lot of interesting material.

Historical section

I may be wrong, but in my experience, people in historical wargaming hobby are almost always history buffs. This section is for you guys.

‘In Our Time’ is actually a radio program produced by BBC, but thankfully some smart person decided that it would be a good idea to share all the good stuff with the ‘colonies’ and turned it into a podcast. The program covers a lot of historical topics and participants are always scholars of highest caliber.

‘The History of Rome Podcast’ is a baby of one man, Mike Duncan and may initially sound like a silly idea. After all, who has the time or energy to listen some guy babbling about stuff that we all know about anyway? Don’t be fooled though, this podcast is done with heart and soul and you will be quickly engrossed in the story told by Mr. Duncan.

Another one man show podcast that I was initially rather skeptical about but quickly won me over, is ‘Hardcore History’ by Dan Carlin. As title indicates, content of this podcast is not to be taken lightly, although not because of advanced topics or difficult material. Taking in content of Mr. Carlin’s production is easy enough, but the thing is that he makes you really think about stuff he’s talking about. His series about World War II in the east, called ‘Ghosts of Eastern Front’, is truly haunting, while shows about struggle between Carthage and Rome really try to make you understand what warfare during that time was about.

My last selection for this round is ‘Ancient Warfare Podcast’, companion to rather recently started magazine ‘Ancient Warfare’. Each podcast is closely related to, and usually deals with main theme of latest issue of the magazine. There’s a lot of good discussions about different aspects of warfare during that period and let’s be honest, if you’re into ancient warfare, can you ever get enough of the stuff?

That’s it for this time – if you think that podcasts are something you could be interested in, click on the links and check them out.

One final word - I would like to take opportunity here and really thank all of the people I mention above, especially you who publish all this wonderful material all on your own. You guys spend your time, money and a lot of effort for the benefit of complete strangers and I’m very grateful for your work. Keep up the good work!