November 28, 2012

Eckmuhl Redux–PART I

Yesterday I had a chance to have another run at General de Brigade rules and the Eckmuhl scenario L. and I played couple of months ago. For details about the scenario itself have a look at my first AAR.

Preparations and deployment

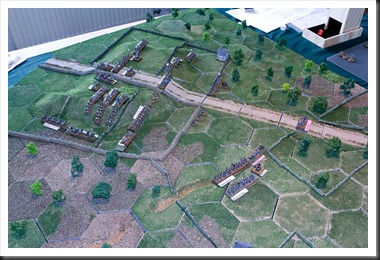
This time around, I’ve made slight changes to the terrain layout – I added one hex row to the width of the “battlefield”, thus increasing the distance between the villages. To add a bit of variety to the scenario and break up LOS (Scenarios in GdeB scenario books from Partizan are notorious in this respect with maps providing information only about prominent terrain features), I’ve randomly scattered clumps of heavy vegetation all over the place. The other addition, plowed fields, are there for purely aesthetic purposes.

Once again, it became my responsibility to lead the French to victory. Remembering lessons learned from the first game, this time around I decided to stick with the KISS-principle – I decided to commit my line infantry brigades to a brute frontal assault, one brigade each against the two villages.  The remaining brigade (consisting of two battalions elite light infantry) would this time around be ordered to move as quickly as possible on my right flank and pin the enemy on the high ground behind the settlements, thus hopefully disturbing any counter-attacks before I took control of the settlements. Finally, I deployed my single battery in the middle, between my line infantry brigades, with intention of causing as much mayhem as possible among Austrian infantry deployed between the villages.

Austrian deployment in this scenario is rather hamstrung by deployment instructions – each of the villages must be garrisoned by a brigade, while the remainder of the troops is to be placed on the high ground behind them.  The one significant change in L’s initial dispositions when compared with previous our game consisted of his decision to properly garrison the villages themselves. He placed one line infantry battalion in each of them and deployed rest of two brigades in his first defensive line between the settlements, thus securing the flanks of his defensive position. Remaining infantry was deployed on the heights behind, as per scenario instructions.

The game – day one

Yes, you read correctly – day one, since we had to split this “little” engagement over two days and at the moment this text is being written, the battle is still very much undecided and hanging in balance!

We managed to get through seven rounds during first sitting. The game developed in rather predictable fashion. During initial phases the French advance was pretty much undisturbed, if one disregards the fire from lone Austrian battery in the middle of L’s line. As my light brigade came into range, the other Austrian battery joined the fight and drew their first blood.

Pace picked up as my troops came near the village. By that time, L. got his Cheval-Légere regiment into position where they would become a major disturbance on my left flank. Their first action was to chase away my skirmish screen. That pushy behaviour was rewarded by a rather devastating salvo from outermost French infantry battalion, but that didn’t chase them away for long. Once they turned around, they parked themselves on the outer flank of troops in Oberlachning, effectively hindering one of my battalions from storming the village (GdeB rules hinder charges of any kind within half charge range of an enemy cavalry unit). I decided to wait for a turn – a decision that turned out to be horrific. In one of the last actions of the day, L now boldly ordered a charge against the my line battalion, still formed in column and too close to their assailants to form square. It was a close fight, but in the end my column was pushed back and retreated, with one third of its soldiers laying dead or wounded on the ground. The only reason why the engagement didn’t turn into complete disaster was that L.’s Cheval-Légeres blew their horses in the charge and had to retreat and reform behind their lines.

Assault against Unterlachning developed according to the French script. Once in range, two battalions of 57e Ligne charged into the village in a bold bayonet charge, swiftly ejecting its Austrian defenders. Or at least that was my intention, ‘cause in fact, only one of French battalions went in, the other deciding to sit this one out in last second (failed morale check before charge). Fortunately, that was enough and Le Terrible 57e managed to keep its reputation intact.

In the meantime, a vicious little fight developed between my light brigade and artillery on the heights behind the village. Frenchmen, in open formation, kept the battery under fire, but they paid the price. At this time, that engagement is still undecided.

LachnlingA20121128_1French right flank…

LachnlingA20121128_2…and the left flank

LachnlingA20121128_3Austrian perspective

LachnlingA20121128_4Taking of Unterlachning

LachnlingA20121128_5Cheval-Légeres victorious at Unterlachling

November 17, 2012

C4 Open 2012- Part 1

For those unfamiliar with the event, C4 Open is the largest plastic model exhibition in Southern Sweden. Since modelling hobby and wargaming are so closely related with each other (I’m yet to meet a wargamer who hasn’t built models at one time or other), I’m always posting the pictures that I’m taking at those events. This time around, mostly because I don’t have time to process all pictures at once, I’ll be splitting posts with photographs over a couple of posts. Hope you’ll enjoy them.

First off, the the pictures of models exhibited outside of the competitions.

October 28, 2012

Dux Britanniarum - ruleset overview and first impressions

When I read first announcement about Too Fat Lardies' Dux Britanniarum' ruleset, my wargaming heart skipped a beat. A ruleset about Saxon invasion of British Isles? For once I had all the figures I would need before getting the rules! With that thought in mind, I've got a bundle consisting of hardcopy and a card deck as soon as it became available. A PDF version was sent to me as an extra only hours after I sent Mr. Clarke the payment; that's what I call customer care!

The ruleset

Dux Britanniarum is a low level skirmish ruleset with deceptively simple game mechanics. A "standard size" game can be played with about 50 figures per side. Units consist (at least initially) of six figures each and come in three classes- levies, common warriors and the elite hearthguard warriors. Additionally the players will need at least four figures for their leaders and a champion warrior. Throw in a handful of skirmishers with bows or slings rounds into the mix and you have all the figures necessary for most games and indeed also for the launch of a full-fledged campaign.
The game itself is controlled in usual TFL-manner, with help of cards activating individual leaders. Once a leader is activated, he can use his activation points to manage units within his command range. This basically means that he can order them to move, form up in formations consisting of two or more six-man groups, fight or to rally those units that about to crack.

Movement is handled with another TFL-patented mechanism - up to 3D6 are rolled to decide the distance units will move in a specific turn; movement can be reduced by individual pips or whole dices depending on terrain, formation and morale state of the unit.

Formations are handled in rudimentary fashion - individual units can be brought together into larger bands which require single activation point to act and thus become more manageable. There are two types of formations - massed formation and a shieldwall. Both have different advantages, but they also have adverse effect on movement speeds and maneuverability of units in formation.

Combat is handled with 'buckets of dices' vaguely reminding of the Warhammer Ancients mechanism. Combatants roll a bunch of D6 decided by number of figures participating in combat, attached leaders, differences in troop quality and terrain. High results are considered to be a hit that can be 'deflected' by a subsequent defense roll. Hits that "get through" come in two varieties - direct kills and Shock points. The effect of the first is self-explanatory, accumulation of the later mean all sorts of bad things for effectiveness of afflicted unit.

There is of course a bunch of 'chrome rules' that add complexity and period flavor, but it is clear even after the first read-through of the ruleset that the designer of Dux Britanniarum wanted the combat mechanics to be simple and utilitarian. If they were all that there was to Dux Britanniarum, one could easily draw the conclusion that it was a ruleset of vanilla variety.

There are however two mechanisms in this ruleset that make it into anything but vanilla. Fate Cards are the first of them. Before the battle begins each player gets a hand with five of those cards and they can be used during the game to affect the gameplay in a variety of ways. While there is nothing unique with this 'event deck', it works especially well in this setting. The cards also add a factor of chance and uncertainty that goes a long way to alleviate the simplicity of the core rules and potentially make even a smallest skirmish into a nail biting affair. (Just to clarify, players' hand is continuously replenished, so the players usually have about five cards in their hand throughout the game.)

The second element that turns 'Dux Britanniarum' into something different and unique is its campaign meta-game. I must say that even before I played my first game, I've got the impression that the campaign is the main component of this ruleset and that the individual battles serve primarily to drive it forward. When 'Dux Britanniarum' is played as a campaign (and I think already that it's the only way in which this ruleset should be used), a completely new dimension is added into the mix. Not only does this aspect of the game bind otherwise slightly meaningless 'one-off' battles into a coherent and exciting story, but it also puts the players into a position of fledgling chieftains trying to make a name for themselves with help of theirs sword and wits. Let's be honest, who among us can resist such challenge?

Our first game

For our first attempt H. and I decided to keep things rather relaxed and give ourselves a chance to familiarize ourselves with different aspects of the portion of the game that deals with battles. Thus, we used the scenario generator to setup a generic battle with a simple goal of slaying as many of opponent's warriors as possible before we run out of time.
Having placed 'default armies at start of the campaign' on the table, we proceeded with pre-battle phase, which was the only campaign mechanism we choose to use that evening. This part of the game is supposed to reflect what we assume took place before real encounters of this type. The basic idea is to perform one or more of several possible actions, such as a speech to the troops or offerings to the gods, with purpose of improving the morale of one's army. Even though those actions in most cases require a simple dice roll and a result check in a table, I'm quite convinced that this part of the game is guaranteed to generate many boasts if things work out and snarky remarks if player's efforts are less than favorable for his cause.

Dux_A20121028Britons hasting to meet the Saxon warband

In our case, H. decided that it would be a good idea to start the event of the day with single combat of our champions. Since my champion won it handedly, H. switfly proceeded with drowning the disappointment of his warriors by the barrels of beer brought for after-the-battle feast. His gesture was received with remarkable enthusiasm. Toast of his followers were so loud that barely anyone noticed the fact that he also took the opportunity to make a little speech. I on my part decided to put the time to good use and attempted to cheer up my men by telling them that if they find themselves in grassy green fields, then they're already dead and are in Elysian Fields. You know, It worked for Crowe! 

In my case, pointing out the chance of meeting grim end in next couple of minutes only resulted in everybody becoming a little gloomy. Or perhaps the reason for the sudden drop in morale of my troops was caused by the fact that we now saw the horde of Saxons running toward us. Apparently they run out of beer.

Dux_A20121028_1Saxons on the move

First couple of rounds took a bit of effort to complete, as is usually the case with new rulesets. However, once we got hang of the basics, the pace picked up considerably. H. split his force in two groups, apparently trying to fix me with one of them and flank me with the other. I followed his suit and divided my force into two equally sized formations. First contact took place when a group of Saxons led by one of H.-s sub-chiefs rushed forward way in front of their companions and clashed with my chieftain and his hearthguard.

Dux_A20121028_2First encounter

It was a short encounter and disastrous for the Saxons, who were swiftly slaughtered without mercy almost to the last man. Their wounded leader was, in true Hollywood style, the sole survivor of this debacle. Somehow, he managed to scurry back to his chieftain to tell the tale and demand vengeance for the death of his men. My Britons, who suffered no casualties in this initial encounter, calmly set up a shieldwall and waited for next onslaught.  Their confidence in their skill was greatly bolstered. Supporting shieldwall, consisting of warriors, was to their right rear, but based on demonstration of prowess just displayed by my hearthguard, I didn't think that it would be necessary to bring it up.

Dux_A20121028_3Saxon heart guard preparing to charge the shieldwall

In next turn, H. showed me the foolishness of my assumption. Responding to the call of his sub-commander, he pushed his hearthguard warriors forward and smashed into shieldwall of my men. One of my men went down in the initial clash, then two more were struck down. All of the sudden, it was the Saxon elite warriors that displayed why their lord choose them as body guards. Next thing I knew, they decided that enough was enough, broke rank and started running away.
The collapse of my hearthguard put me in rather precarious situation with enemy warbands on both flanks of my warriors huddling behind their shieldwall. but luckily my remaining troops were saved by the bell - we run out of time and called it a day.

Musings after the game

For now, I'd like to refrain from drawing any deep conclusions about 'Dux Britanniarum'. All I can say is that combat mechanics are simple and most of the time are clearly explained in the ruleset. H. and I did become confused about a couple of things, but any questions we had were clarified by the author of the rules on TFL Yahoo forum on the very next day.

The impressions of our first game were something of a mixed bag. H. and I were especially amused by originality of the pre-game phase. It may strike one as a gimmick, but there is however some depth hidden in that feature - a player needs to carefully judge whether he wants to max out the staying power of his troops, as this will mean protracted battle and higher losses, which will then have to be replaced in campaign setting.
H. was less impressed by the rules governing the battle itself, mainly because he found the a bit unclear and perhaps a bit too 'quick'. It has however to be said that he is yet to read the rules and I think that once he does, he will agree with my opinion that when set into the context of the campaign, they are more than sufficient for what they're supposed to do. Also, I don't think we can fully appreciate the full potential of the Fate Deck yet and will be able to 'see the whole picture' much better once we get a couple of battles under our belts.

We're already making plans for our campaign, so stay tuned...

October 14, 2012

GHQ Terrain Part 3–ROADS

By pure coincidence, I saw that yesterday it was exactly one year since my last article regarding GHQ terrain hexes. In other words, it’s about time to add to the “series”.

OK, this time around, let’s talk about roads. Once again, it’s pretty basic stuff – unless you’re in need of some odd, scenario specific combination, what you’ll need are hexes with straight roads and turns of 60 degrees. Beyond those, you’ll usually need couple of forks and crossroads.My layouts vary between 10x10 and 16x14 hexagons and one pack of 1/2’ thick variant (24 hexes) covered comfortably most of my needs. I make odd pieces when I when I them for a scenario.

Now for a bit of bad news – to have a truly flexible road network, you’ll actually need to make hexes with straight sections in two different variants. The obvious variant is with roads running between two parallel vertices. The other one needs to have the road running between two diagonal vertices. You’ll won’t have to do this second variant immediately, but you’ll need when you’ll want your road network to have true 90 degrees crossroads.

HexagonsII2220121014Couple of different road hexes I’ve been needing in my games so far

HexagonsII2320121014Here’s why you’ll need two types of straight road hexes

Things to consider beforehand

Couple of things need to be considered before making first batch of road hexes. First of all, how wide roads do you need? When I started out, I remembered what someone once wrote on TMP – that roads should be twice as wide as standard bases, so that two columns could pass each other without problems. My infantry bases are 15mm wide, thus based on the opinion above, my roads are 30mm wide, which is about half the width of a GHQ hexagon (about 60mm +/-3mm, depending on how well particular batch is cut). In hindsight, I wish I went with width of 20 mm or even less. But as always, it’s a question of personal taste.

Next, you need to decide whether or not to have ditches. This detail adds an additional step to making process and involves a sharp blade, with all possible consequences. Cutting a ditch is however quite straightforward – just mark the outline of the ditch and cut the styrofoam at about 40 degrees on both sides. Don’t worry about the resulting v-shape of the ditch – some additional white glue at the bottom will catch an extra about of sand and provide nice u-turned profile.

Different strokes for different folks

I make my road hexagons in exactly same way as basic hexes, which I already described in previous post about this topic. There are two main differences. As a first step, I cut out the drainage ditches, as already described above. Then it’s paint-sand-paint sandwich and finally flocking with one minor difference – I flock only the sides of the road and sprinkle a littile flock on the edges of the road. Process is finished by sealing the flock with mixture of white glue and water.

The main advantage of method above is that I user the painted sand texture for the roads, which is very convenient and quick. However, I must admit that it’s not the most appealing technique from the visual perspective. Another possibility is to cover the road surface with thin layer of wall filler to hide the unattractive texture of styrofoam and maybe even scribe wheel tracks and such. Yet another alternative is to not even bother with hiding the natural texture of the hex and simply use sand-coloured flock for road surfaces.

Is it worth the trouble?

Considering the fact that I have by now made over 100 of road hexes of all possible shapes and forms, it may be a bit odd question. Nonetheless, I have to say that there are times when I wonder if the end result is worth the bother.

The obvious advantage of roads recreated directly on the hexes lies in visual appeal. However, one also needs to consider all the extra work that is required to achieve this effect – I am constantly making new road hexes for elevations and different types of terrain. There are also limitations to this approach that are purely geometrical – hexagons allow a minimum 30 degree turns, unless one is willing to make one of bits. This in turn limits the flexibility in road network layout and forced me on more than one occasion to a compromise.

The fact is that the overhead in work effort required by ‘inherent’ road hexes is so big, that I am seriously considering moving over to some alternative system. More specifically, I am eying with curiosity those flexible roads made out of silicone that Total Battle Miniatures are making. If I decide to give them a try, I’ll tell you all about it.

September 22, 2012

Review of “Wilson’s Creek–The second battle of the Civil War and the men who fought it”

WilsonCreek"Wilson's Creek" could have been yet another narrative of an American Civil War battle. Luckily, the authors recognized the opportunity given by the unique features of that engagement and wrote a book that provides not only an excellent analysis of the battle itself, but also a fascinating insight into political and social reasons for outbreak of the conflict in Missouri and its neighbor states.

In first part of the book, the authors concentrate on the developments that led to the battle at Wilson's Creek. Main personalities are described in great detail, giving the reader a great understanding of how their views and actions affected the course of events. Equal attention is given to the units that subsequently took part in the battle and especially their very special relations with the communities from which they were raised. I found this part of the book especially touching - private letters and articles from contemporary newspapers are frequently cited by the authors to accentuate the "local" nature of that battle, but in extension also of the war itself.

The battle itself is described in clear, analytical and objective style. Also here, the authors take the full opportunity of the fact that Wilson's Creek was a relatively small battle when compared with later massive engagements and often describe actions of individual companies. By doing this, they provide once again an insight into "nukes and crannies" of an American Civil War battle seldom seen in other similar books. Unfortunately, same level of detail isn't maintained in the maps that are included in the book. Sure enough, there are a few of them and they are most helpful in understanding how the battle developed. However, they are completely devoid of topographical information, which definitely detracts from their usefulness.

From a wargamer's perspective, "Wilson's Creek" should be of interest for every gamer interested in ACW period. Complete orders of battle are included in the book, while narrative of the engagement can be easily used to set up at least four different scenarios - entire battle, initial assault of Lyon, Confederate counterattacks against Union positions at Bloody Hill and finally, the adventures of Siegel's flanking column. I am also convinced that one could use this book as a foundation for a very interesting campaign, especially since total number of troops that took part in battle at Wilson's Creek was relatively small for American Civil War.

September 14, 2012

Return to Logan’s Cross Roads

I am slowly but methodically working my way through “Heartland” scenario book from Partizan Press and this time around it was time to re-play battle at Logan’s Cross Roads. It’s one of those early battles where both sides were challenged in all possible manners - inexperienced troops, hopeless leaders and sub-standard weapons. In one respect, those early engagements are a lot of fun, but they also present some rather unique challenges for a wargamer.

Scenario setup and initial deployment
At first sight, battle at Logan’s Cross Roads isn’t hard to set up. The terrain is uncomplicated - single “largish” elevation, couple of houses, large wooded areas, usual bunch of fences and road network that perhaps is more complex than normally, but shouldn’t present much challenge in re-creating on the tabletop. The only unusual terrain feature is a ravine stretching through about half the width of the battlefield.

Background information about the of the battle itself is readily available on the net, so I won’t go into its details here. In game terms, a Confederate force consisting of eight regiments, supported by artillery and some cavalry, attempts a surprise attack on encamped Union force of similar size. The scenario starts with one Union brigade spread out all over the place, most of its troops in camp. Two Union brigades with artillery support arrive on the battlefield shortly after the battle is joined.

Despite equal numbers on both sides, this is an extremely hard scenario for the Confederate player. Not only is he hampered by the fact that his troops are using wet powder, he also has to contest with the fact that his alter ego on the tabletop as well as both of his brigade commanders are rather sorry excuses for officers.

This doesn’t mean however that the situation of the rebels is hopeless from the outset. As mentioned above, Union troops are spread out in camps and half of the Federal troops isn’t even on the table at the start of the game. Thus, if Confederate player acts decisively and perhaps more importantly, with speed, he may very well succeed in smashing the Union force piecemeal and gain an important victory for his cause.

The game
The actual game turned out to be a rather short and straightforward affair. H. advanced his toward the height, Zolicoffer’s brigade in front, followed by Carroll and cavalry short distance behind. Union pickets consisting of skirmishers and small cavalry detachment contested possession of the high ground for a short while, but the result of that struggle was a foregone conclusion - it took H. but a couple of rounds to sweep Unionists away and take control of high ground.

LogansCross120120914Situation at start of the game

LogansCross220120914Zollicoffer’s troops gain control of the high ground

As my skirmishers did their best to delay confederate advance, I tried my best to gather together my scattered troops and form some sort of battle line. I decided that the most suitable point for concentration of my regiments was in the middle of the battlefield, where the ravine would offer pretty decent protection for troops on my left flank.
Next couple of turns was something of a race, or rather, it would have been a race if the fate didn’t turn against H. and stopped him cold in his tracks. In other words, H. suffered rather horribly from bad luck with the card deck, either being hindered by Coffee Break cards (I play with two of them in the deck) or being hit with the effects of Political/Cautious General card, or rolling low with activation dice. Thus, when he finally managed to get his troops moving again, I was more than ready to receive his assault. Not only did I manage to concentrate troops present on the table at the outset of the game, but my reinforcements have by then also arrived and were well on their way to their position on my left flank (from where I intended to launch my counter-attack). Needless to say, I was pretty confident at this stage of the game.
LogansCross320120914Situation before Confederate assault on main Union position

As it turned out, for once my confidence was well-founded. H.’s regiments advanced slowly toward my battle line... and stalled yet again, this time at the most inopportune moment, just as they came within close range of my artillery. Flailed mercilessly by grapeshot and musket fire, the rebels paid in full for their indecisiveness for a couple of rounds. Nonetheless, despite severe losses and their exposed position, only the rightmost of Zolicoffer’s regiments broke and run away, leaving a gap in the middle of confederate line. Remaining troops of his brigade drifted into rough terrain to their left, in search of cover, and continued to slowly advance toward my battleline.

LogansCross620120914Confederate advance stalls, while Union reinforcements arrive on the left flank

Meanwhile, on the other flank, Carroll provided the highlight of the day. Somewhat to my astonishment, his troops actually managed to close the distance and charged my position, with their brigade commander heroically leading one of his regiments in person. Unfortunately for the rebels, it was a gallant but vain effort. Weakened by losses suffered during their advance, the confederate regiments turned out to be too weak to make any impression on the blue-clad line and were decisively repulsed. To add insult to the injury, Carroll payed the ultimate price for his heroism.

LogansCross720120914Carroll’s valiant charge…

LogansCross820120914…and its results

Once we caught our breath after all this excitement, both H. and I were in agreement that there wasn’t much point in continuing the engagement. Three of rebel regiments were broken, one more was defeated and it was only a question of time before my counterattack force consisting of four regiments would smash into H.’s rather weak right flank. H. issued the order for general retreat and yet another Confederate defeat at Logan’s Cross Road was a fact.

LogansCross920120914Situation at the end of the game, seen from extreme Union left flank

LogansCross1020120914Confederate perspective, seen from the high ground

Musings after the battle or wargamer’s dillema
Engagement at Logan’s Cross Road presented me with two distinct problems. The first of them is rather common to our hobby - the historical ‘setup’ provides a rather unbalanced game, in this case mainly because of disparity in quality of commanders. Union troops were commanded by George Henry Thomas, future ‘Rock of Chickamauga’ and green but competent brigade officers.. Confederates were under control of George B. Crittenden, who was incompetent to such a degree that he was cashiered shortly after the battle by Bragg on what seems to be trumped up charges of drunkenness. His sub-commanders had almost no military experience - Zollicoffer was a newspaper publisher, Carroll was a plantage owner. Zollicoffer was killed at Logan’s Crossroads, Carroll shared Crittenden’s fate and was never allowed to lead troops again.

LogansCross1120120914

LogansCross1220120914Two ACW buildings I bought recently from Total Battle Miniatures.
Damn cute if you ask me.

It is easy to see that with commanders like that, the rebels are at severe disadvantage by default. Thus, this engagement is a good example for what can be called ‘a wargamer’s dilema’ - should one follow the historical parameters and play a potentially dull game or fiddle with the facts to even things out and end up with an scenario that doesn’t represent the historical situation in any shape or form?

Being a ‘historical’ wargamer, in this case I decided to take the ‘strict’ approach. I made Crittenden a cautious commander, while Zollicoffer and Carroll became ‘political’. To even things out, I kept Thomas at ‘human’ level and designated him as ‘professional’ (this being the beginning of the war and all that). Also, during the game, I allowed Crittenden to pass on his turn to one of the subordinates  when he was afflicted by ‘Political/Cautious’ card (which happened with unnerving regularity) as long as they were within his commad range and let them act without restrictions of that card. The ruleset doesn’t actually define whether it is allowed or not, but it does feel ‘fishy’. In this case however, I thought it would be a neat way to even things out. Also, if I didn’t make that concession, I don’t think the Confederate army would be able to move at all.

In the end it didn’t matter much, as the abysmal quality of Confederate commanders still managed to decide the outcome of our game all on their own. H. suffered greatly from shortcomings of his officers and never managed to gain the momentum necessary for Confederates to win this scenario. Luckily, he’s a very good-natured chap who enjoys the game for game’s sake and took all the reverses with good humor. Nevertheless, I doubt he will regard that game as one of the highlights of his wargaming ‘career’.

Somewhat odd setup of Logan’s Crossroads, with one of the Union brigades scattered all over the place and with weak detachments acting hopelessly outside of their commander’s range created another issue. The simple fact is that ‘They Couldn’t Hit an Elephant’, which assumes that elements of a brigade stay close to each other, doesn’t handle such situations very well at all. I was vaguely aware that this would present a complication, but didn’t make any plans for how to handle it. In the end, I had to ‘shoot from the hip’ as the game progressed and was probably too generous in allowing individual Union regiments to move too quickly and too freely. I will have to give this problem some thought before playing this scenario again. Adding some friction to movement ability of Union troops at the beginning of the game could go a long way to make it a much more balanced game, perhaps even turning Logan’s Crossroads into a real nailbiter.

July 28, 2012

Gladiators from Crusader Miniatures

Believe it or not, I had best intentions to write this post just at the latest a couple of days after my review of Morituri Te Salutant. Time really flies when you’re not having any fun.

Anyway… Those of you who has been following this blog for a while (that means you and you… and maybe you) do perhaps remember a bunch of gladiator miniatures from Crusader Miniatures. Well, as it turns out, I have painted a useful bunch of those figures during the course of last year. The only reason why they haven’t already made an appearance on the blog is that setting up the camera for decent close-ups is such a hassle (in other words, I’m lazy). But considering the topic of my previous post, it’s about time for me to introduce them to the interwebs.

So here they are, in no particular order. And in case you wonder, yes, I really enjoyed painting those figures – they have crisp detail, fun poses and almost no flash out of the blister. Figures like that pretty much paint themselves, I just help with the brush movement. It must be said though – finding decent motifs for gladiatorial shields is pure pain in the butt. If any of the visitors could point me in the right direction, any help would be of great assistance.

IMG_0002IMG_0011IMG_0012IMG_0020IMG_0021