August 14, 2011

French FOOT Artillery from Adler

One of my favorite figure manufacturers is Adler Miniatures. However, I always find it a bit disappointing that there are so few published pictures on their site. So, just to give a lending hand, here is a picture of my next step toward French OOB for my first General De Brigade scenario - French foot artillery 6/8 pound battery, code FBAT1, in their original bare metal condition.

Pictures of painted figures will be posted when I'm done, whenever that may be.

Adler_French_FootAdler French foot 6/8 pound artillery battery (FBAT1) straight from the plastic bag

August 07, 2011

Dogfight over Convoy BOSOM

My Stukas didn't have long to wait until their combat debut - just a couple of hours ago we run a simplified version of scenario "Dogfight over Convoy BOSOM" from scenario book “Over The Channel” with four of my friends. Since we had one completely new player, I decided to remove certain elements of the scenario, most significantly clouds and spotting rules.

"Dogfight over Convoy BOSSOM" is a very neat little scenario for 2 to 4 players. German side runs a pair of Me-110:s and Me-109:s escorting ten Stukas. RAF is represented by a flight of Spitfires and Hurricanes. This scenario is also quite interesting from the tactical perspective - British planes can deploy in a perfect position for a head-on pass against Stukas, while German fighters are hindered from engaging British fighters until they fire. However, after first salvo, British players have some decisive decisions to make - do they make another pass against Stukas or do they act defensively and counter the German escorts?

Our game followed the by now quite familiar script (I’ve actually played this scenario once before in Copenhagen, with remarkably similar results). The critical first fire phase from British players was quite ineffective (only one Stuka damaged). To add insult to injury, one of Hurricanes run out of ammo almost immediately and left the engagement in a hurry. Spitfire flight then turned around to get the Stukas from behind, while Hurricanes continued straight forward, gaining altitude at the same time. Results of those maneuvers were predictable - Spitfires gained perfect position for attack against the Stukas and managed to damage three of them. Unfortunately, they were by now unsupported and exposed to German escorts, which shot down two of Spitfires (the “stunner” of the game consisted of the fact that it took four very potent hits from Messershmidts to down one of the Spits). By round six, three British planes were opposed by four German escorts in advantageous position and we decided that it was time to call it a day.

P1000782 Situation in the middle of our game – front group of Stukas are out of harm’s way, while Spitfires are hammering the second group of bombers from behind, while being hammered by the escorts.

Conclusion of this game is once again that trying to gain 6 o'clock position against bombers, while ignoring their escorts is a suicidal proposition. Attacking side must instead keep maximum speed and either engage the escorts in a head on contest (unhealthy proposition for the British because of 20mm cannons of Messerschmitts) or try to position themselves in a position for a deflection shot against the bombers several turns later in the game.

Stukas from Tumbling Dice

Just a short post to keep the blogg alive – just finished a batch of Stukas and they deserve a photo opportunity. Miniatures are from Tumbling Dice, decals are from Dom’s Decals.

Paint scheme is simplified cammo for 1940 period – upper surfaces are painted with Valejo Olive Grey 888 and Bronze Green 897, lower surfaces are painted with Valejo Pale Blue 906. In 1/600 scale differences between two shades of green are almost invisible, so I choose to lighten Olive Grey with a healthy dose of dull yellow (any kind will do, as long as it’s not some sort of bright lemon shade).

P1000797

Stukas_Resized

July 06, 2011

Baby STEPS with green stuff

I’m not saying that Perry brothers or Copplestone need to start looking out for new competition… But I have to say that I am a little proud to announce that I have attempted my miniature conversion and didn’t botch it completely.

Just to flesh out this post, here’s the background story. As those few that follow this blog already know, the WAB army I have been working on for last couple of years (has it been that long already?) has been inspired by Cornwell’s “Winter King”. An army of Arthur based on that source would of course be incomplete without the Wolftails. Those cunning buggers at Gripping Beast are fully aware of that fact and do provide a rather sweet set of 12 miniatures that are perfect for that role. Yours truly has already grabbed, painted, based and fielded that unit.

Unfortunately, as it turns out, in WAB a unit of 12 Roman commanipulares has about as much chance against 24 charging Saxon Dughuts as a snowball has in hell. And it doesn’t help pointing out that they are Derfel’s invincible warriors that can’t loose – I tried that and H. just laughed at me as he exterminated them to the last man… eh, I mean figure.

After seeing Derfel’s boys being swamped by the Saxon horde in their inital engagement I quickly came to conclusion that to reach their full potential, they needed reinforcements. But were from? Any warrior that wished to be included in this elite band had to provide a mandatory wolftail on his helmet and such things were rare, very rare indeed! The only choice other than getting duplicates from Gripping Beast (boring!!!) was to make my own.

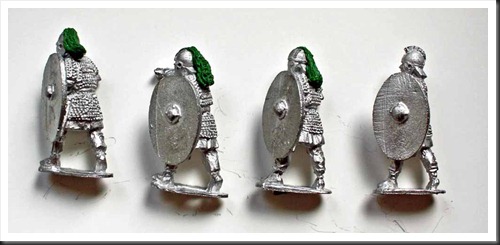
Well, without further comments, here’s the end result. The miniature on the right hadn’t completed his initiation ceremony, so he’s still wearing the original helmet.

Remake

May 14, 2011

Not Dead Yet…

When I look at the date of my latest entry in the blog, I can't help but wonder about how fast time passes these days. Also, I wonder about how often the phrase 'Not dead yet!' has been used on half-abandoned blogs, followed by explanations and excuses. In this case, my long silence was caused by several different factors,but first and foremost - I moved to a new place. The bad thing here is that fixing the new place is taking ten times longer than I expected. The good thing is that I finally have both a nice painting area and plenty of space for a decent gaming table.

Returning to the age of Arthur
This blog is supposed to be about miniature wargaming, so enough about my new flat and let's move over to last Sunday’s event. On that day H. came over with his Saxons and we gave Warhammer Ancient Battles another go. It was our third game, so we were finally starting to get a grip of the ruleset. Nevertheless, I was a bit anxious, because our previous games ended in a rather inglorious whooping of yours truly. Now, I don't mind having my behind being handed over to me every once in a while. In case of H.'s Saxons however, the single reason for my defeats was the monstrous special character of his king, who so far managed to vaporize anybody who dared to stand in his way. Romano-British army list doesn't really offer any direct antidote to that monster, something that I admittedly started to find tad unfair and frustrating.

Same, same, but different
Since we are both still fumbling our way through WAB ruleset, we decided to run yet another set piecebattle with few pieces of terrain for sake of variety.

Our deployments were rather unimaginative. I placed a huge swarm of skirmishers in the rough ground to my right, while the rest of my infantry - two units of milites and one of peasant rabble were placed in the centre. My mounted mounted milites in skirmish order were placed on my right flank, while mounted commanipulares were held in reserve.
H.'s dispositions were pretty much a mirror of mine - his skirmishers, although heavily outnumbered by mine, intended apparently to meet mine in a straightout shootout contest. Three units of Saxon warriors were placed to the left of the skirmisher, while his cavalry concentrated on the Saxon left flank.

H's intention was apparently to repeat the events from our second game - smash with his cavalry through my rightmost milites unit and then take care of my cavalry. With that suspicion in my mind, I choose a purely defensive strategy - infantry would take the charge and hopefully hold. In the meantime, my light troops would try to annoy the crap out of the Saxons with missile fire.


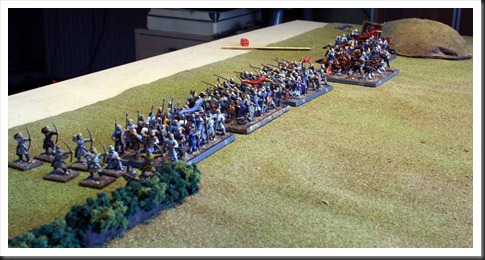
001_Initial_Dispositions001 Birds view before battle

002_Romanl_Dispositions002 Romano-British deployment

003_Saxon_Dispositions003 Initial deployment of Saxons

When events actually follow the plan
The battle that followed can be described in very few words. H moved his entire army forward, while I awaited the onslaught. My foot skirmishers on right flank exchange missile fire with H's archers and mass of Saxon infantry. The results were inconclusive, the only source of real excitement being caused by an uncontrolled charge of some of his infantry, which my skirmishers avoided by a hair's breath.

Main action was once again initiated by H:s cavalry. His light cavalry unit charged bravely into my rightmost milites as soon as it was in range... and was promptly sent back with a bloody nose. I must admit it caused me no small pleasure, because similar charges in our two previous games started disastrous chains of events that led to catastrophic defeats of poor Romans. Not this time though; it's nice to know that WAB is capable to handle cavalry charges into formed infantry in proper manner. It’s even nicer to know that my army doesn’t always trip over its own legs at slightest push.

004_Failed_Saxon_Charge004 First Saxon charge bounces against Roman shieldwall

His initial setback failed however to disturb Saxon king's retinue, who in following round managed to completely mangle mounted milites on my left flank. Poor buggers came a tad too close to Saxons in open formation and were caught while trying to evade the predictable chagre that followed. This success placed Saxons in perfect position for a clash of arms with my mounted commanipulares, a contest which on both previous occasions proved to be catastrophic for my general’s retinue.

Sure enough, the Saxon king charged and to everybody’s suprise failed to make any impression whatsoever on my cavalry. The fact that I cunningly equiped them with heavy armour for this battle did help. To be fair though, H:s hopeless luck with dices helped even more. My retinue also managed to cause enough Saxon casualties to make them flee. This rout would have once again been been a decisive one, but for the fact that in this battle Saxons were as skilled at running away as they were in close combat on previous occasions.
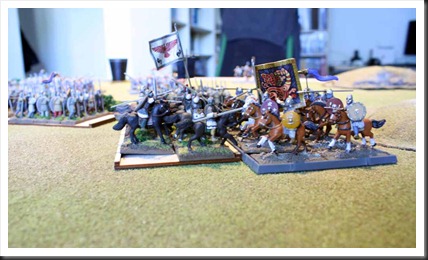
006_Decisive_Moment006 Decisive moment

007_Halfhearted_Clash_of_Shields007 Inconclusive infantry engagement in the center
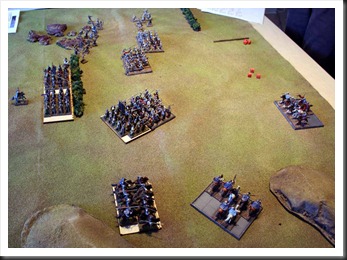
008_End_of_Battle008 Situation at the end of the game

By that time we were both satisfied with the outcome and decided to call it a day. It turned out to be yet another Saxon victory, although this time it was a mariginal one. Personally, I was mostly relieved that my Romano-British army didn't (once again) crumble like a paper mug. H. was probably a tad relieved over and certainly very entertained by happy escape of his king's retinue. Overall, a pretty decent Sunday afternoon.

October 03, 2010

The Wars of Alexander’s Successors - Volume One: Commanders & Campaigns

Alexander1 In simple terms, this is the book I've been searching for ever since I read Warry's 'Warfare in Classical World' some twenty years ago. 'The Wars of Alexander's Successors 323-281 - Commanders & Campaigns' contains exactly what the rather lengthy title indicates - a narrative of the events that took place from the moment Alexander the Great drew his last breath to the demise of his last general and subsequent empire-builder, Seleucus.

I dare to say that if one disregards the primary sources, this book is the only available source completely dedicated to the period of Alexander's Successors. If there are any other similar works easily available on the market, I am not aware of them. It is therefore impossible for me to make a comparative judgment regarding the quality of the material. I can however say that the authors do a pretty good job condensing the very complex events of the period into 220 pages of detailed, but accessible material.

Unsurprisingly, the first chapters of the book deal with the traumatic events in Babylon, starting with those dramatic and confusing hours immediately after Alexander's death, which laid the fundament for the following decades of continuous strife and warfare. Chapters that follow deal with the reign and demise of Perdiccas, Lamian War and struggle for Macedonia that followed. Next, struggle between Eumenes and Antigonus is then studied in detail, followed by chapters dedicated to Ptolemy and Seleucus up to the period immediately before the battle of Ipsus. Events leading to Ipsus, the battle itself and its aftermath are handled in great detail. Final chapters of the book focus on Lysimachus, his contest with Demetrius and last years of the Successor period. Some chapters overlap each other chronologically and those jumps in timelines did manage to confuse me on a couple of occasions (death of Cassander is initially mentioned almost by accident, while first mention of Demetrius' change of fortunes comes out of nowhere). Overall however, the authors make great job in creating a comprehensive picture of an extremely complex period, both politically and from military perspective.

My only real criticism regarding this book is directed against a single issue - the almost complete lack of maps. In this day and age it is almost unforgivable not to provide the graphic material, especially when the authors frequently refer to geographical locations that no longer exist.

From wargaming perspective, this book is a literal treasure trove. Let's face it, this book is nothing else but a descriptions of continuous campaigns during a period of over forty years along with detailed and sometimes very personal descriptions of very capable warlords. Even most choosy campaign builder should be able to find here something to his liking.

September 12, 2010

First attempt at Adler Austrians

Well, without any unnecessary introductions, here they are – my first 6mm Austrians. Bases need of course some flocking and they're missing their banner, but I haven't posted anything on the blog for so long, so it's better than nothing.


Can't say I'm particularly pleased with them and am still wondering about how to best outline their belts. But I guess they'll do in a pinch.

001